
Onboarding Projects
Next Identity empowers service administrators with the ability to create custom onboarding projects for each application, and provision properties and clients that fit their unique integration requirements. With Next Identity Projects, your team can streamline the entire onboarding process, ensuring a seamless experience for everyone involved. Get ready to say goodbye to hassle and hello to a faster, smoother onboarding experience.
Next Identity empowers service administrators to create custom projects for each application, provisioning properties and clients to fit unique integration requirements. Streamline your entire onboarding process with Next Identity Projects for a seamless experience.
Creating a New Project
Next Identity Projects is designed to simplify the onboarding of numerous applications to an enterprise customer identity service. The process is divided into three primary steps: Creating a Project, Associating the Project with a Property, and Adding Clients.
Let's delve into each step.
1. Creating a New Project
Navigate to Onboarding Projects under Adopt and select the New project button.
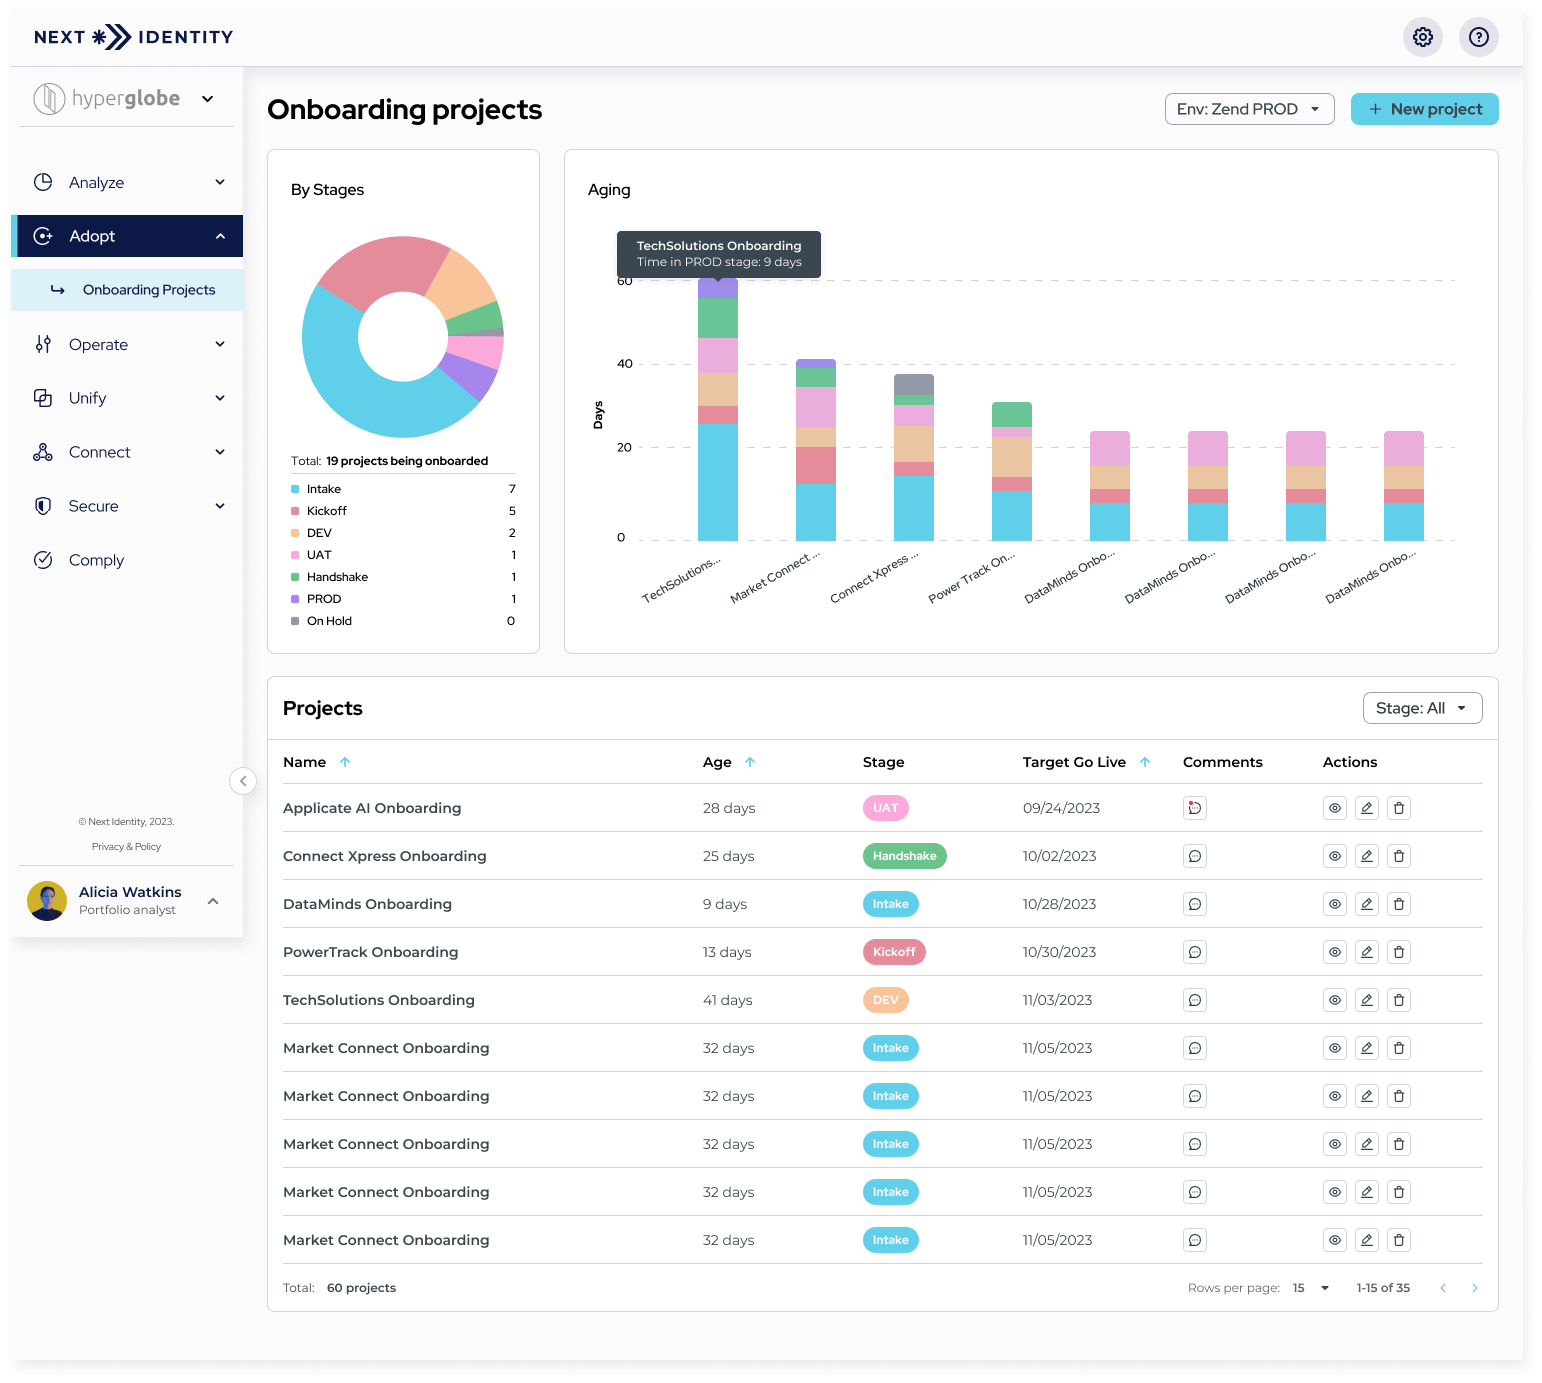
Onboarding Dashboard with New Project button
Enter your project's details on the Create new project page.
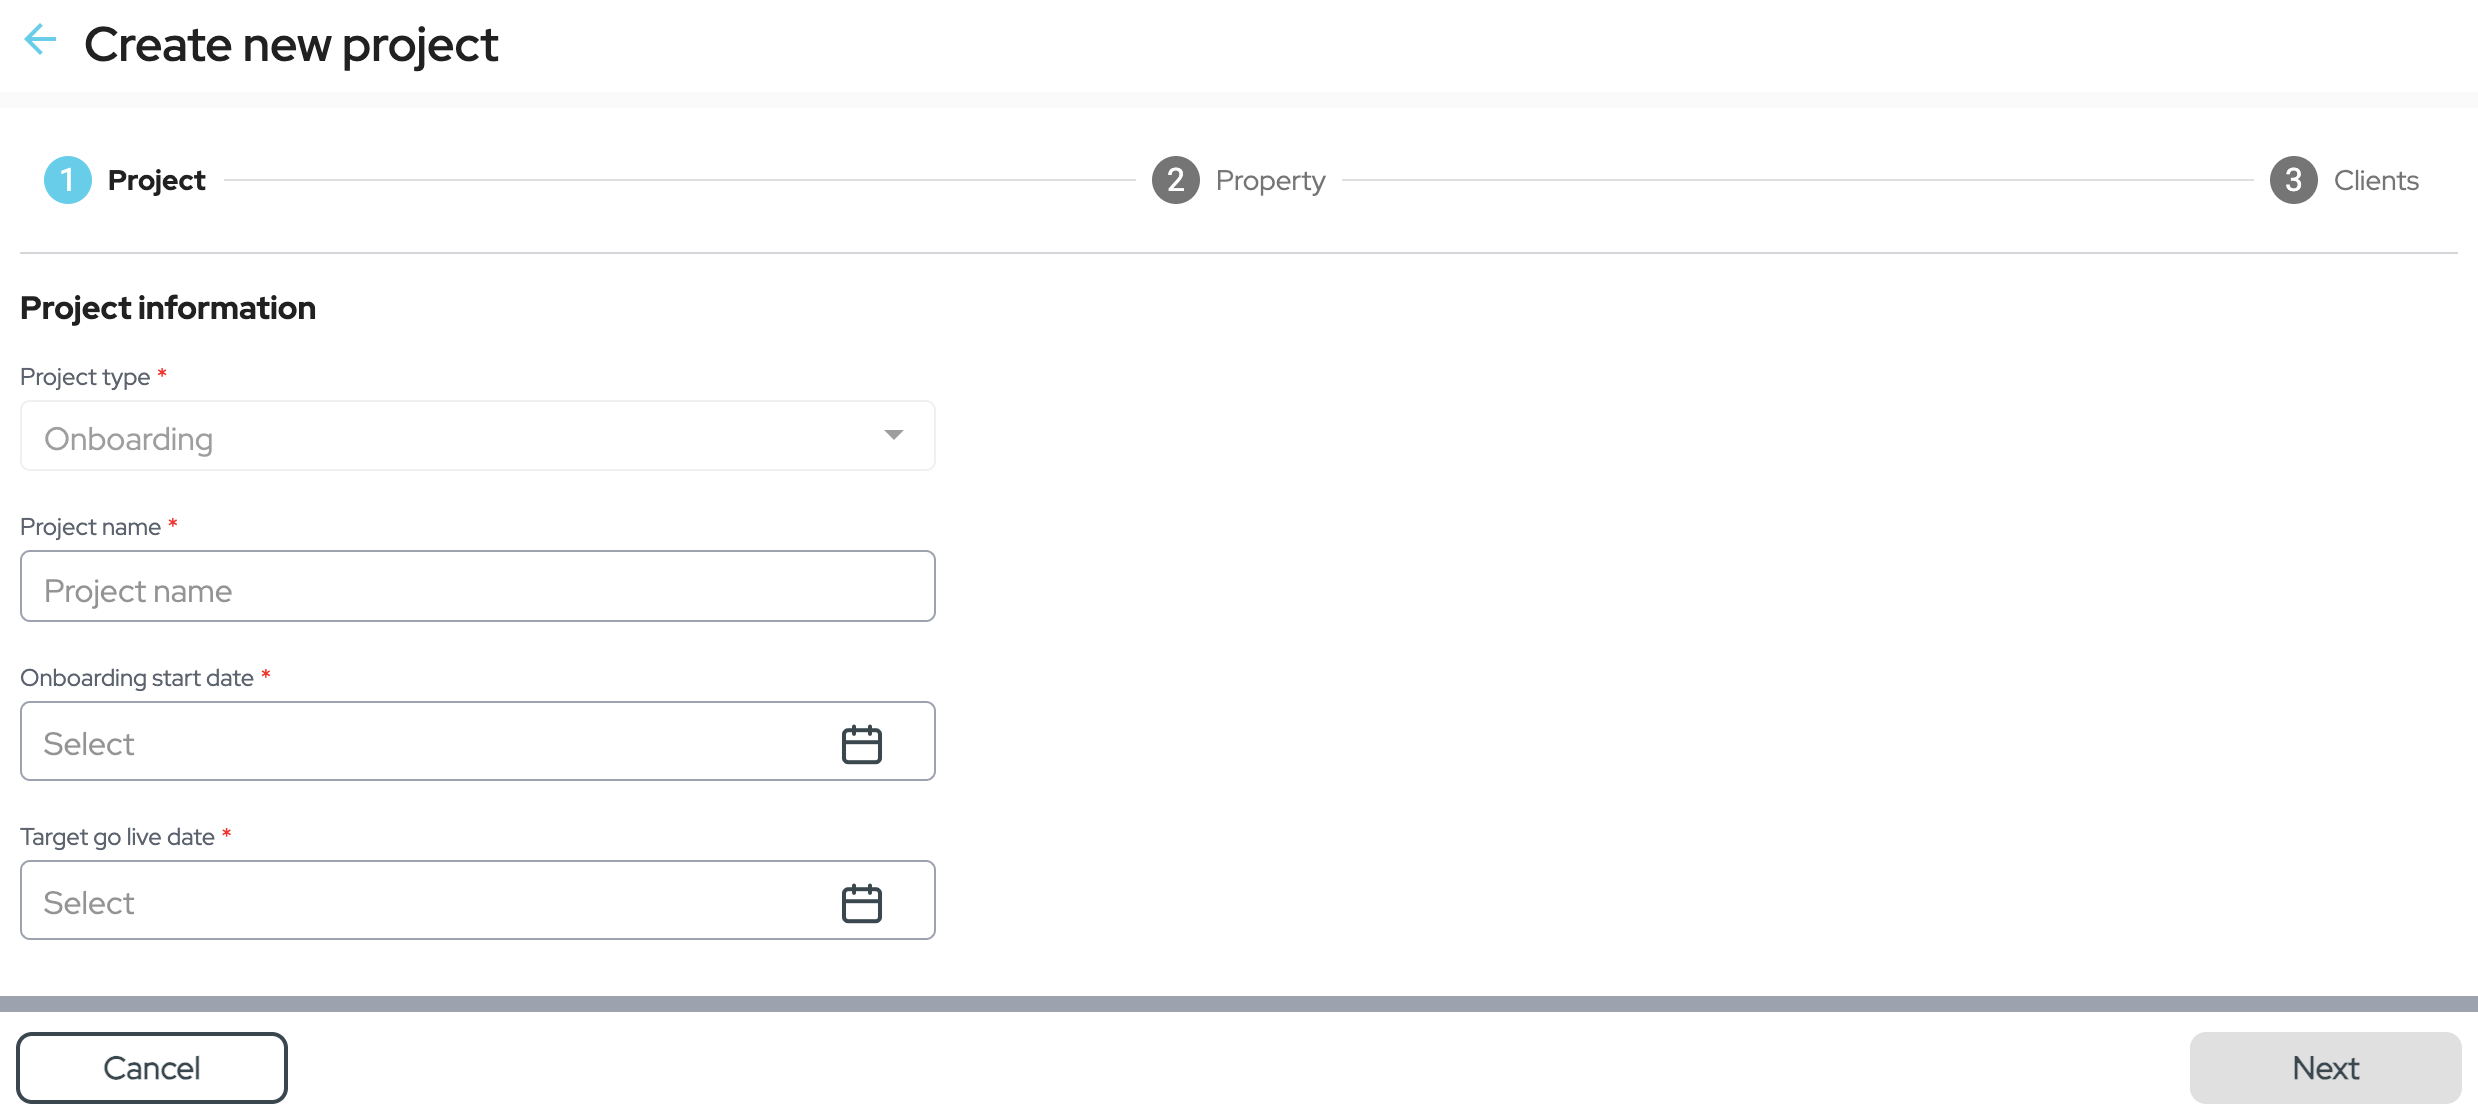
Create a new project page
2. Associating the Project with a Property
Once you've provided your project's details, select an existing property from the list or create a new one.
a. Create Clients on an Existing Property: Select it from the list if it is already set up.
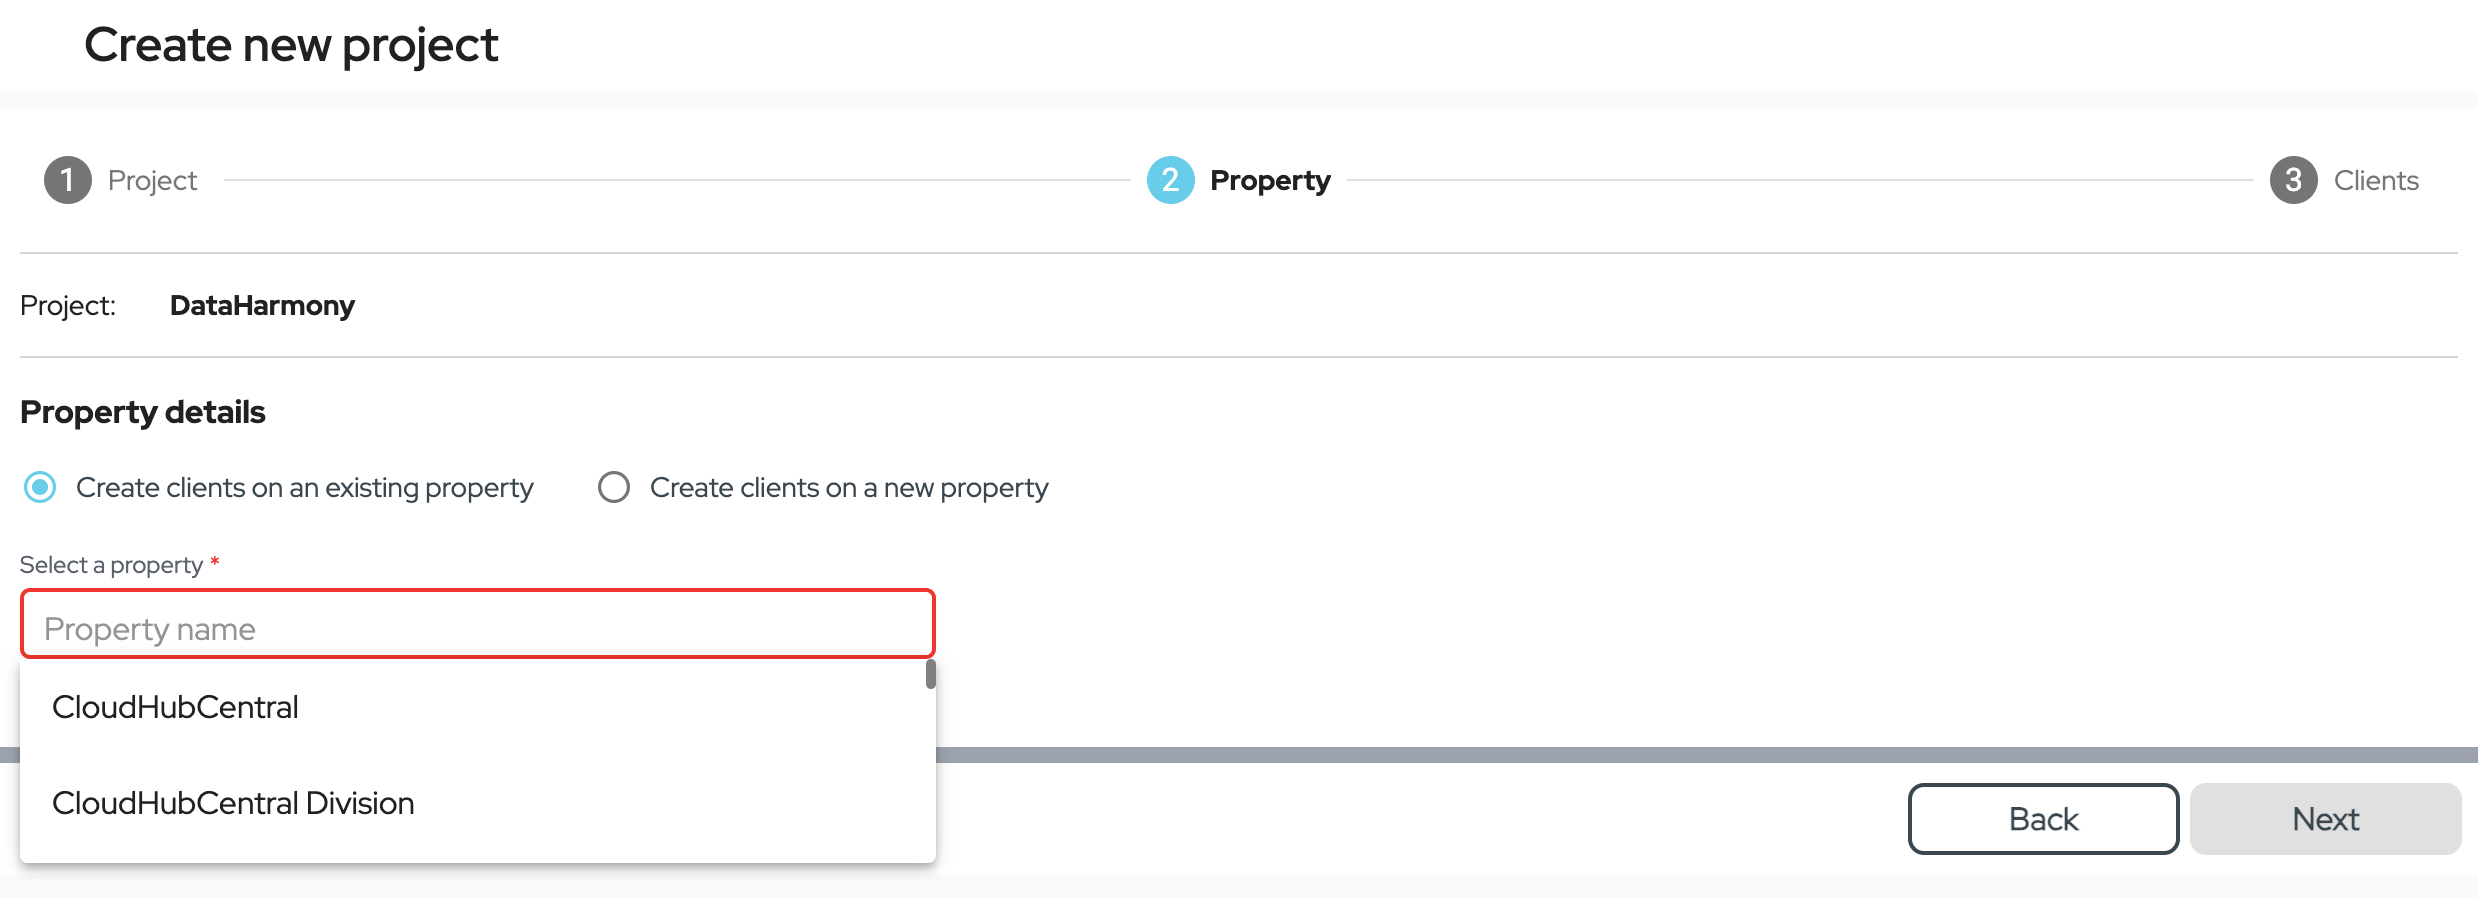
Selecting an existing property
b. Create Clients on a New Property: Choose "Create clients on a new property" and provide the required details.
⚠️ Important: Press ENTER on your keyboard to save items under the Alias and Business Unit fields.
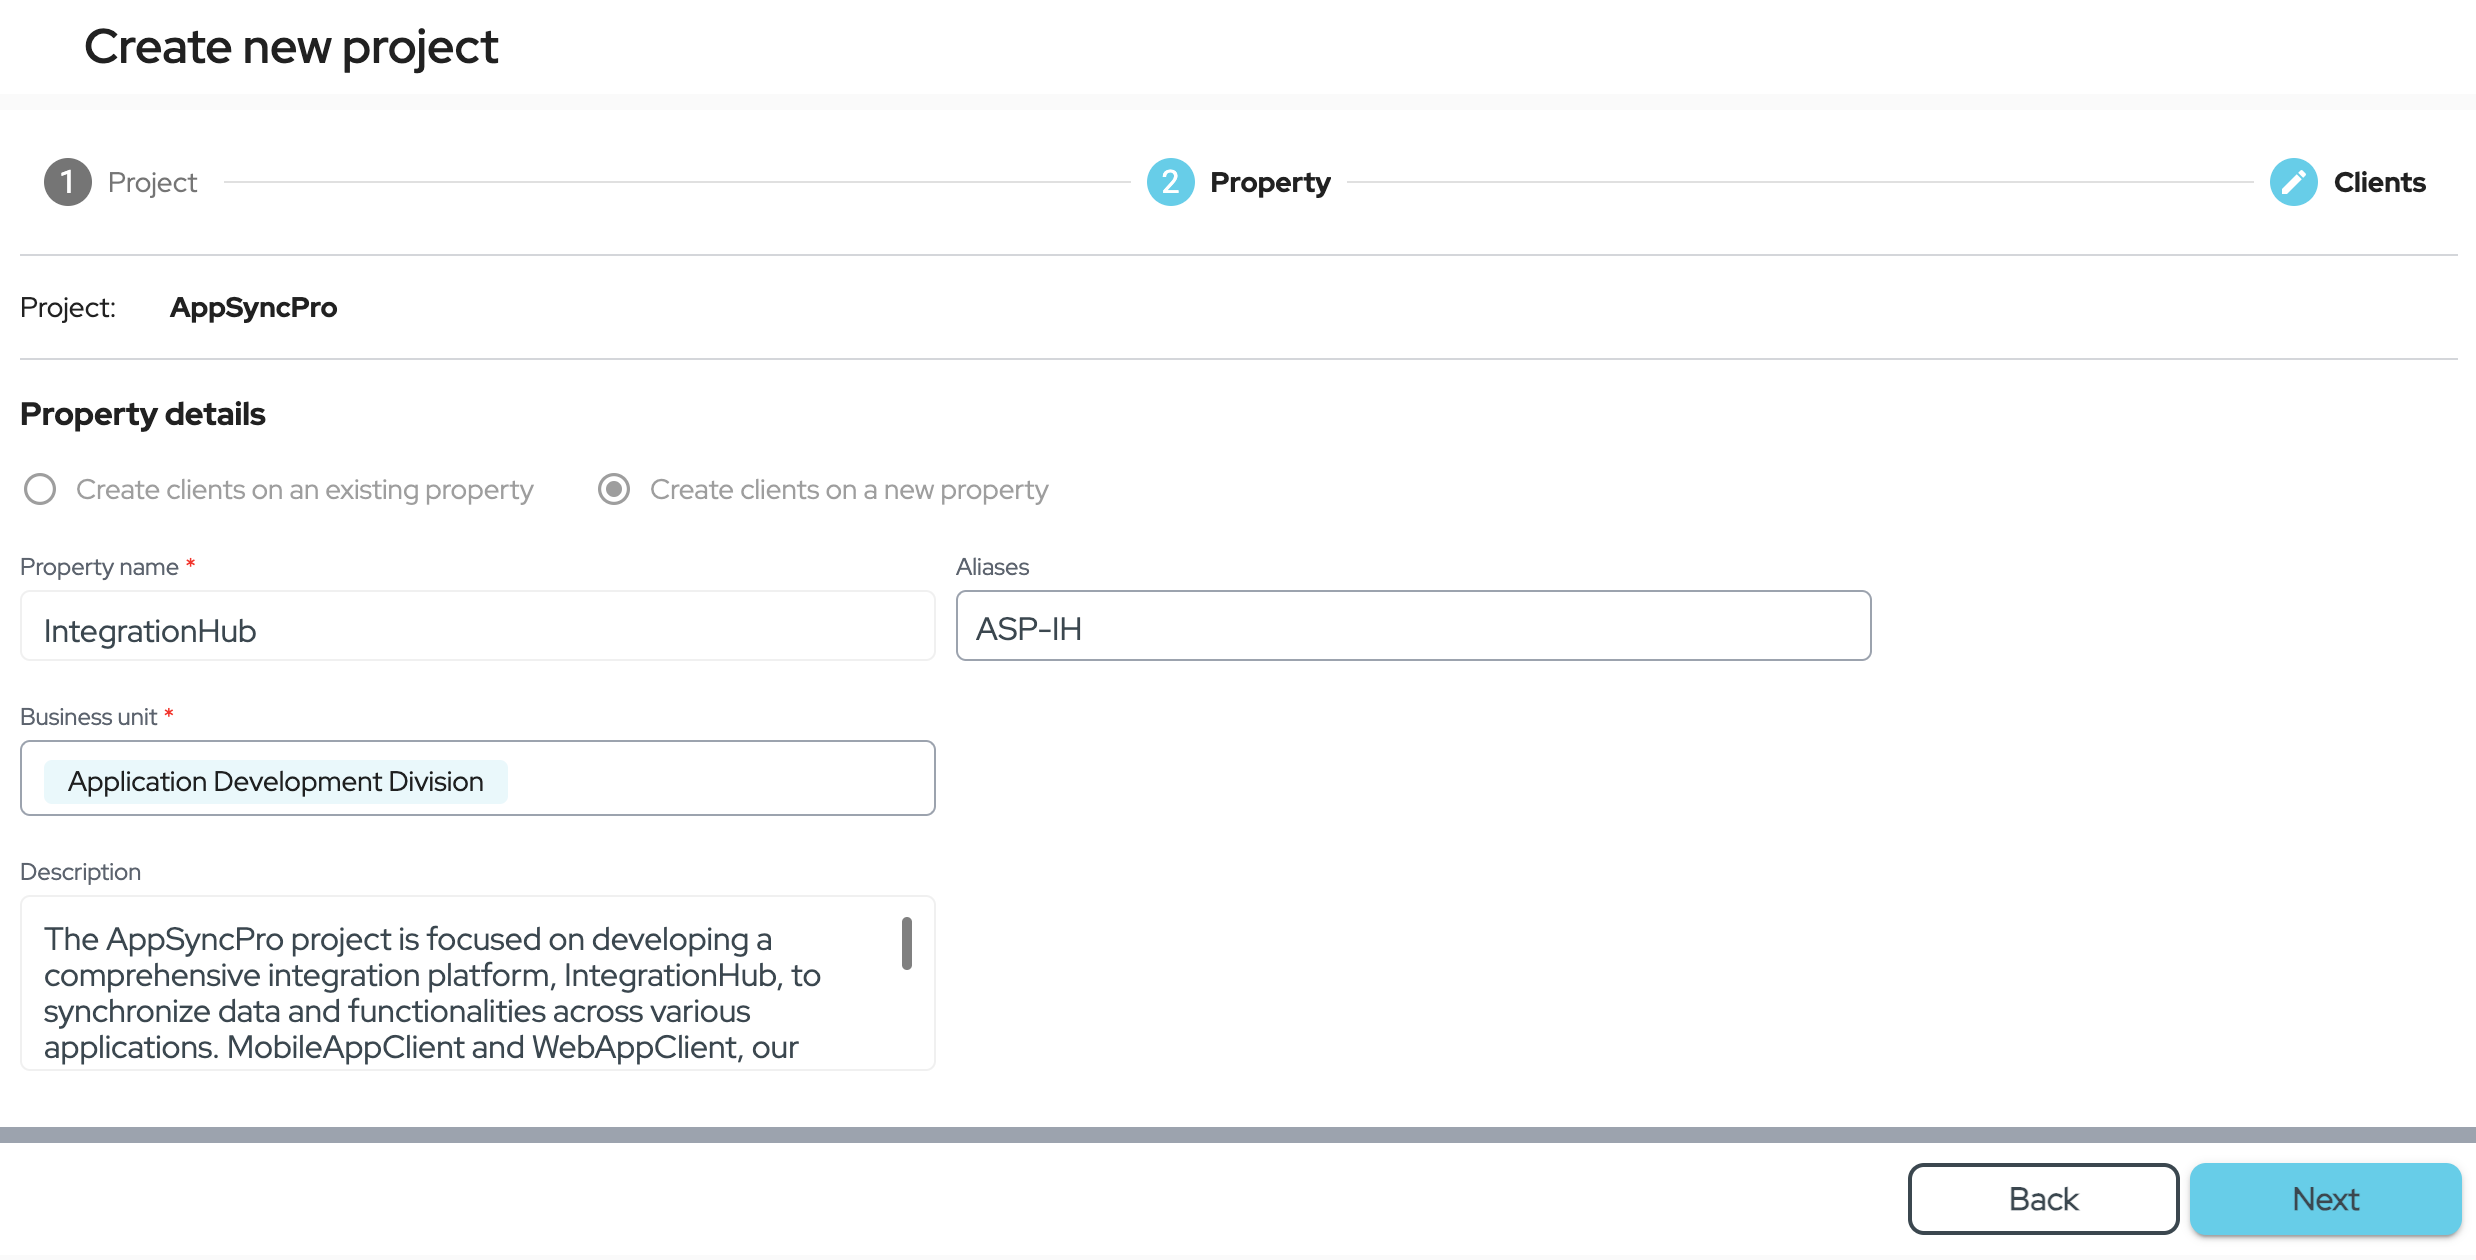
Creating a new property
After associating your project with a property, choose Next to proceed to the final step.
3. Creating/Adding New Clients
Select the Add new client link at the bottom left corner of the window to open a new window.
In this new window, the first step involves choosing the type of application you are creating. The options include:
- Web app
- Single-page app (SPA)
- Mobile App
- Machine-to-Machine (M2M)
Select the type that best fits your needs.
Next, fill in the details about your client. Depending on the type of application you've chosen, some fields may vary or become optional/mandatory.
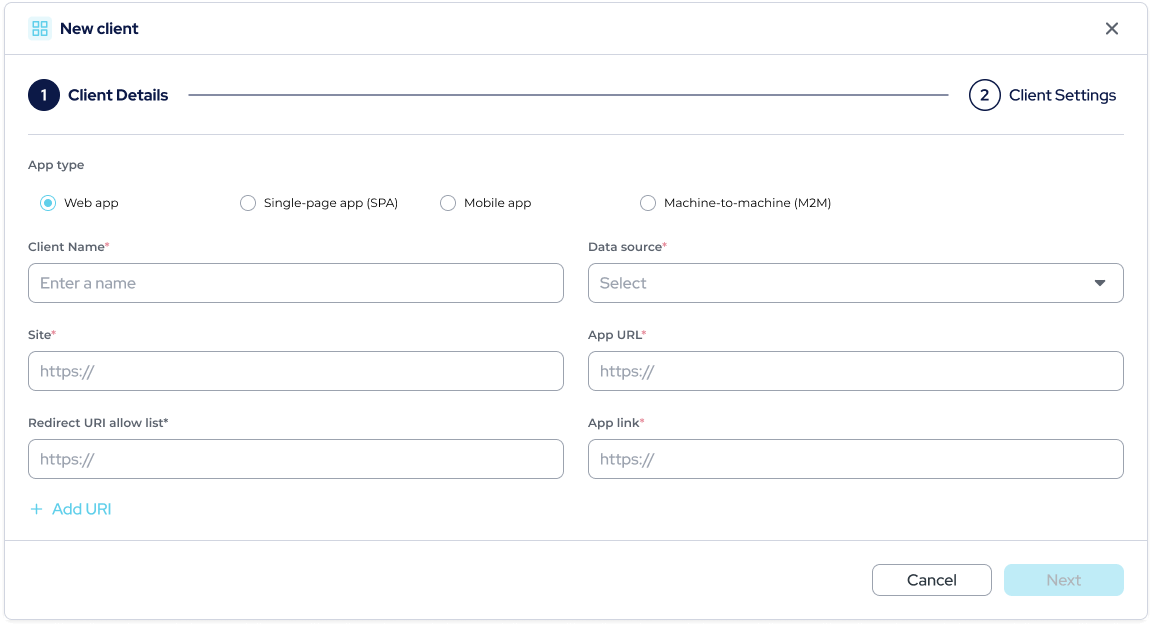
Client Details
Following this, you will be prompted to choose specific settings for your client, such as:
- How users will be primarily identified (email or mobile)
- The authentication method (password or one-time password (OTP))
- Whether to enable biometrics
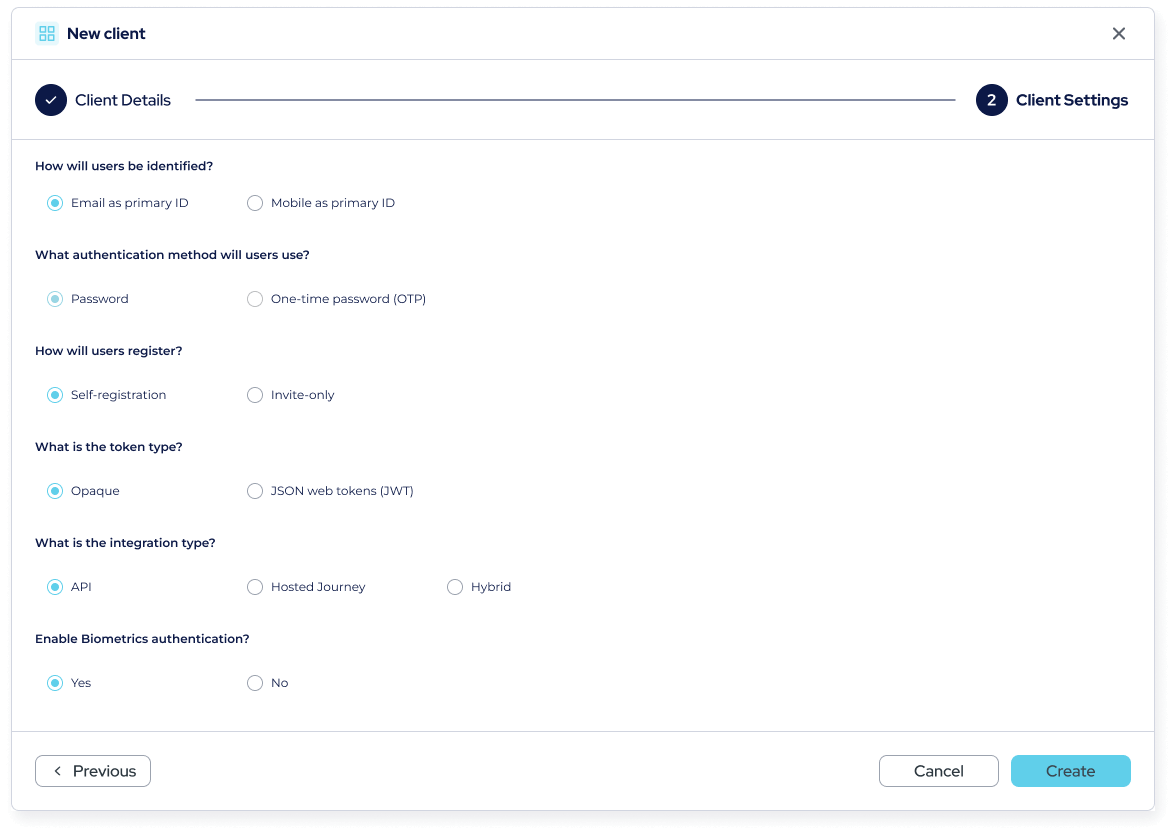
Client Settings Options
After configuring these settings, click the Create button. Based on your choices, a template will be selected, and a client will be provisioned. A confirmation message will appear indicating the client has been created successfully.
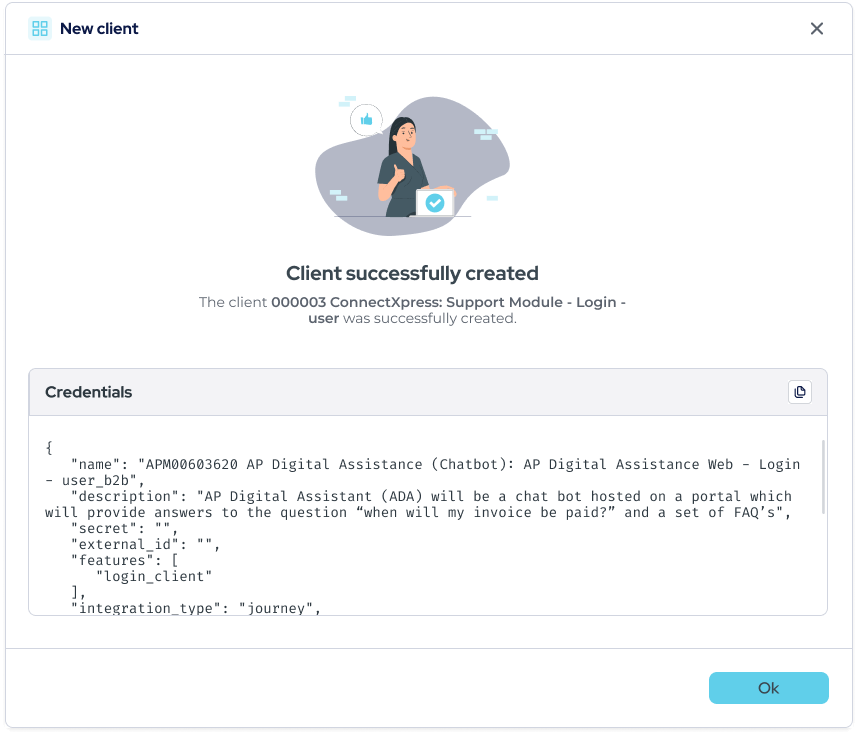
Successful client creation
Multiple clients can be created under the same propertyYou can always add new clients if you need to onboard multiple clients into one property or project by selecting Add new client.
Viewing Project Details
Access the list of Onboarding Projects under Adopt and click the View (eye icon) in the Actions column to see project details.

View action

Project Details Screen
You can access all client information on this screen, including previous comments, technical notes, and the number of clients for each environment. By clicking on the "Environment" link, you will be taken to the Property details page in a new tab to see the complete list of clients associated with that property in that specific environment.
Next Identity Projects offers a user-friendly approach to onboarding applications to your enterprise customer identity service, now with enhanced visibility into project details and onboarding progress.
Updated 9 months ago