Propagate Changes
Easily manage and propagate configuration changes across multiple environments.
The Propagate Changes feature in Next Identity empowers users to efficiently replicate configuration changes across different environments. This feature provides a structured workflow to ensure consistency and accuracy when applying changes to environments like Development, UAT (Stage), and Production, helping reduce manual effort and mitigate errors.
Understanding Clients, Properties, and Environments
In Next Identity, you can manage multiple clients, organized into properties. During the onboarding process, these clients and properties are created across multiple environments to meet your business and development needs.
The following image illustrates a scenario where a customer has three properties, each set up across three environments:
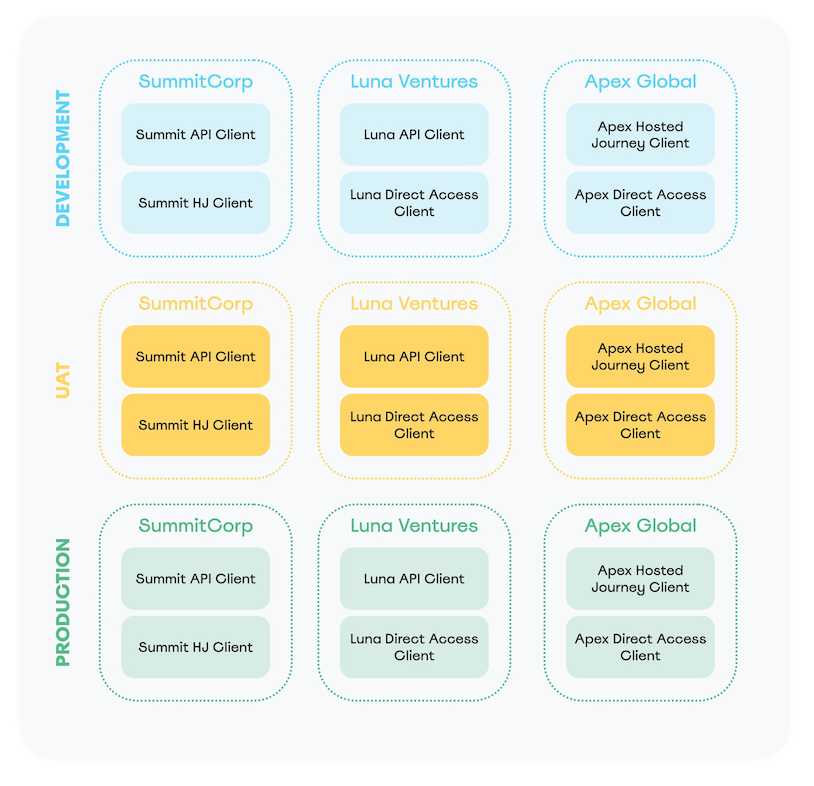
Example of Customer with 3 properties and 3 environments
For each property and its associated clients, you will find that they exist in all configured environments. This structure allows you to:
- Implement Changes in a Controlled Environment: Make updates or test new features in the lowest environment environment to ensure they work as expected.
- Propagate the Changes: Once tested, you can confidently replicate these changes across the upper environments, such as UAT (Stage) and Production.
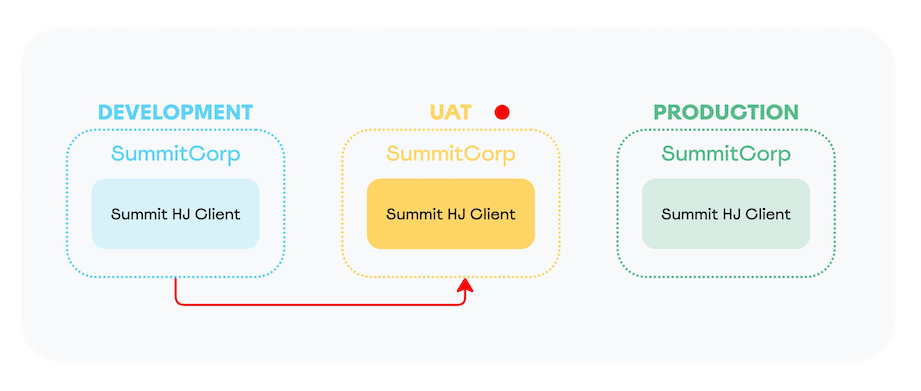
Changes Implemented in Lower Environment (Development) that Need to be Propagated
This architecture helps maintain consistency across environments, making it easier to manage large-scale systems while avoiding redundant manual updates.
Propagating Changes Across Environments
The Propagate Changes feature enables you to make changes in your lowest environment (typically Development), thoroughly test them, and then easily push the same updates to higher environments. This ensures that your application configurations are applied consistently across environments, reducing the risk of manual errors.
For example, let’s say you have 2FA disabled in your application and now wish to enable it. The process would involve enabling the feature in the Authentication Journey for the Development environment, testing the change, and then propagating it to the UAT (Stage) and Production environments (this might vary according to your environment pipeline).
Here’s how the propagation process works:
-
Once you have performed changes in the lowest environment, the system detects any inconsistencies between environments and highlights them with a red dot on the Client Details page. In this case, the next environment in the pipeline will be marked.
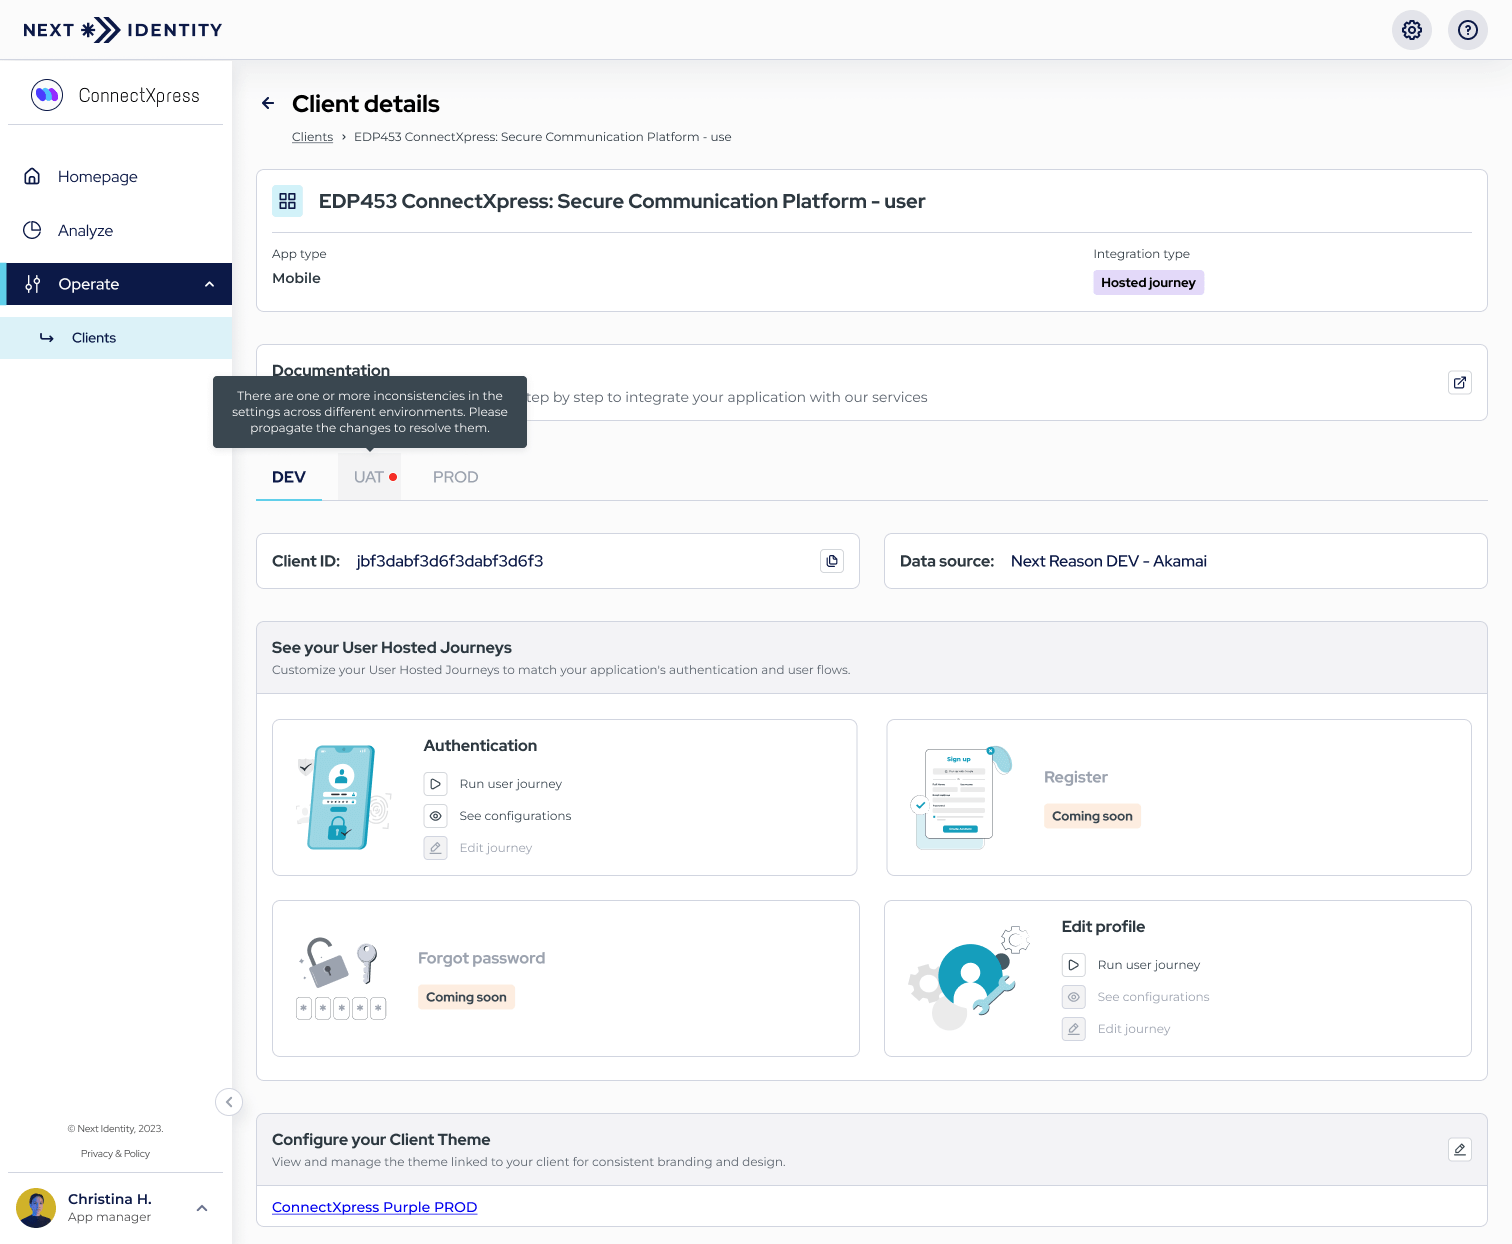
Environment highlighted with inconsistencies
-
Clicking on the highlighted environment tab will present a message explaining why the environment is flagged and what needs to be done to resolve the inconsistencies.
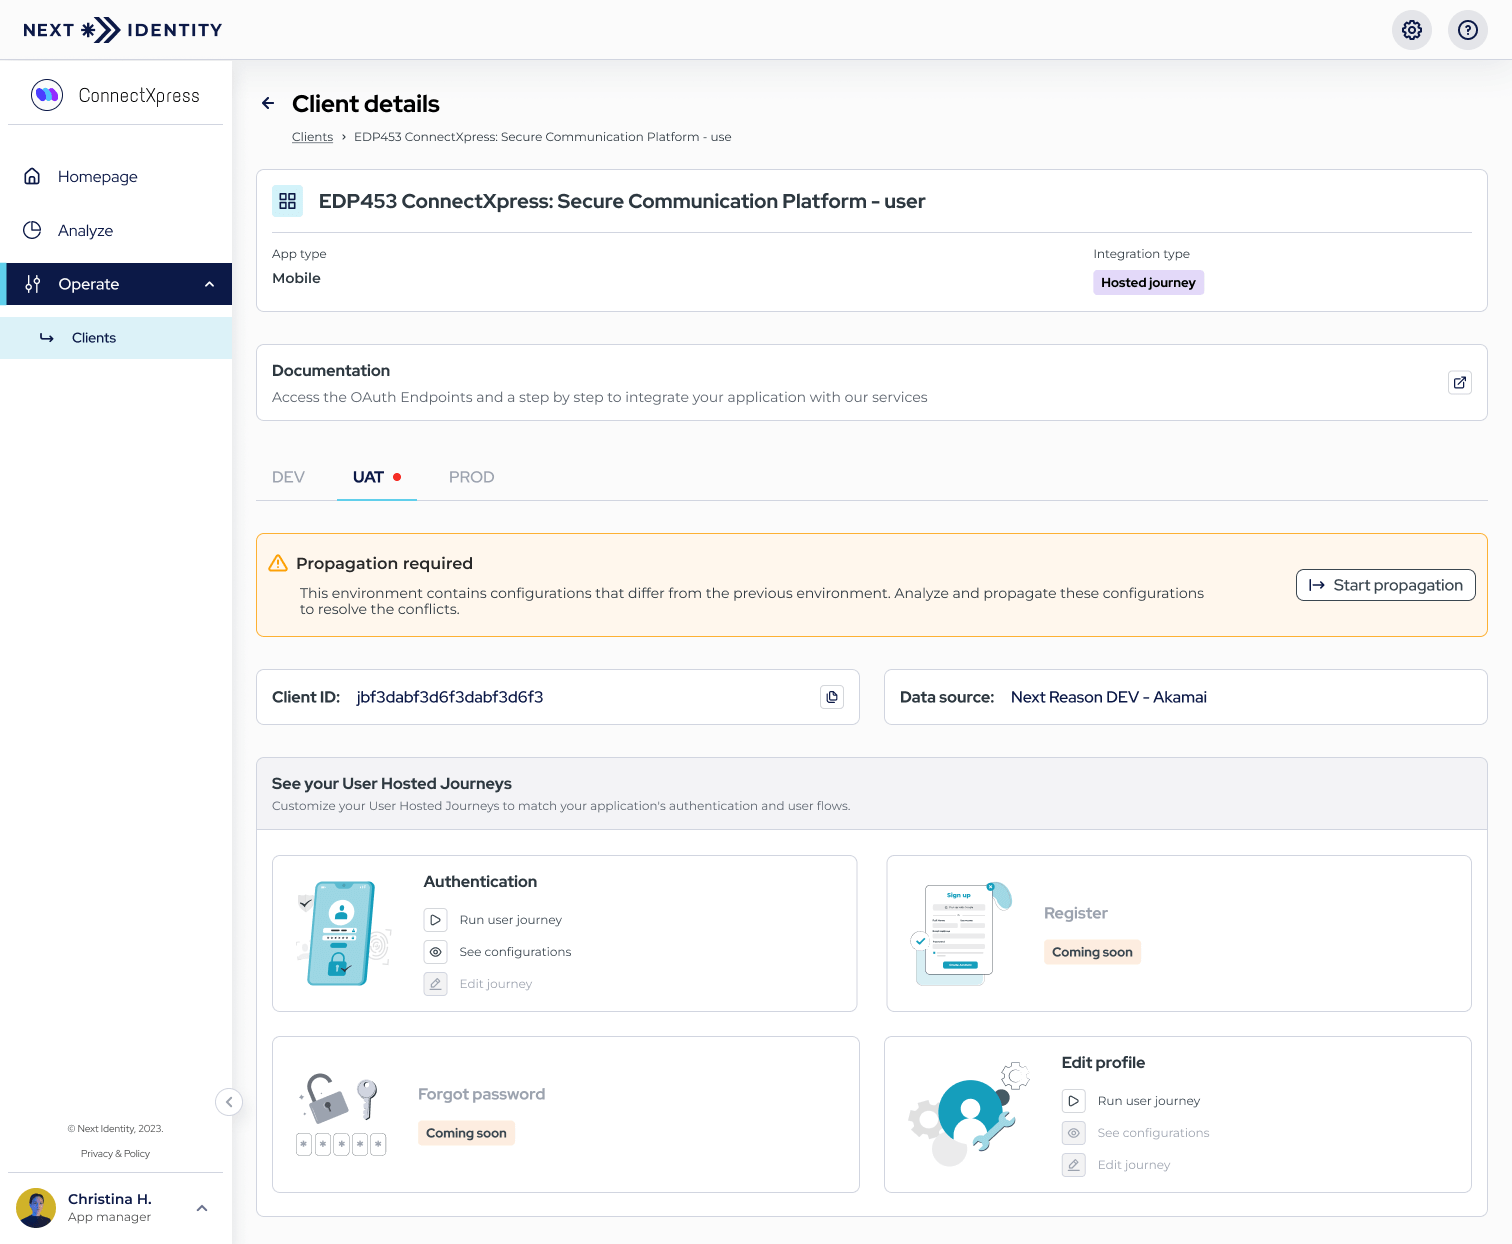
Explanation of Inconsistencies
-
Clicking the Start Propagation button will take you to the first step of the process, where you can analyze each item that was updated in the lower environment and compare its values with the next environment.
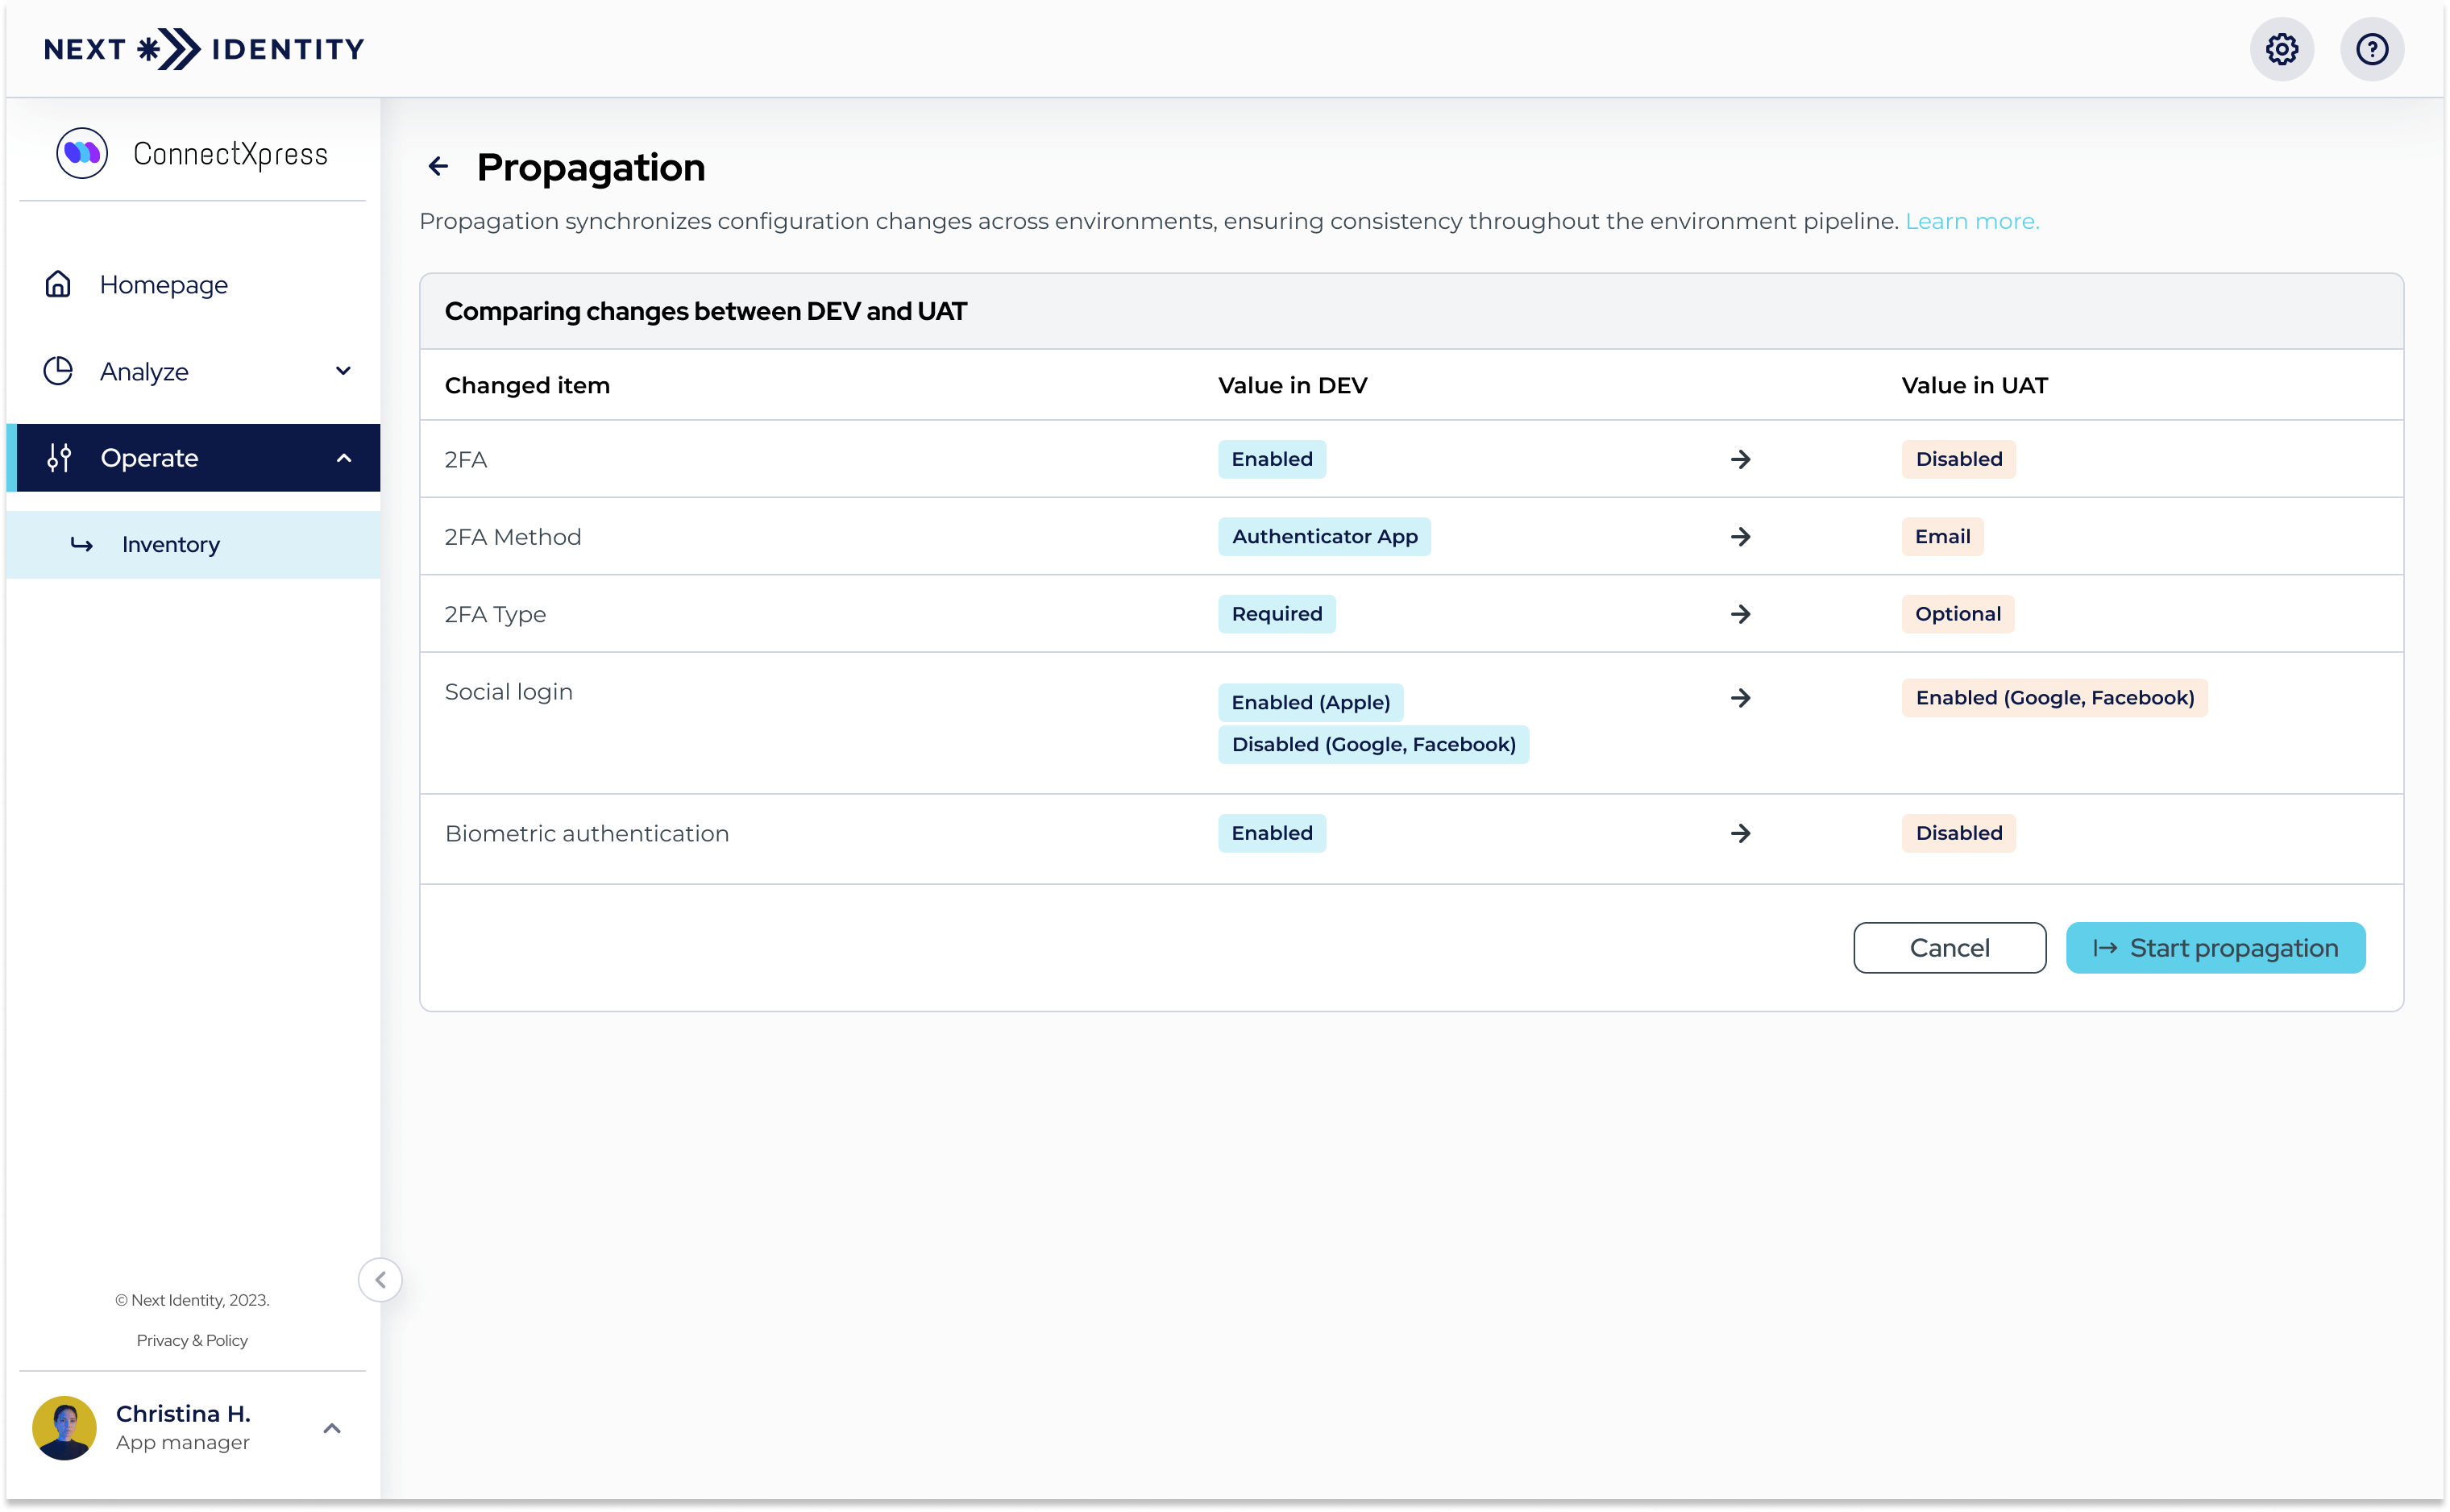
Analyzing Updated Items Across Environments
-
Once the analysis is complete, click Start Propagation again to open a confirmation dialog. Here, you can optionally add a comment for future auditing purposes.
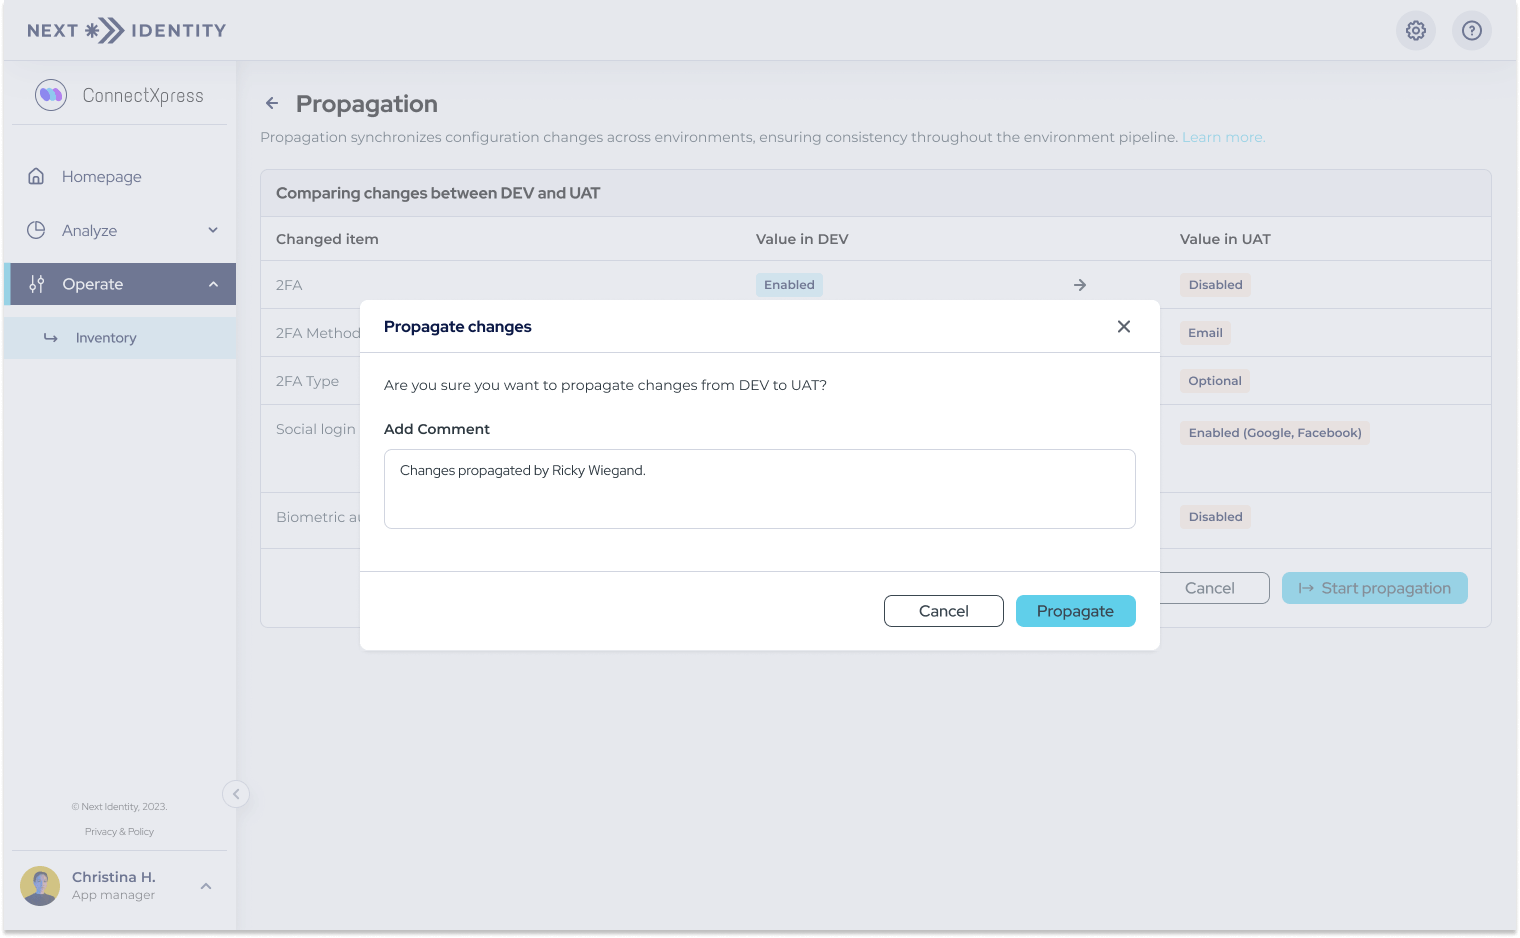
Confirmation Dialog with Optional Auditing Comment
-
Clicking Propagate will replicate your changes to the next environment in the pipeline. If this is not the final environment (e.g., Production), you will still see a red dot on the next environment, indicating further propagation is needed.
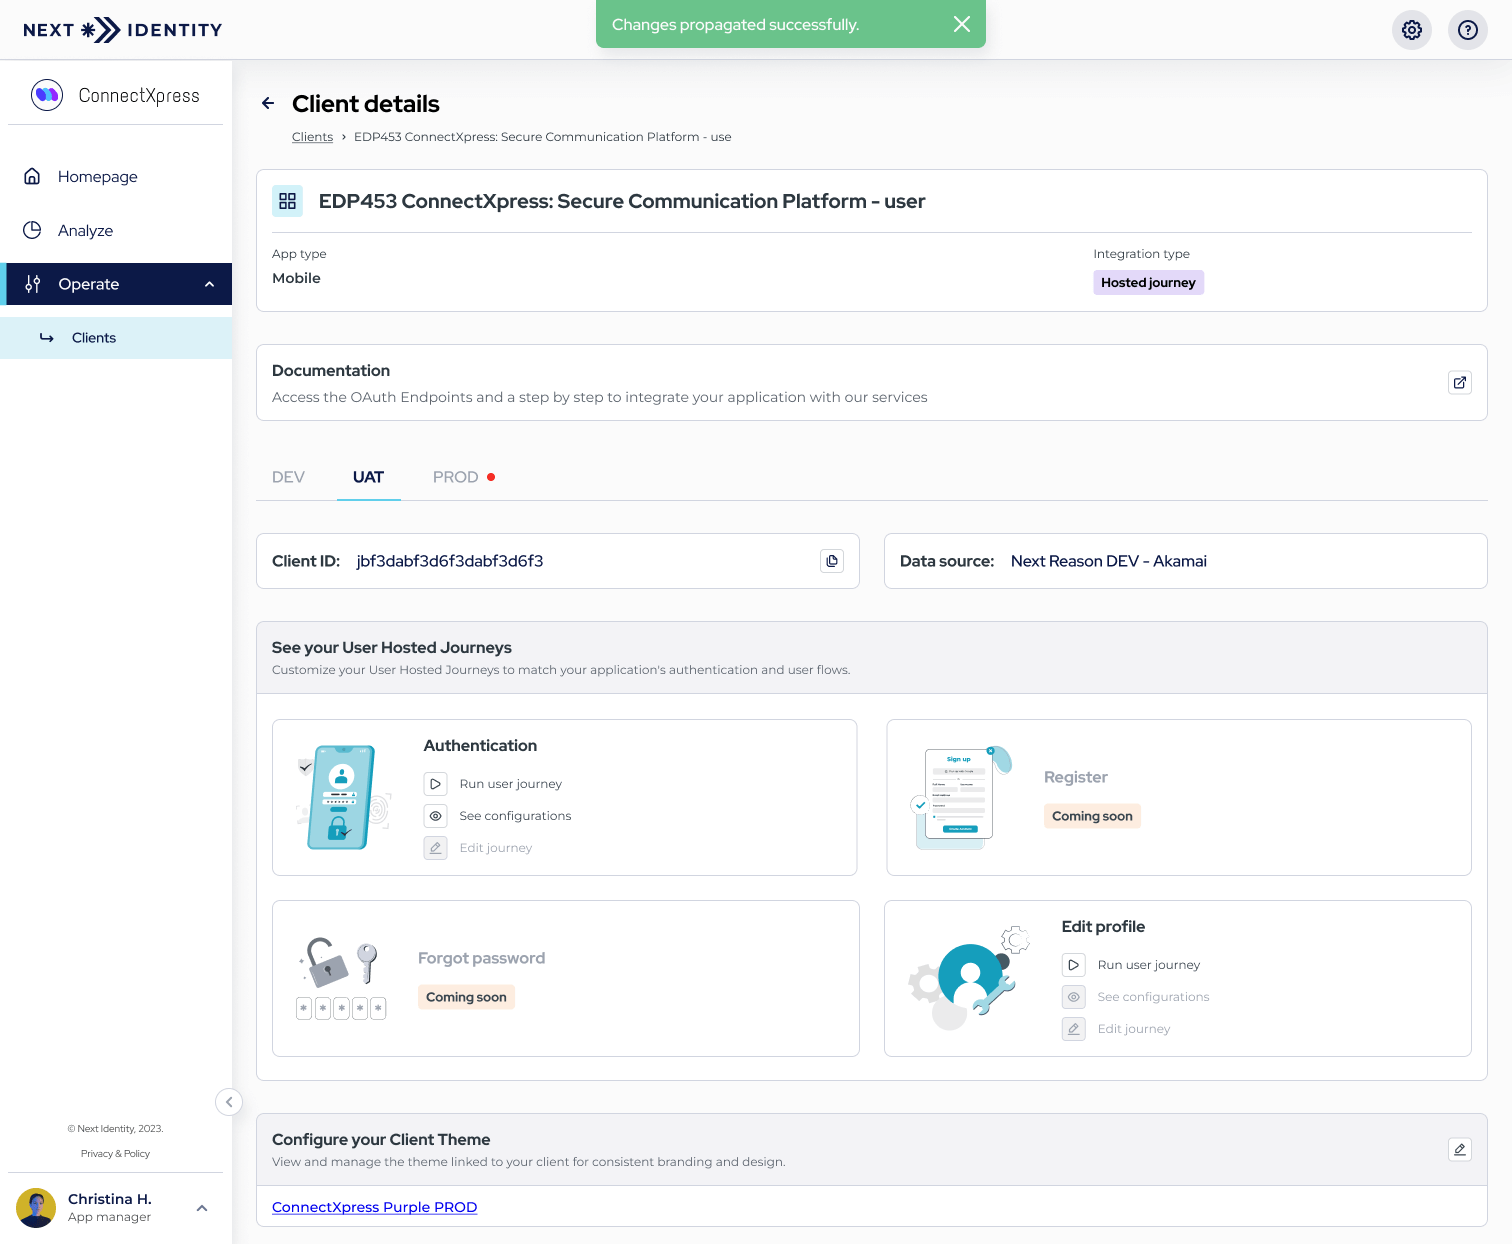
Propagation Success Message
This step-by-step process ensures that your changes are propagated in a controlled, auditable manner, allowing for thorough testing before reaching your production environment. By minimizing manual updates, you can maintain consistency and accuracy throughout the deployment process.
Updated 9 months ago
