
Themes
Add custom branding to the hosted user journey experience
Next Identity Unify includes Themes as a crucial feature, empowering users to create and personalize themes that reflect their brand identity. Modify various design elements, including color schemes, typography, and more, to tailor your brand's unique identity. Whether it's multi-branding, unbranding, or third-party branding, Themes ensures quick time-to-market goals can be achieved.
Themes available with Next Identity JourneysNext Identity Journeys deliver hosted pre-registration, registration, login, forgot password, profile, and other common customer use cases with easy OpenID Connect (OIDC) integration patterns. Deploy fast, save money, follow industry standards and best practices, achieve security and privacy requirements, and stay on the cutting edge across your global customer identity landscape with Next Identity Journeys.
Theme Options
Themes offer the flexibility to support different branding needs and standard options, ensuring quick deployment.
Component | Availability |
|---|---|
Hosting Domain Support multiple custom domains for Next Identity Journeys (such as | ✅ |
Reply-to Email Address Support multiple custom email addresses for transactional emails (such as | ✅ |
Next Identity Journeys Support multiple sets of branding requirements for all hosted user journeys. | ☑️ Standard supports custom logos, colors, fonts, and other styles but does not include layout customizations for Next Identity Journeys. |
Emails & SMS Support multiple custom designs for transactional emails and sender IDs for SMS | ☑️ Standard supports custom logos, colors, fonts, and other styles but does not include layout customizations for transactional notifications. |
Default Theme
Next Identity Unify includes the concept of a Default Theme, which is used in cases where clients have no associated theme. There are two types of default themes available:
- Next Identity Default Theme: This theme serves as a standard visual appearance for clients without a specific theme.
- Customer Default Theme: Defined in collaboration with the client, this theme allows for a more personalized default appearance that aligns with the customer's brand identity.
The default theme ensures that the user interfaces maintain a consistent and professional appearance, even without specific customization. It is a fallback option, providing a seamless experience across various client interfaces.
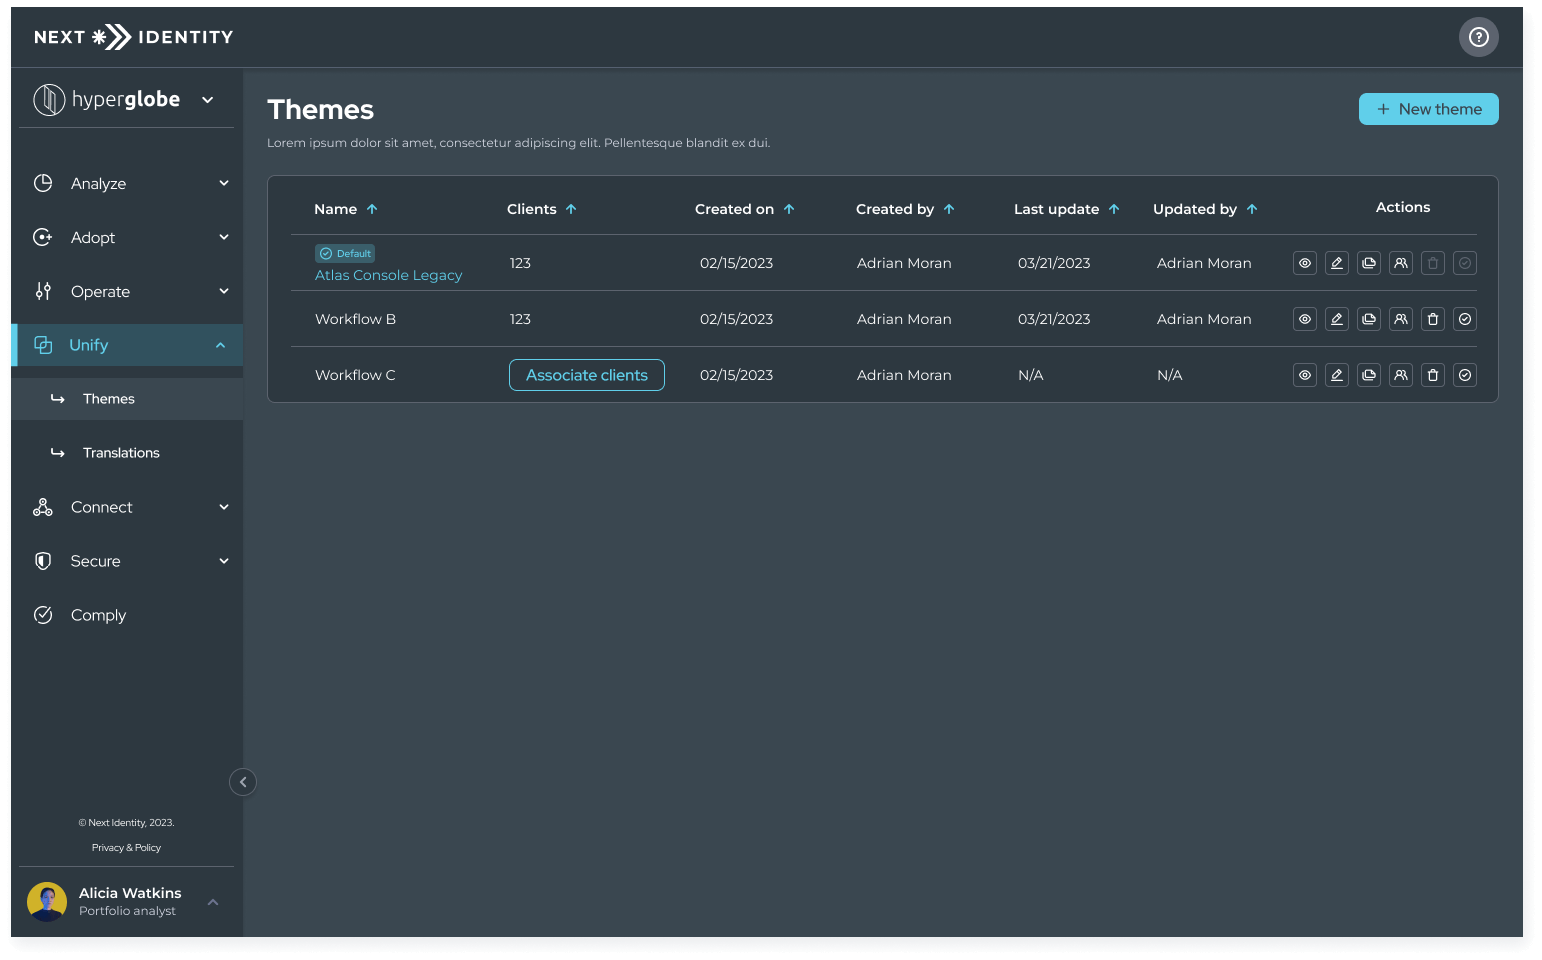
Themes on Next Identity Console
Navigate to Unify in Next Identity Console left menu and select Themes to access this page. The access to Themes is based on the following roles:
- Operator: Can view the list of themes, see theme details, create, edit, and duplicate themes, associate clients to a theme, and disassociate clients from themes. (Note: Operators are not permitted to delete themes.)
- Viewer: Limited to viewing the theme list and individual theme details.
Themes on Next Identity Console
Always Configure Themes Using the Next Identity ConsoleAll theme configurations must be done directly via the Next Identity Console. The Next Identity Themes feature does not overwrite any theme configuration from external IDPs. If you make edits externally and then make changes within Next Identity Themes, the configurations may not work as expected. Some theme configurations will be applied, while others may not. To ensure a consistent and seamless user experience, always make theme-related changes within the Next Identity Console.
The following sections detail the processes for creating, editing, applying, deleting, duplicating, and associating themes with clients. These functionalities empower users to fully utilize the Themes feature, allowing for a tailored visual appearance that meets specific requirements.
Creating a Theme
To create a new theme, follow these steps:
Step 1: Access the Themes Designer Screen by selecting the "New Theme" button on the Themes Screen.
Step 2: Start by describing the theme's descriptive name. This name should accurately represent the purpose of the theme.
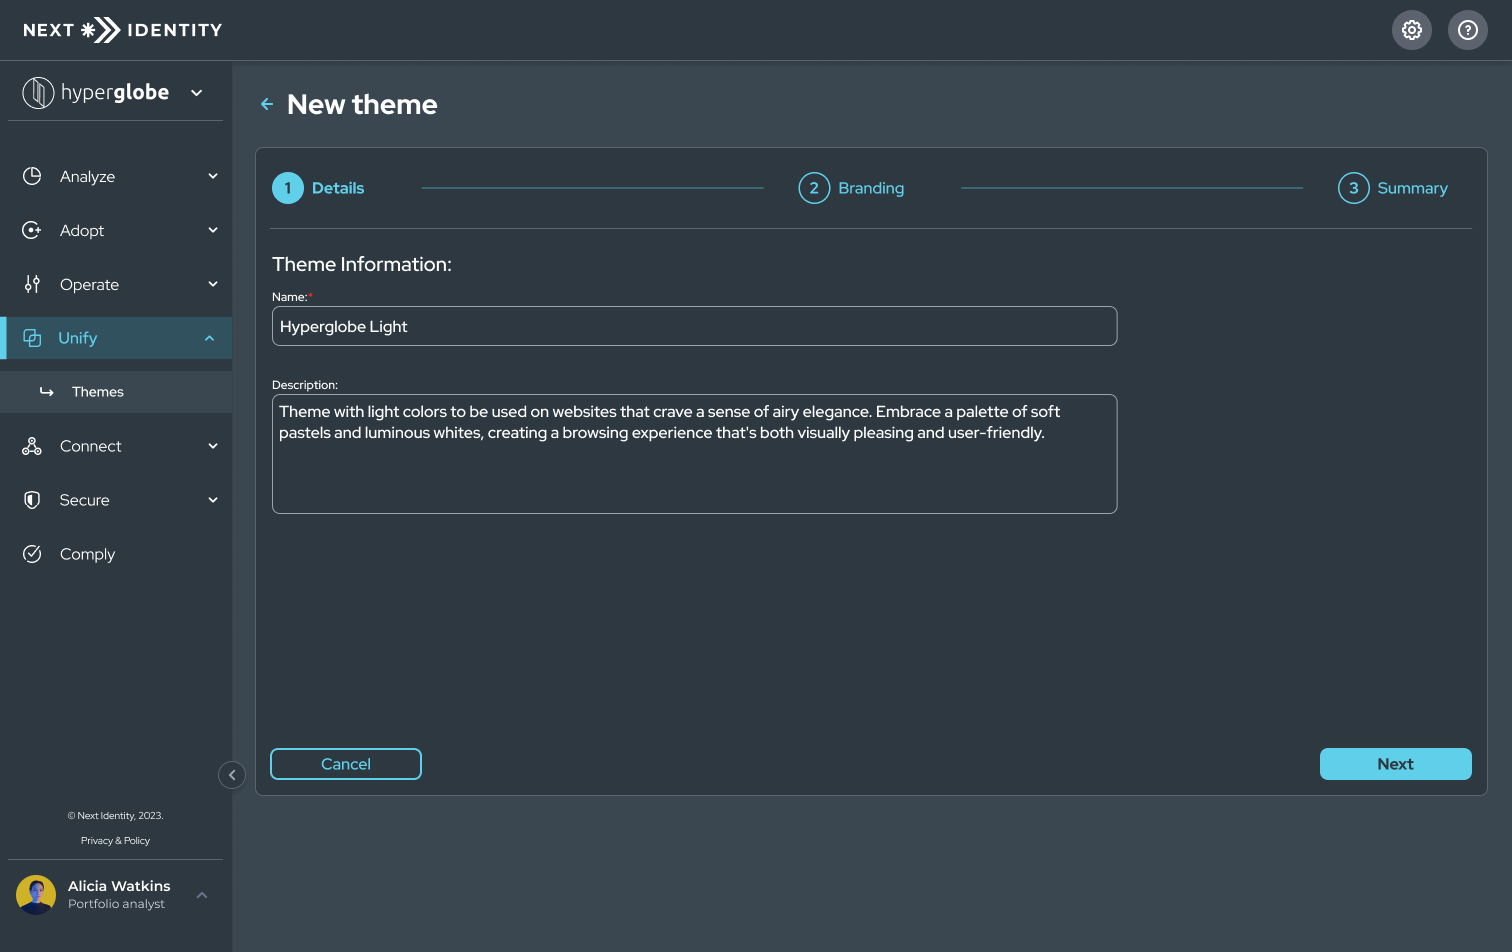
Themes Screen - Defining Name and Description
Step 3: In the Themes Designer Screen, you'll find various options and fields to configure your theme. Begin adding and configuring elements for your theme, such as colors, fonts, and layouts.
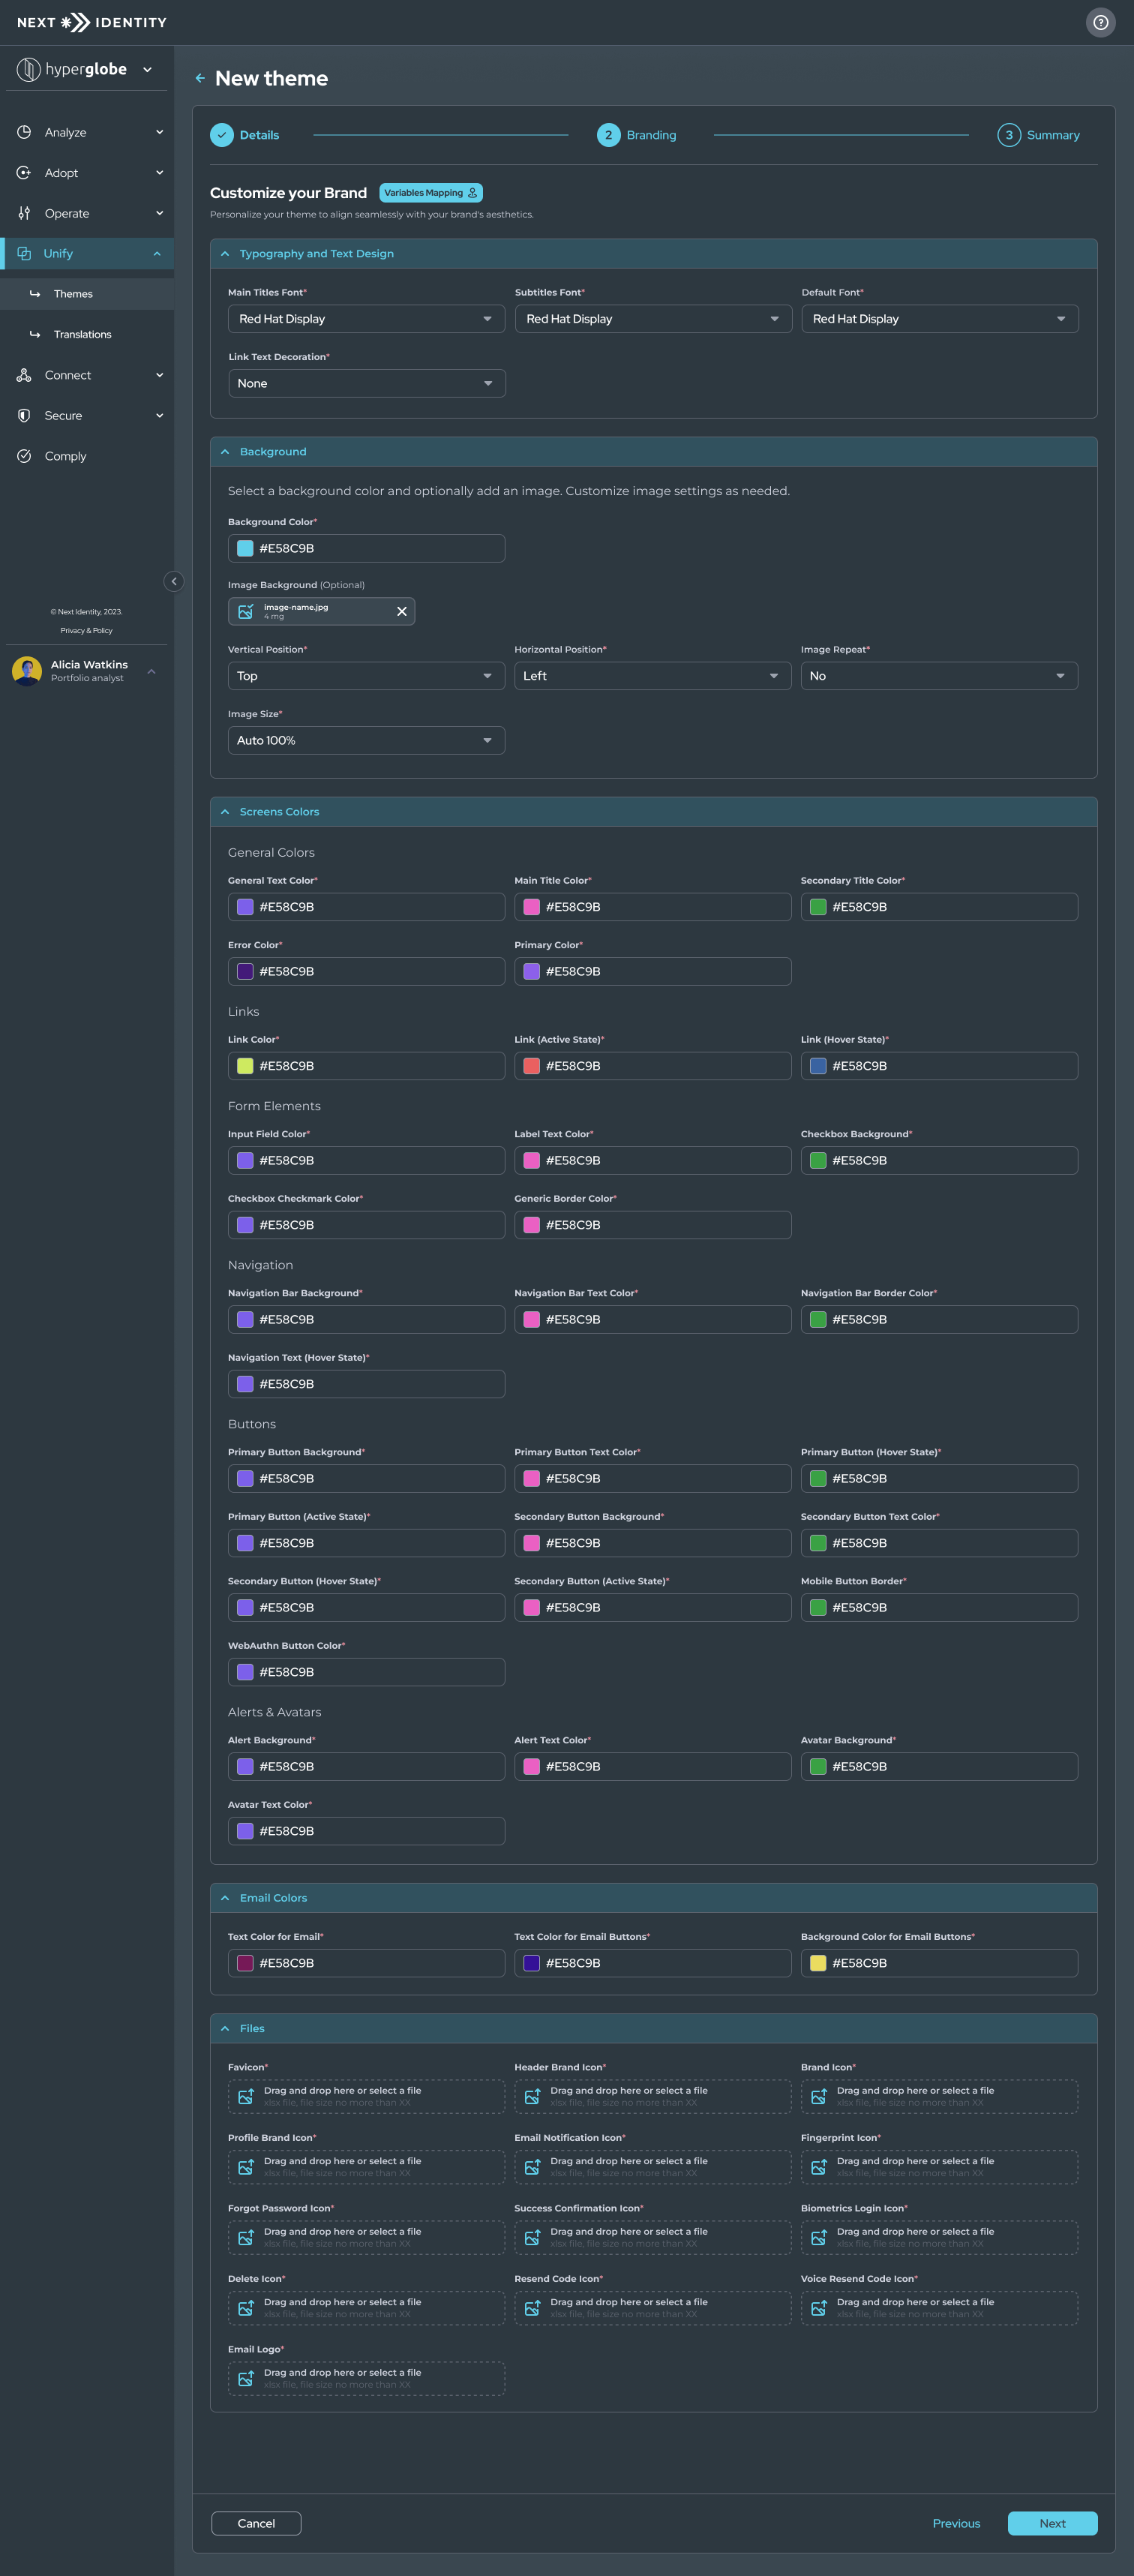
Themes Screen - Branding Configuration
If you are unsure about what you are editing, you can find the "Variables Mapping" button at the top of the screen. When you select this button, a dialog will appear that displays all the details about what you are configuring.
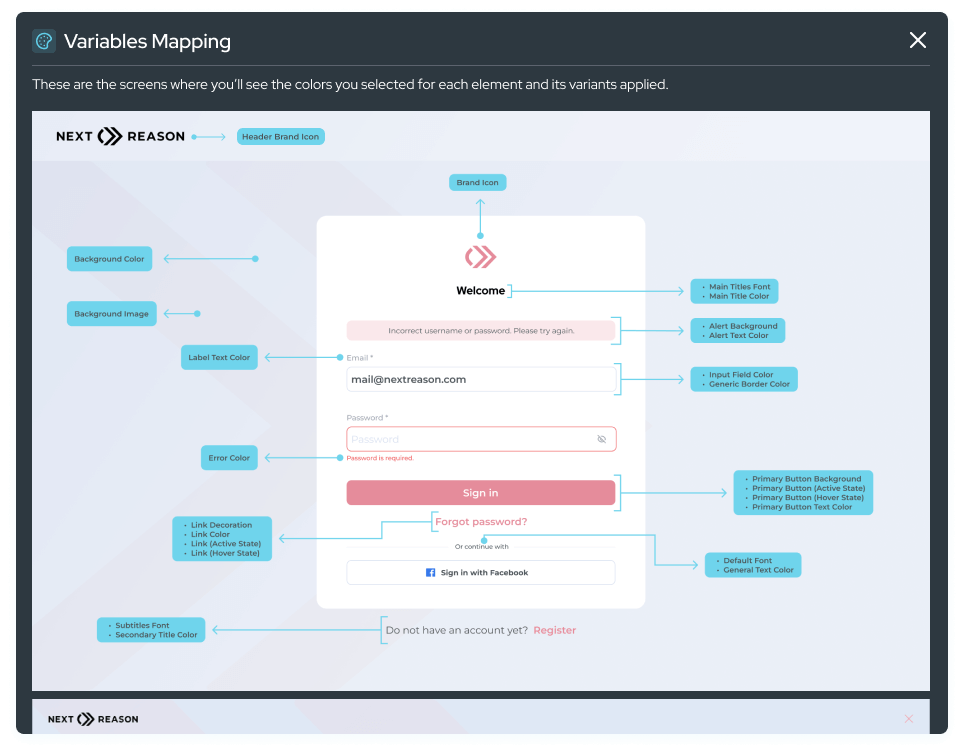
Themes Variable Mapping
Step 4: Save the theme configuration. This will finalize the creation of the theme and take you back to the Themes Management Screen.
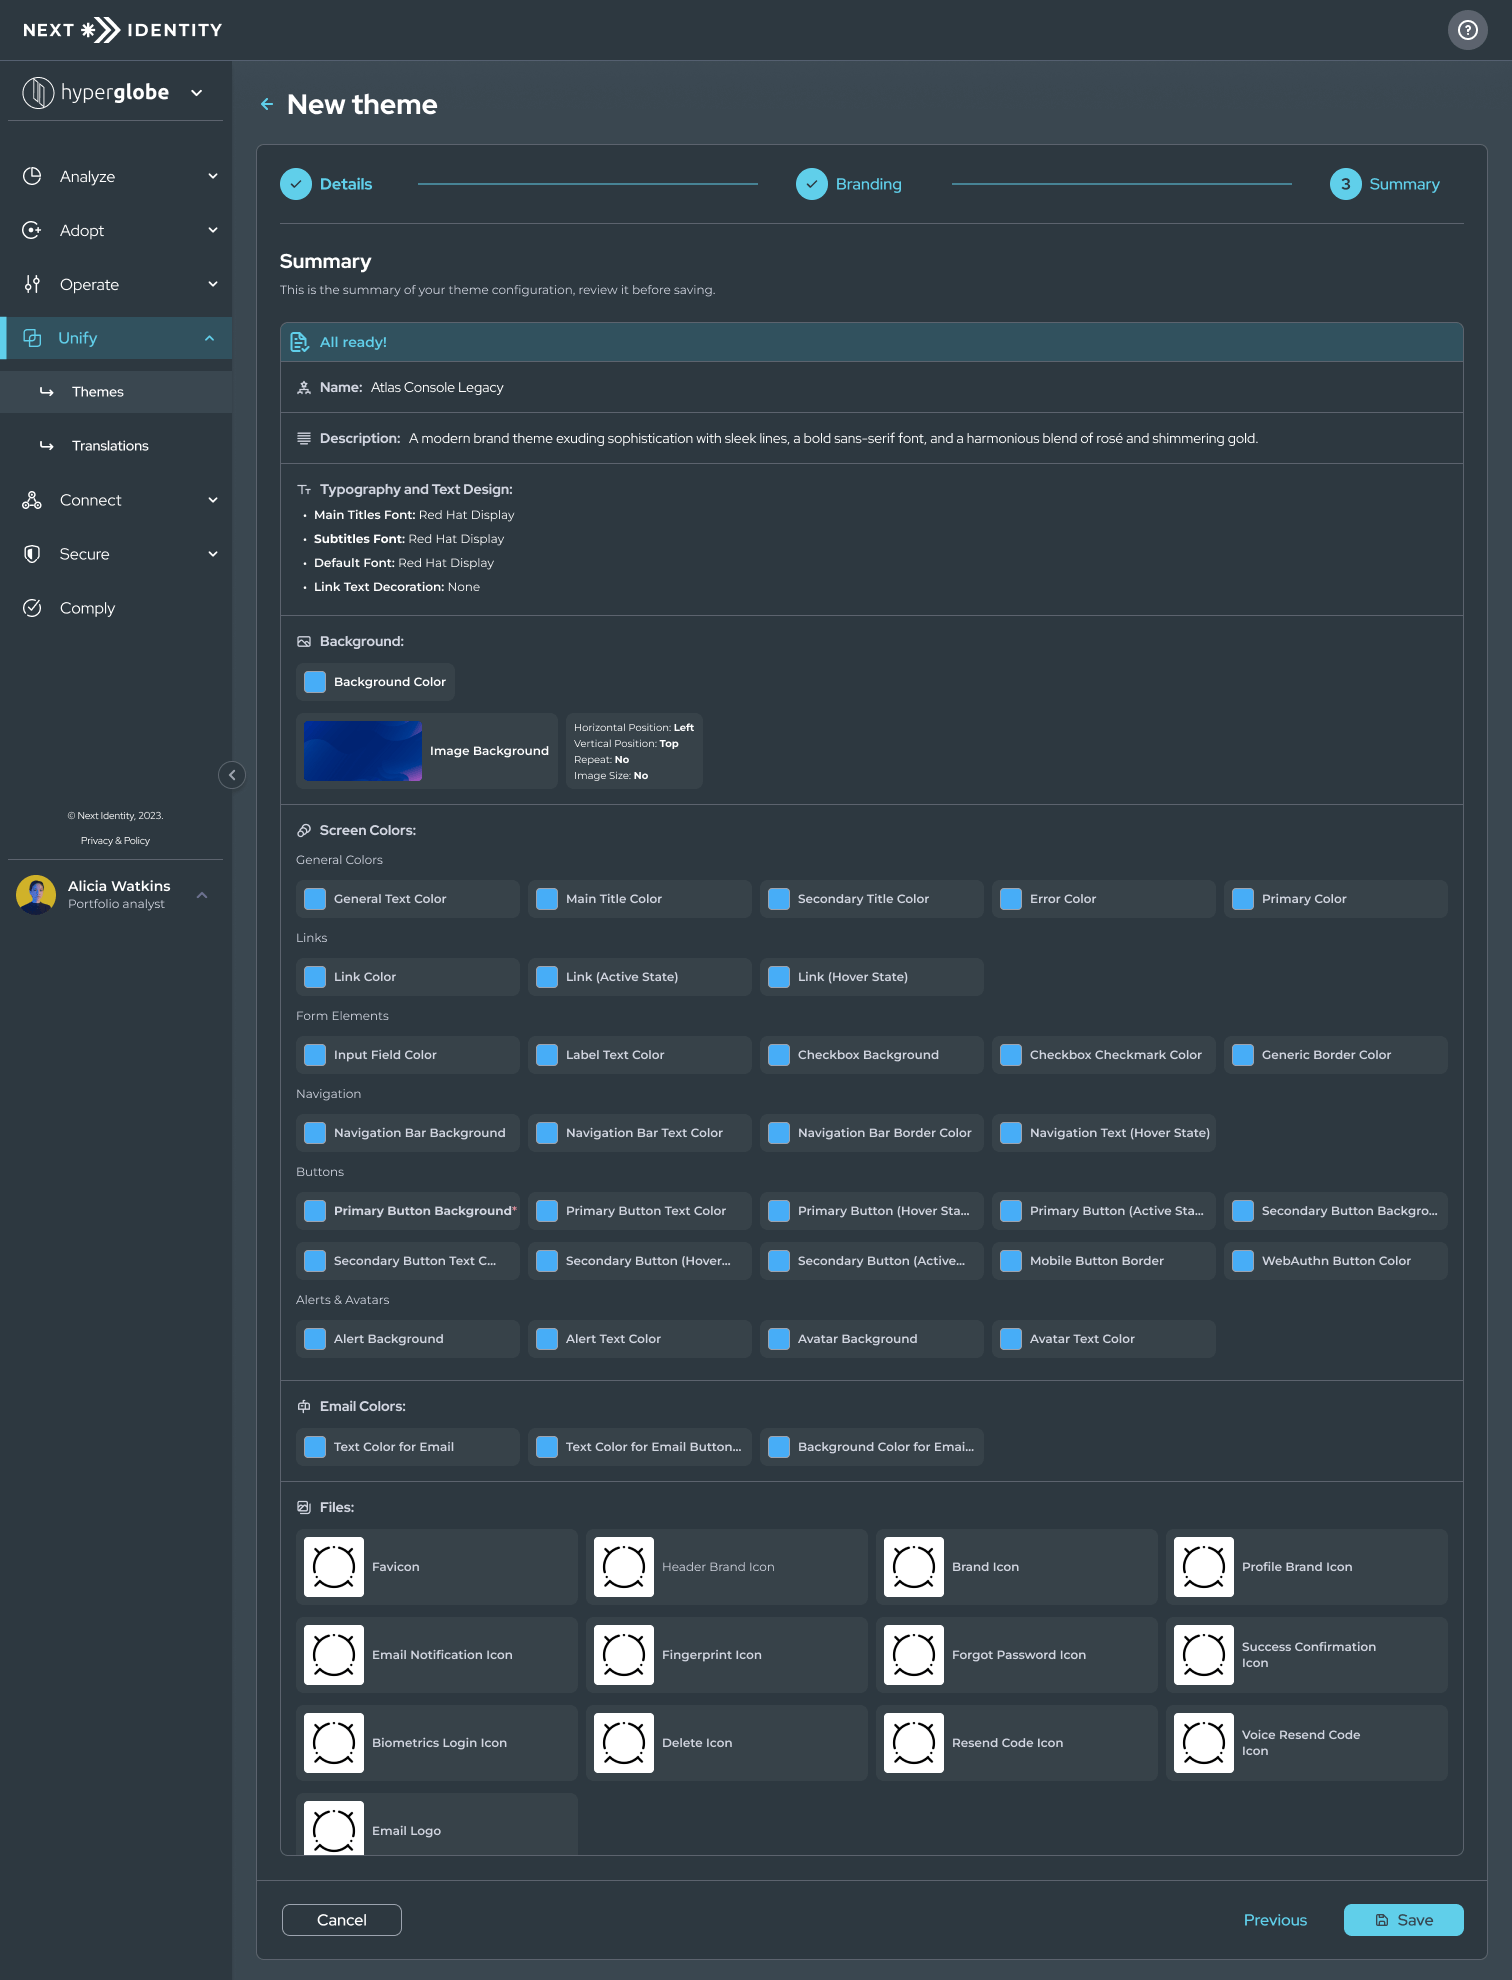
Themes Screen - Summary
Editing a Theme
To edit an existing theme, follow these steps:
Step 1: Find the list of themes in the main Themes Screens and select the edit button (pencil icon) for the desired theme.

Edit Button
Step 2: In the Themes Designer Screen, you can modify the same properties you can define while creating a theme. The rules for editing the elements are the same as when creating a new theme.
Step 3: Configure elements within the theme as needed.
Step 4: Save the theme configuration to apply the changes. This will finalize the theme edition and take you back to the Themes Management Screen.
Associating Clients with a Theme
A hierarchy determines the association of a theme with clients to ensure that there's always a theme applied to a client. Here's how the hierarchy works:
- Existing Theme: If a theme exists for a client in the Next Identity Themes, this theme will be used.
- Client Settings: If no theme is associated with a client in the Next Identity Themes, the system will look for a theme in the client settings.
- Default Theme: The system will use the default theme if the client does not have a theme in the Next Identity Themes and client settings.
This hierarchy ensures that there's always a theme applied to a client, providing a consistent user experience. It also ensures that current clients looking for a theme defined in their settings are not impacted by any changes.
How to Associate Clients with a Theme:
Step 1: Select Clients to Associate
1.1 Select the “Associate Clients” button on the theme you wish to associate.

Associate Clients Button
1.2 You will be directed to the Client's list. Here, you can select the clients you want to associate with. To find clients, enter their name or ID using the search function.
NOTE: Use the X to clear the search for product consistency.
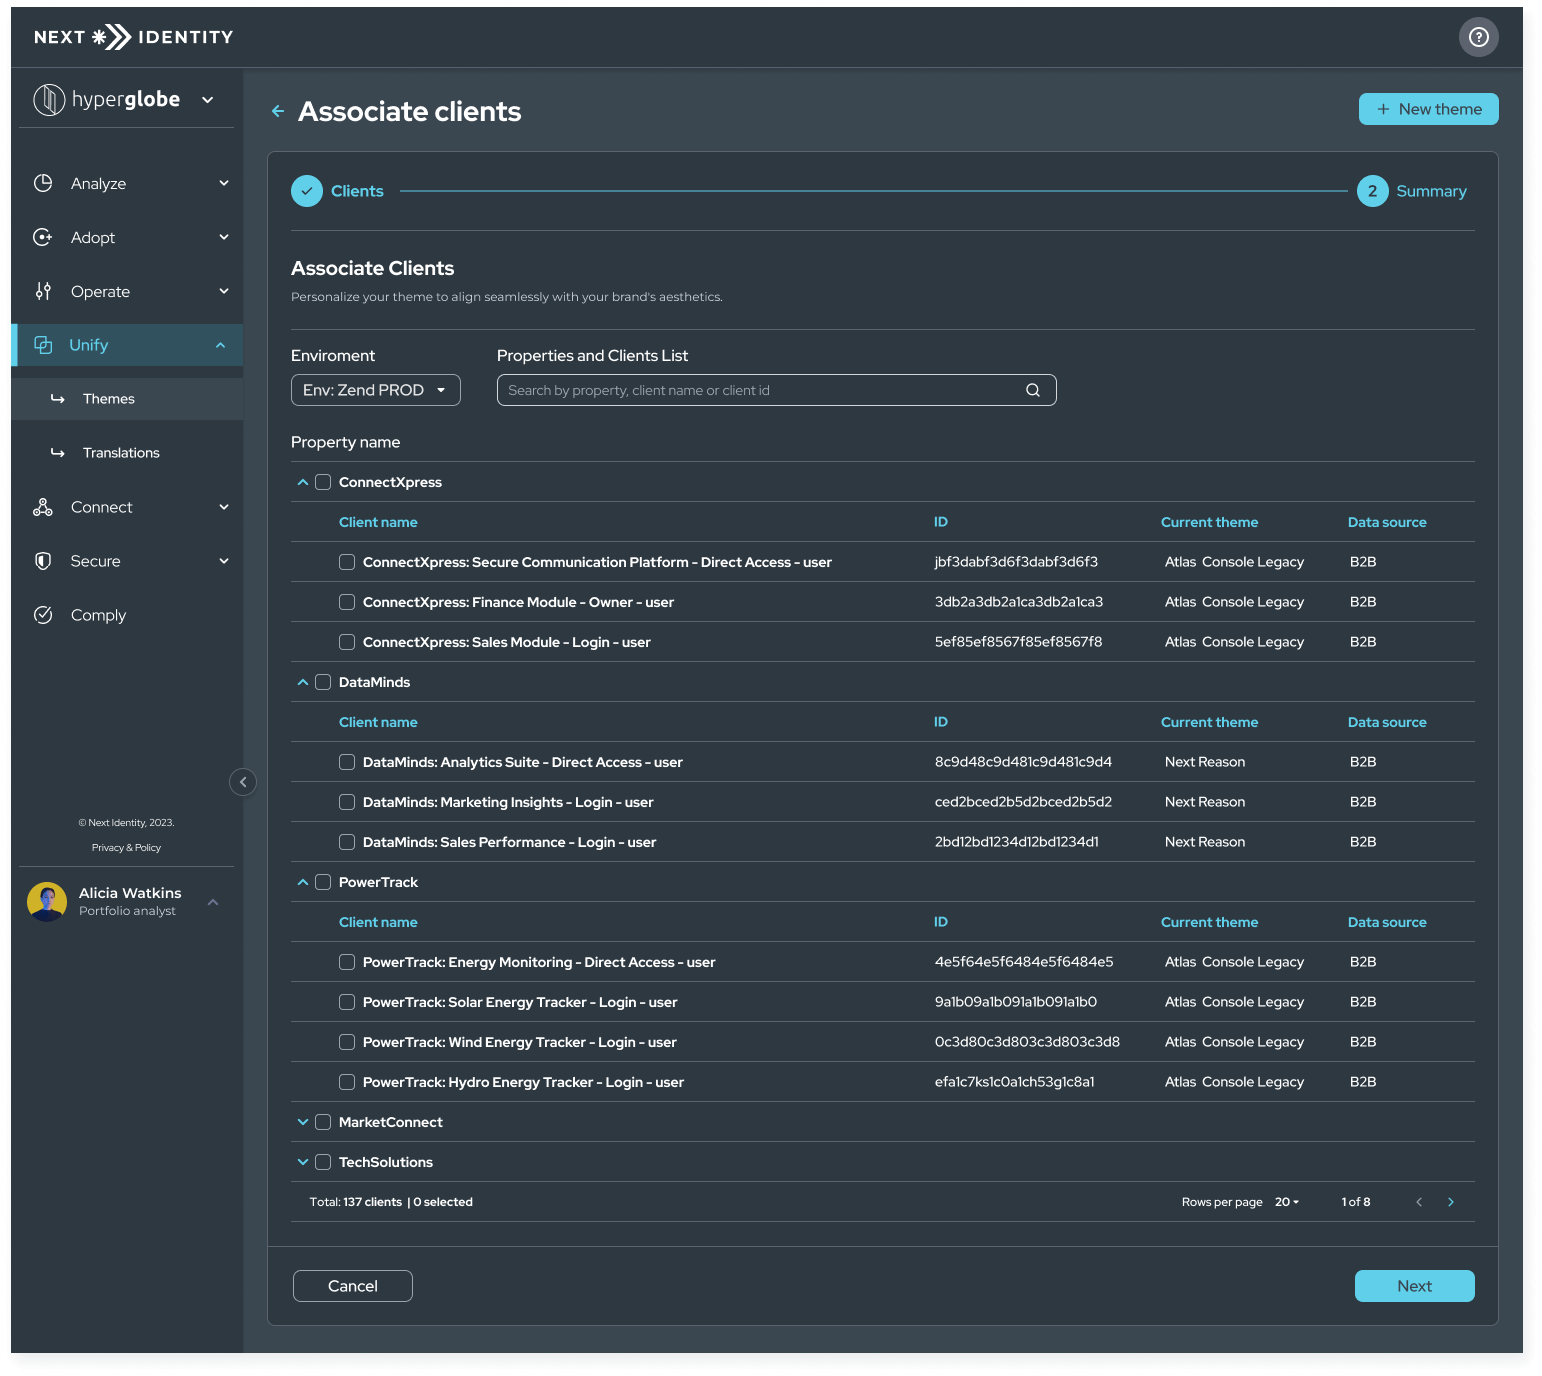
Associating Clients and Themes
1.3 Click on any part of the table row to select a client.
Step 2: Confirm Association
2.1 Select Next to confirm the selected clients and proceed to the summary screen.
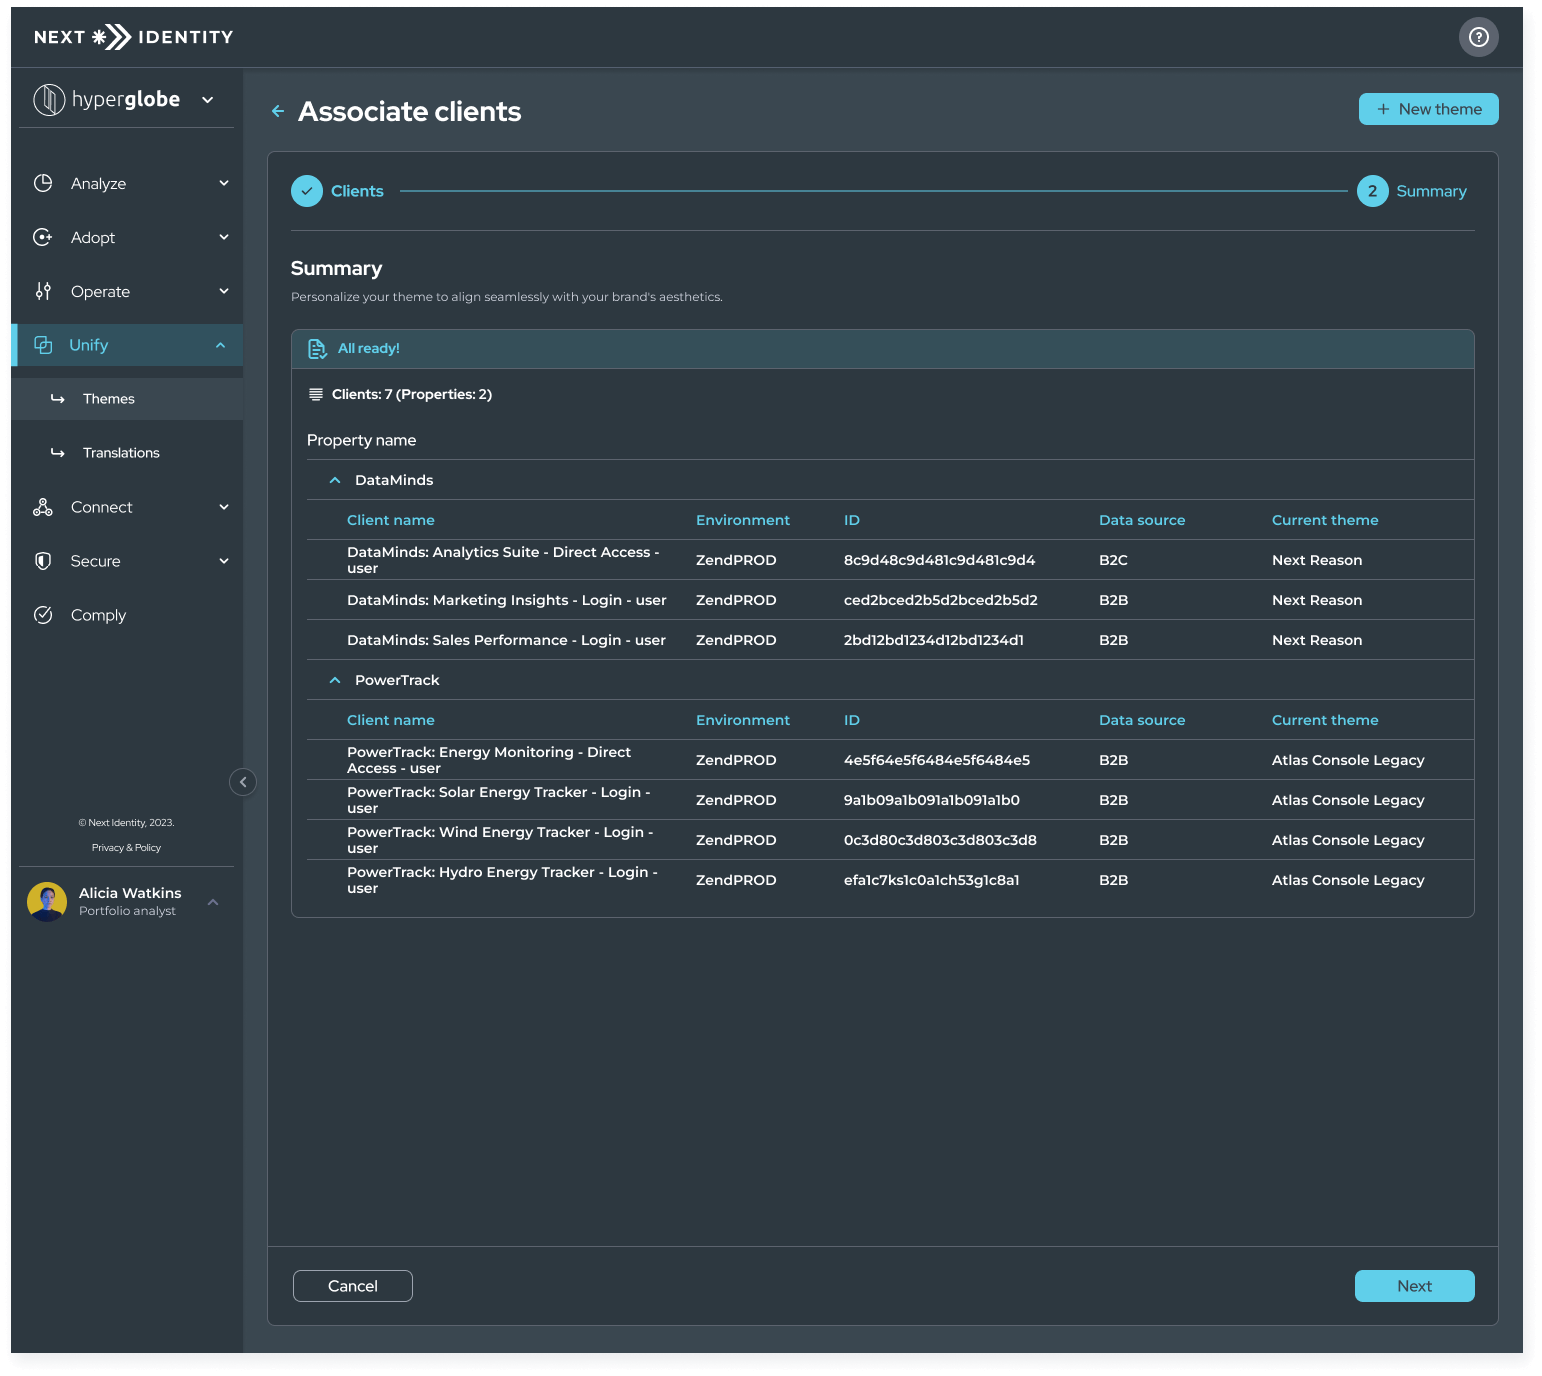
Associating Clients and Themes - Summary Screen
2.2 Select the Save button to confirm the association of the theme with the selected clients.
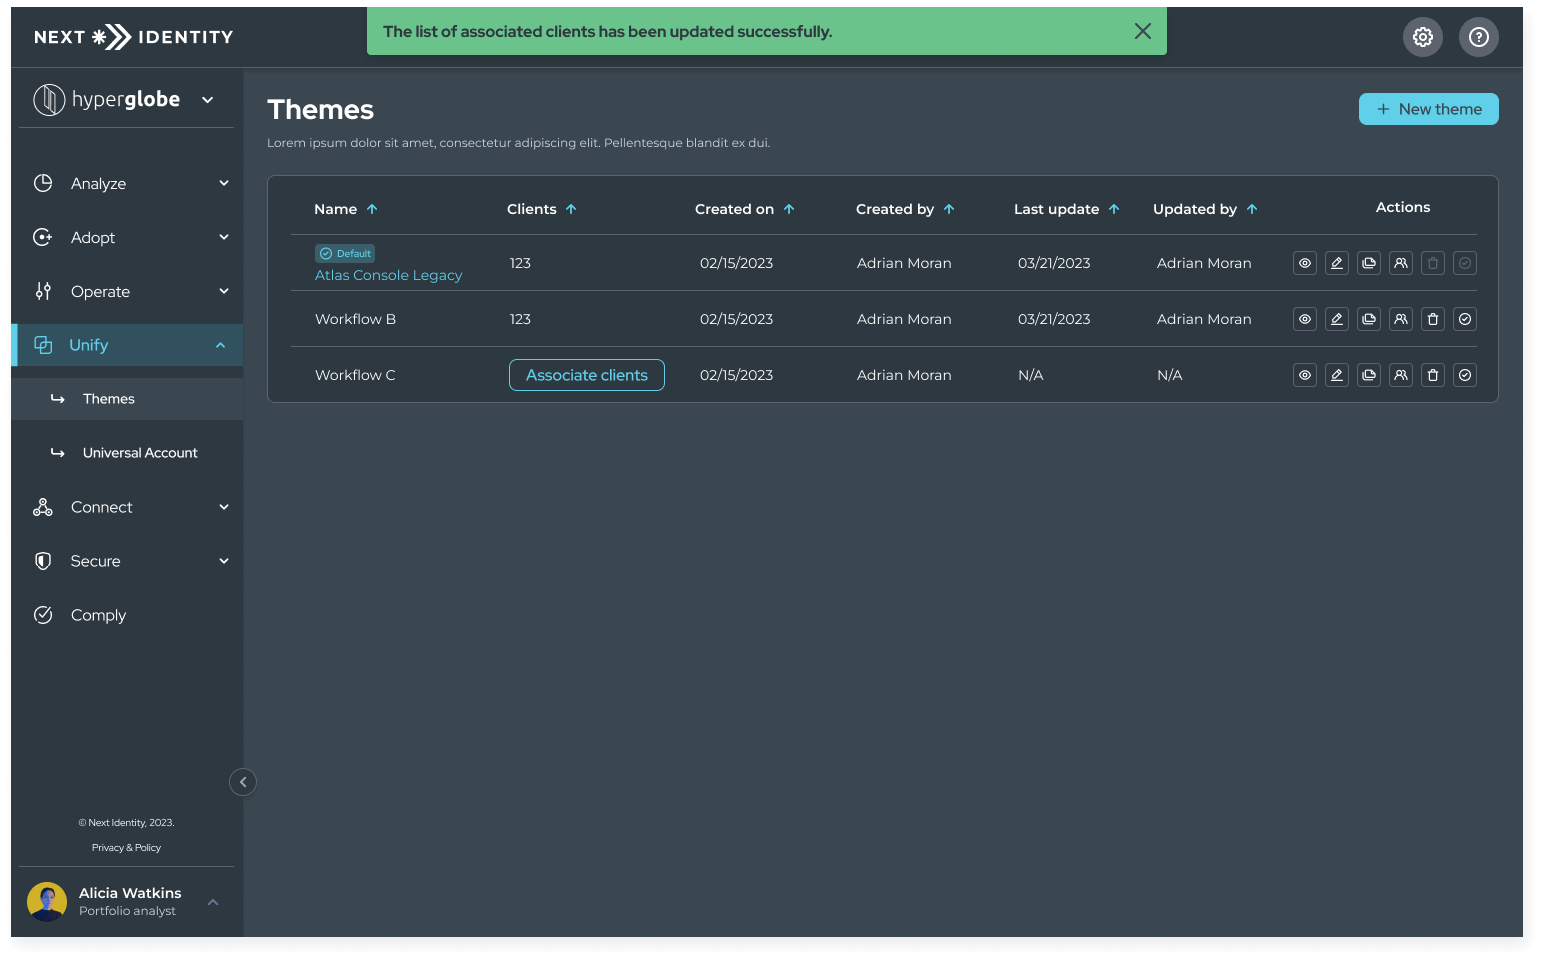
Associating Clients and Themes - Confirmation Screen
The Themes feature offers a versatile and user-friendly way to create and manage themes that reflect your brand's identity. With customizable options, you can ensure a consistent branding experience across your applications.
NOTES:
- Default themes will always be available, but clients won't necessarily be associated with them.
- To remove a client from a theme, follow the steps you would take to associate them. All you need to do is unselect and save.
Duplicating a Theme
To duplicate an existing theme, follow these steps:
Step 1: Access the Themes Management Screen and locate the theme you wish to duplicate.
Step 2: Select the duplicate button (duplicate icon) corresponding to the theme you want to duplicate.

Duplicate Button
Step 3: The system will create a copy of the theme with the same settings. You can then edit the duplicated theme as needed.
Deleting a Theme
To delete an existing theme, follow these steps:
Step 1: Access the Themes Management Screen and locate the theme you wish to delete.
Step 2: Select the delete button (trash icon) corresponding to the theme you want to delete.

Delete Button
Step 3: Confirm the deletion in the pop-up dialog. This action is irreversible, so make sure you want to delete the theme.
NOTE: Themes can only be deleted if they have no associated clients. If you try to delete a theme with clients linked to it, a warning message will pop up, informing you that the theme can only be deleted once all associated clients have been reassigned or removed. This rule is in place to ensure that all clients have a theme, maintaining consistency in the visual appearance.
Still Have Questions?We're here to help! If you have any questions or need further assistance with Themes, don't hesitate to reach out. Our dedicated support team is always available to provide guidance and answer any inquiries you may have.
Updated 9 months ago