
Customize Your Client in Service Management View
Manage and personalize client settings for your applications.
In the Service Management View, you have access to a wide range of customization options for managing your clients according to your specific needs. This view provides comprehensive control over client settings, allowing you to make adjustments to metadata, authentication flows, security settings, and more.
How to Customize Your Client
Follow these steps to customize your client within the Service Management View of the Next Identity console.
- Navigate to the Inventory Feature: From the sidebar, select Operate > Inventory.
- Choose the client you wish to customize by clicking on the client name in the Properties List. Ensure that you have selected client from the correct environment where you want to apply the changes.
- This will direct you to the Client Details page, where you can begin customizing the selected client.
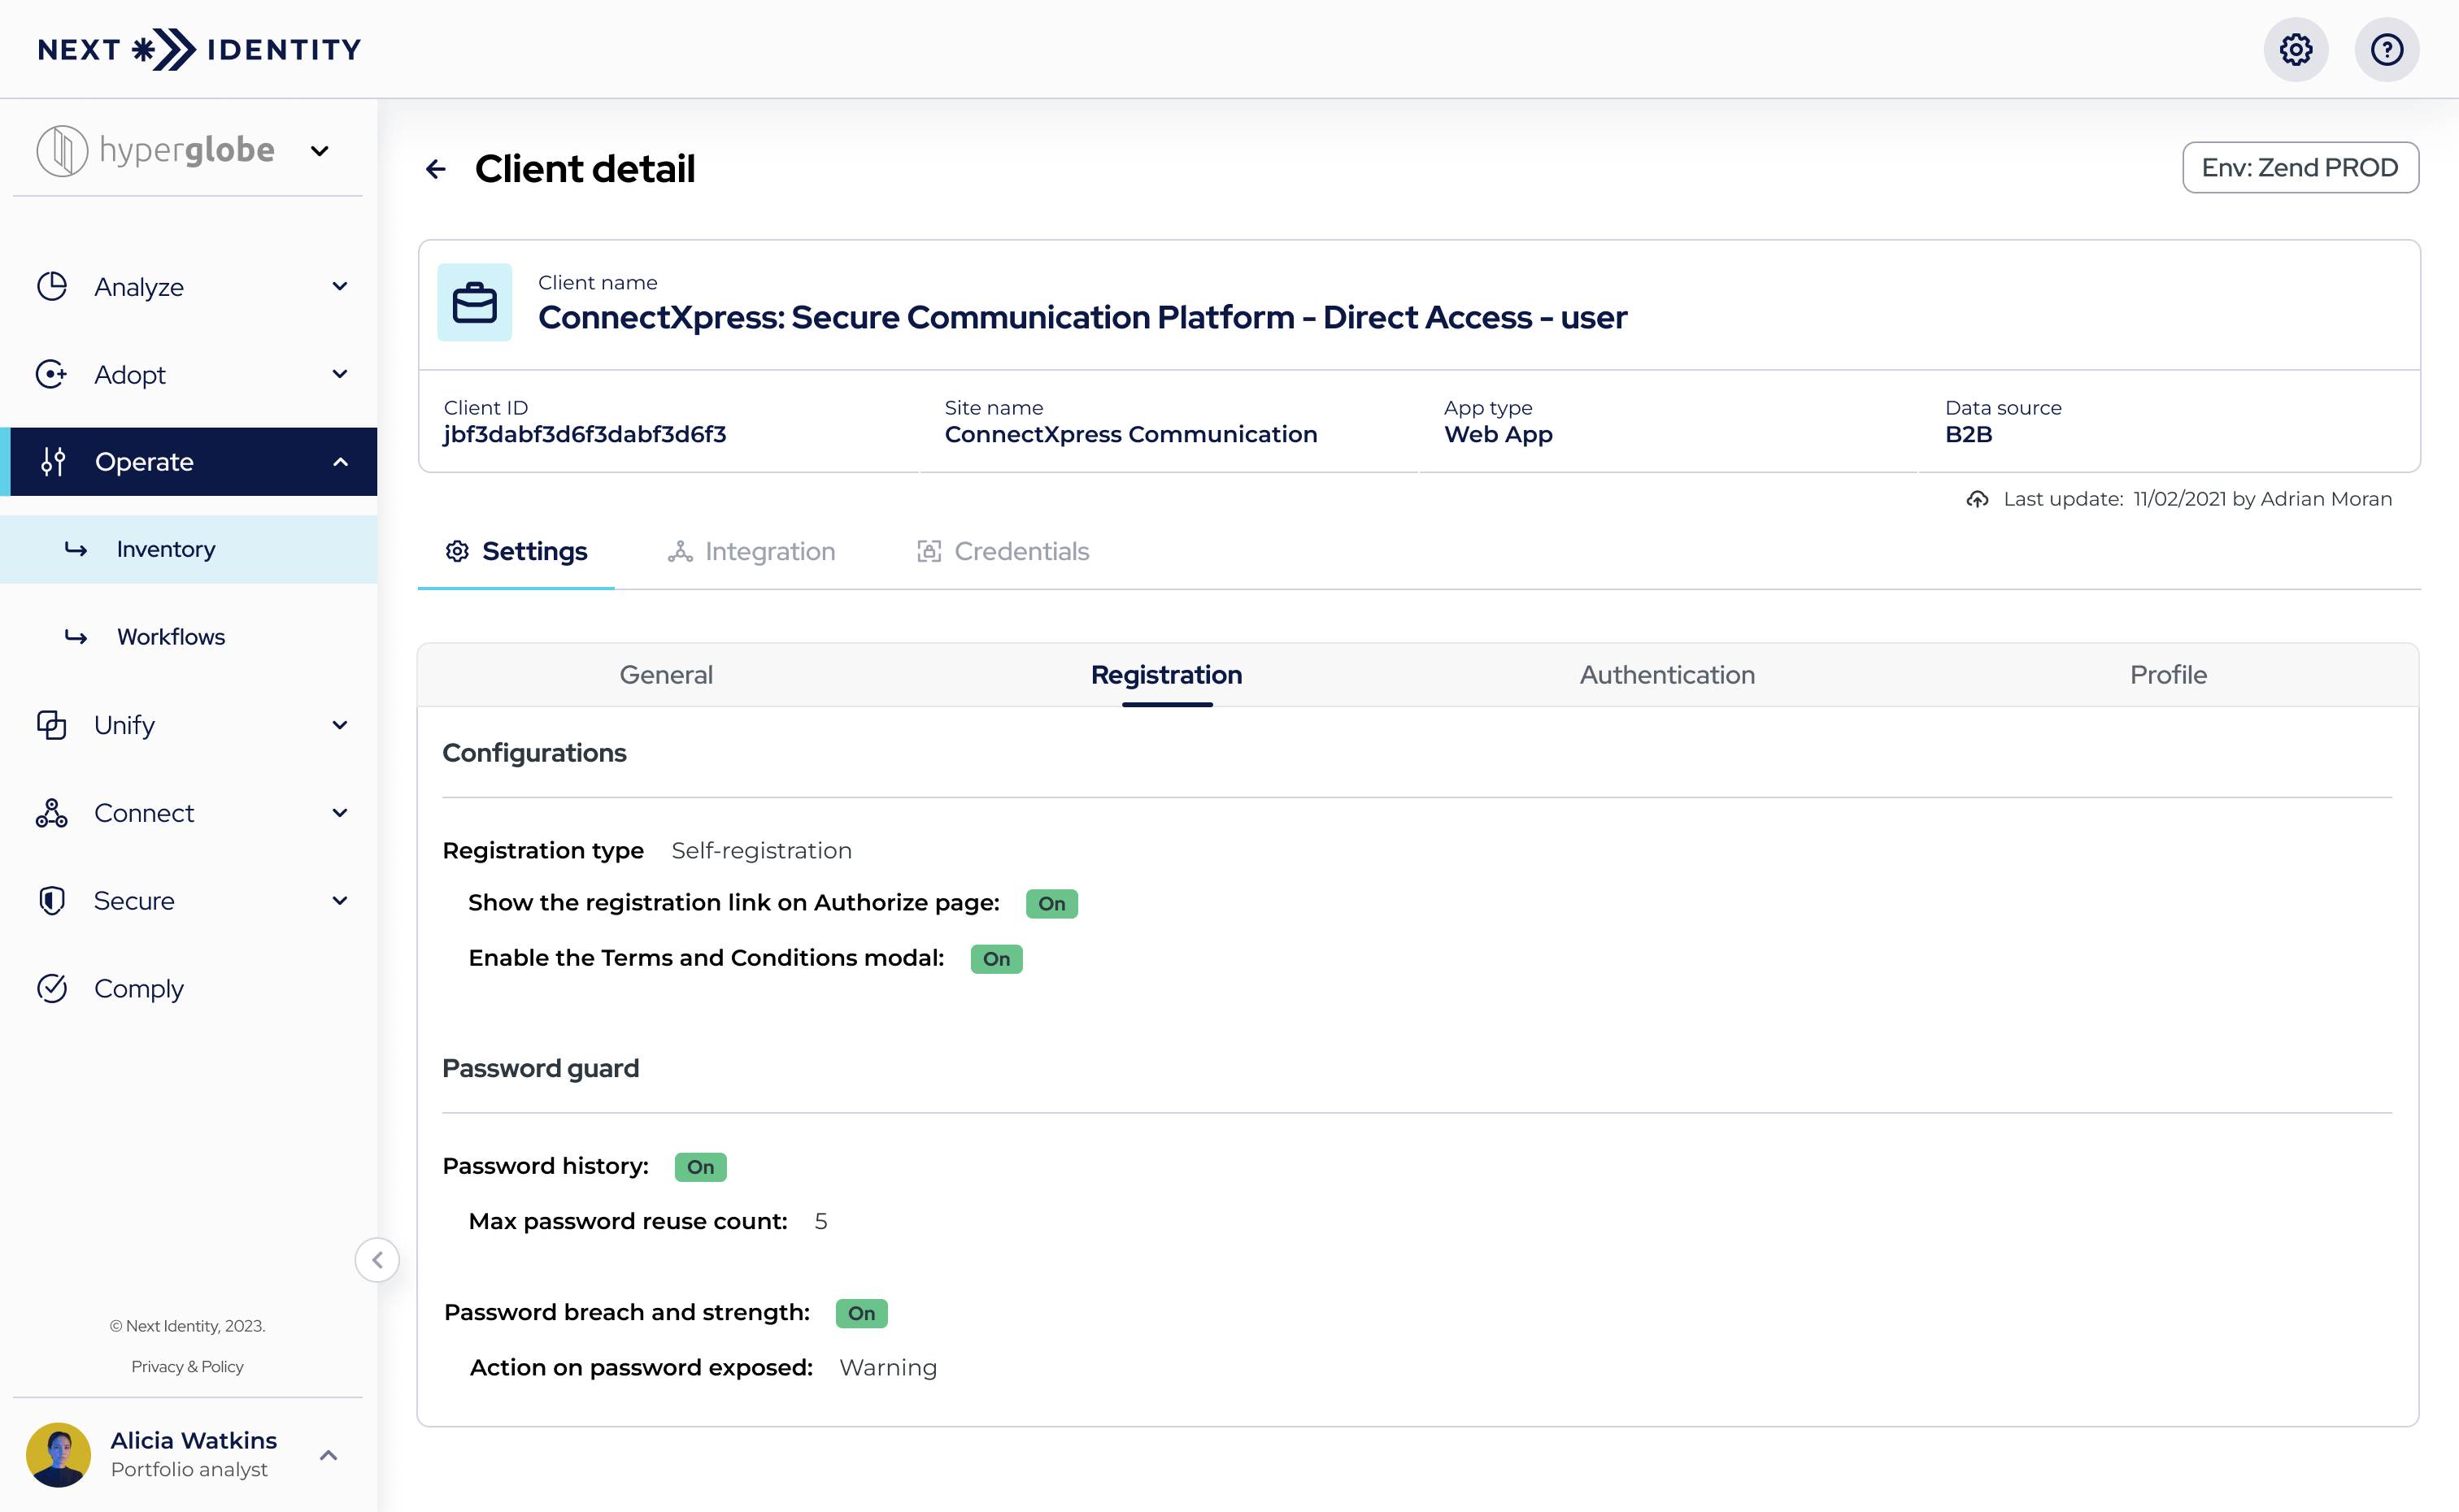
Client Details Page
Customizing Client Metadata
- To update client metadata, such as Site Name, click on the edit button (pencil icon) on the screen's top right corner. This will take you to a form where you can make the necessary changes to the client metadata.

Client Details Card with Client Metadata
Customizing Client Settings
- To update settings for specific flows like Authentication or Registration, follow these steps:
- Select on the Settings tab.
- Find the specific setting you want to configure. Remember that the settings are organized in multiple tabs according to their category.
- Select the setting you want to configure and select the edit button (pencil icon) to configure the setting.
- Each setting has its particular rules for getting updated. Follow the steps in the window that will open.
- Make the necessary changes as per your requirements.

Edit Allow URI List Screen - Step 1

Edit App Link Screen - Step 1
Previewing and Saving Changes
- Before finalizing your changes, you will have the option to preview them to ensure everything is as you want it to be. You will also have the option to add a comment for auditing purposes.
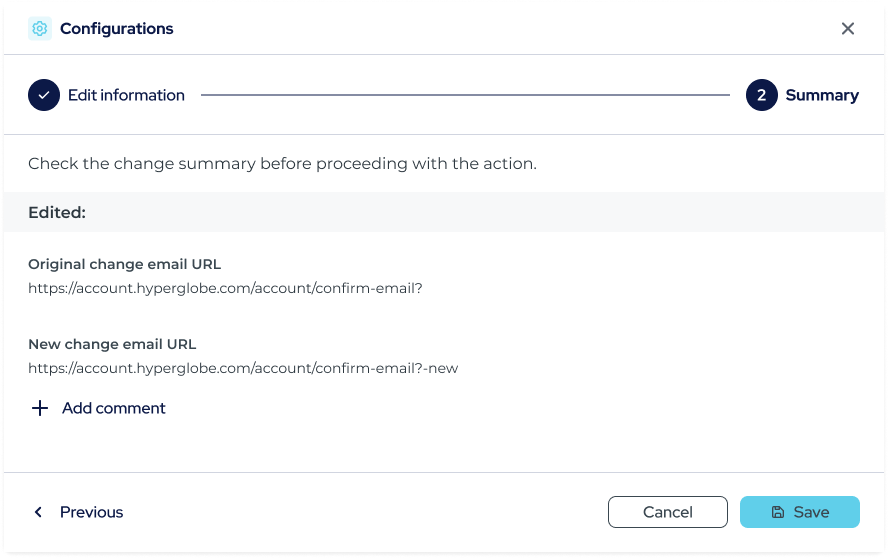
Preview Changes
- Once satisfied, click the Save button. A confirmation message will notify you that your changes have been successfully saved.
Following these steps, you can easily configure the settings in Next Identity to meet your specific needs.
Need assistance?If you need assistance with any of the settings that require a Next Identity consultant, please don't hesitate to contact us.
Roles & Permissions
In the Service Management View, user roles and permissions determine access to these customization features. Ensure that you have the appropriate permissions to customize client settings. For more advanced configurations or settings that are not self-configurable, please consult with your Next Identity consultant.
Self-Service Client Configurations
Here are the available configurations in the Client Details of the Inventory feature that can be customized for your application via Service Management view.
Client Metadata
| Data | Description | Type |
|---|---|---|
| Client name | The name of the client (application). This is an identifier for the application within the system, used for identification and display purposes. | Not self-configurable |
| Client ID | The unique identifier for the client (application) within the system. It is used in API calls and transactions to identify the application securely. | Not self-configurable |
| Site name | Used in email templates to specify the name of the site where the email was triggered. It is also utilized to define the title of HTML pages, enhancing brand visibility and recognition. | 🟢 Self-configurable |
| Data source | The origin or database from which the client (application) retrieves its data. | Not self-configurable |
General Sub-Tab
Allow redirect URI list section
This is a list of complete URLs approved for secure navigation and authorization redirects.
| Setting | Description | Type |
|---|---|---|
| URI 1 to n | Approved URL 1 to n for secure navigation and authorization redirects. Example: If you want to add three URIs, you would have URI 1, URI 2, and URI 3. | 🟢 Self-configurable |
Registration Sub-Tab
Configurations section
Setting | Description | Type |
|---|---|---|
Registration type | Determines the user registration method: | Not self-configurable |
└ App link | This setting can only enabled, and it is only visible if the registration type is | 🟢 Self-configurable |
Account verification method | Determines the method through which users verify their account post-registration, offering tailored options based on your application's setup: • Link: This option sends a direct link for account verification via email. It is applicable when the Magic Link is enabled for email authentication or during Hosted Journey configurations when the authentication method is email or SMS (only if the Registration Type is Invitation). This streamlined approach allows users to activate their accounts effortlessly through a click. • Verification Code: This method sends a verification code, rather than a direct link, and is used when the Magic Link is disabled or for Hosted Journey configurations that use SMS without requiring an invitation for registration. Users will receive a code via SMS, which they must enter to verify their account, adding an extra layer of security to the verification process. | Not self-configurable |
└ Base URL | This is the foundational URL needed for constructing the account verification link sent to users. It plays a crucial role in guiding users to the correct page for completing their account verification. Visibility and editability of this setting depend on the authentication method; it is necessary to configure when the authentication method involves email or SMS (with an invitation registration type), and it is mandatory to be filled in when Magic Link is active. | 🟢 Self-configurable |
Authentication Sub-Tab
Password reset section
Setting | Description | Type |
|---|---|---|
Password reset method | Defines how users can reset their passwords, with options varying based on the authentication method and Magic Link settings: • Link: Users receive an email or SMS with a link to reset their password. This method is activated when Magic Link is enabled or when the authentication method is email. It offers a user-friendly way to securely reset passwords without entering complex codes. • Verification Code: Users receive a verification code via SMS to proceed with the password reset. This method is used when the authentication method is mobile, and Magic Link is off, providing an additional security measure by verifying the user's access to the mobile number associated with their account. | Not self-configurable |
└ Base URL | The base URL for the password reset process. This setting is crucial for creating the link or directing users to the appropriate page for password reset. It must be configured correctly to ensure a seamless and secure password reset experience. This URL is editable when the authentication method is email or when Magic Link is active, ensuring flexibility and security in managing password resets. | 🟢 Self-configurable |
Profile Sub-Tab
Configurations section
Setting | Description | Type |
|---|---|---|
Change email confirmation method | Specifies the method by which users can change their registered email, with options depending on Magic Link settings and the chosen authentication method: • Link: Sends a direct link to the user's current email or mobile number to confirm the email change. This method is applicable when Magic Link is enabled, providing a straightforward way for users to update their email addresses. • Verification Code: Sends a verification code to the user's current email for manual entry during the email change process. This method is used when Magic Link is disabled or in Hosted Journeys, adding an extra layer of verification to ensure the security of the email change process. | Not self-configurable |
└ Base URL | The base URL required for the email change confirmation process. This URL is critical in directing users to the correct page to confirm their new email address. It is available and editable only when Magic Link is active, ensuring users are seamlessly guided through the email change process with minimal hassle. | 🟢 Self-configurable |
Get in TouchIf you need assistance with any of the settings that require a Next Identity consultant, please don't hesitate to get in touch with us.
Updated 9 months ago