
Inventory
Manage all your properties and clients from a single interface
Next Identity Operate enables service administrators to manage an inventory of all properties and clients and provides an overview of properties and the clients as attributes of that property. Each property has a set of environments associated with it, and each environment has a set of metadata (attributes). The property/environment inherits those attributes.
The Inventory feature is exclusive to the Service Management View, where users have access to a broad scope of properties and clients. However, in the Application Management View, users have a reduced scope, seeing only the specific properties and clients they manage.
Application Management ViewIf you are looking for more information on managing properties and clients within the Application Management View, please visit the Application Management Guide.
Displaying property details
In Service Management View, the Properties page allows you to display and navigate properties and clients of the selected organization and environments. It gives a quick overview of relevant details. The Actions column also provides easy access to each property's Analyze, View, and Edit screens.
To display property details, follow these steps:
- Select Operate > Inventory from the sidebar to access the Properties List.
- To view clients under a specific property, click the arrow-down icon on the left side of the property name.
- To view a client's details, click the View icon in the Actions column.
- To hide a property's client list, click the arrow-up icon.
- To show all clients under all properties, click the Expand all button. To collapse all client lists, click the Collapse all button.
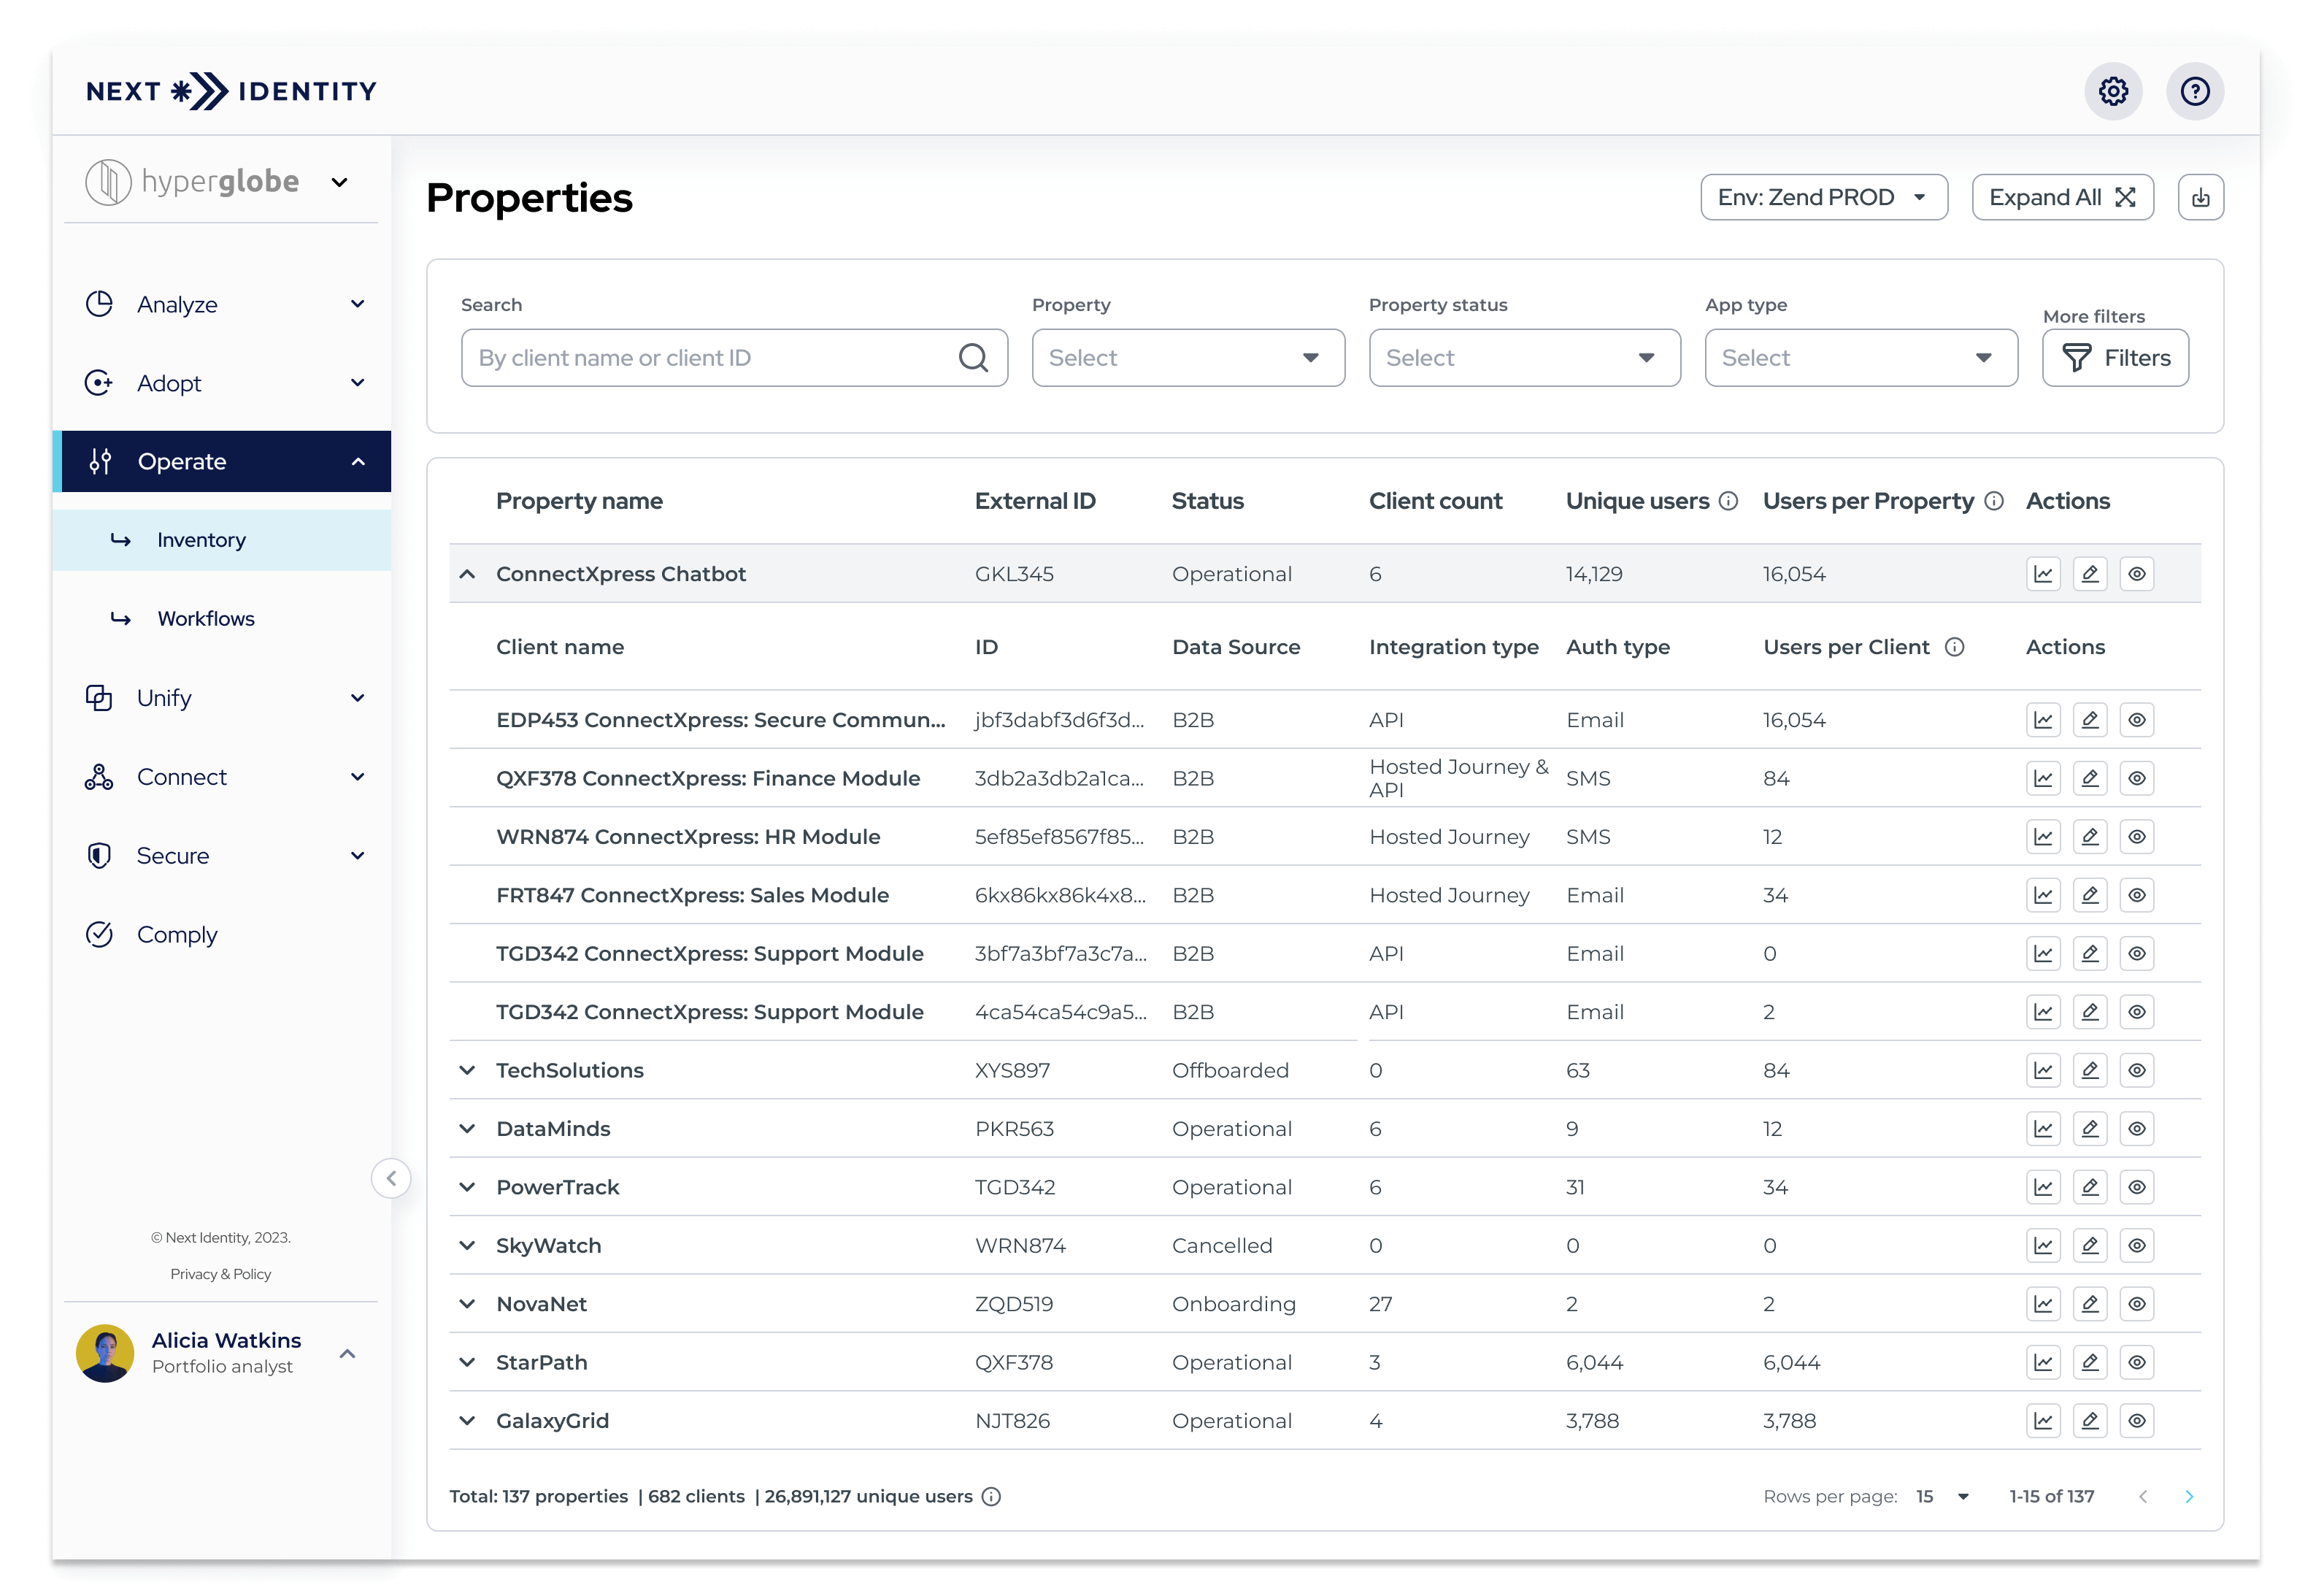
Properties List
Selecting the Number of Rows to Display
You can set the number of rows displayed per list page in the Properties view. Here's how:
- Click on the Rows per page drop-down menu.
- Select the desired number of rows from the available options.
- To navigate to the next or previous page, use the Next page or Previous page arrow accordingly.
Advanced Search
If you need to search or narrow down the results in the properties list, you can utilize the Advanced Search feature. Follow these steps:
- Enter the specific property name, client name, or client ID in the Search field above the properties list and hit Enter to perform the search.
- The properties list will update based on your search criteria.
- For further refinement, you can use advanced filters such as Property Status and 2-step verification displayed on the right side of the box. To access additional filters, click on the More filters button.
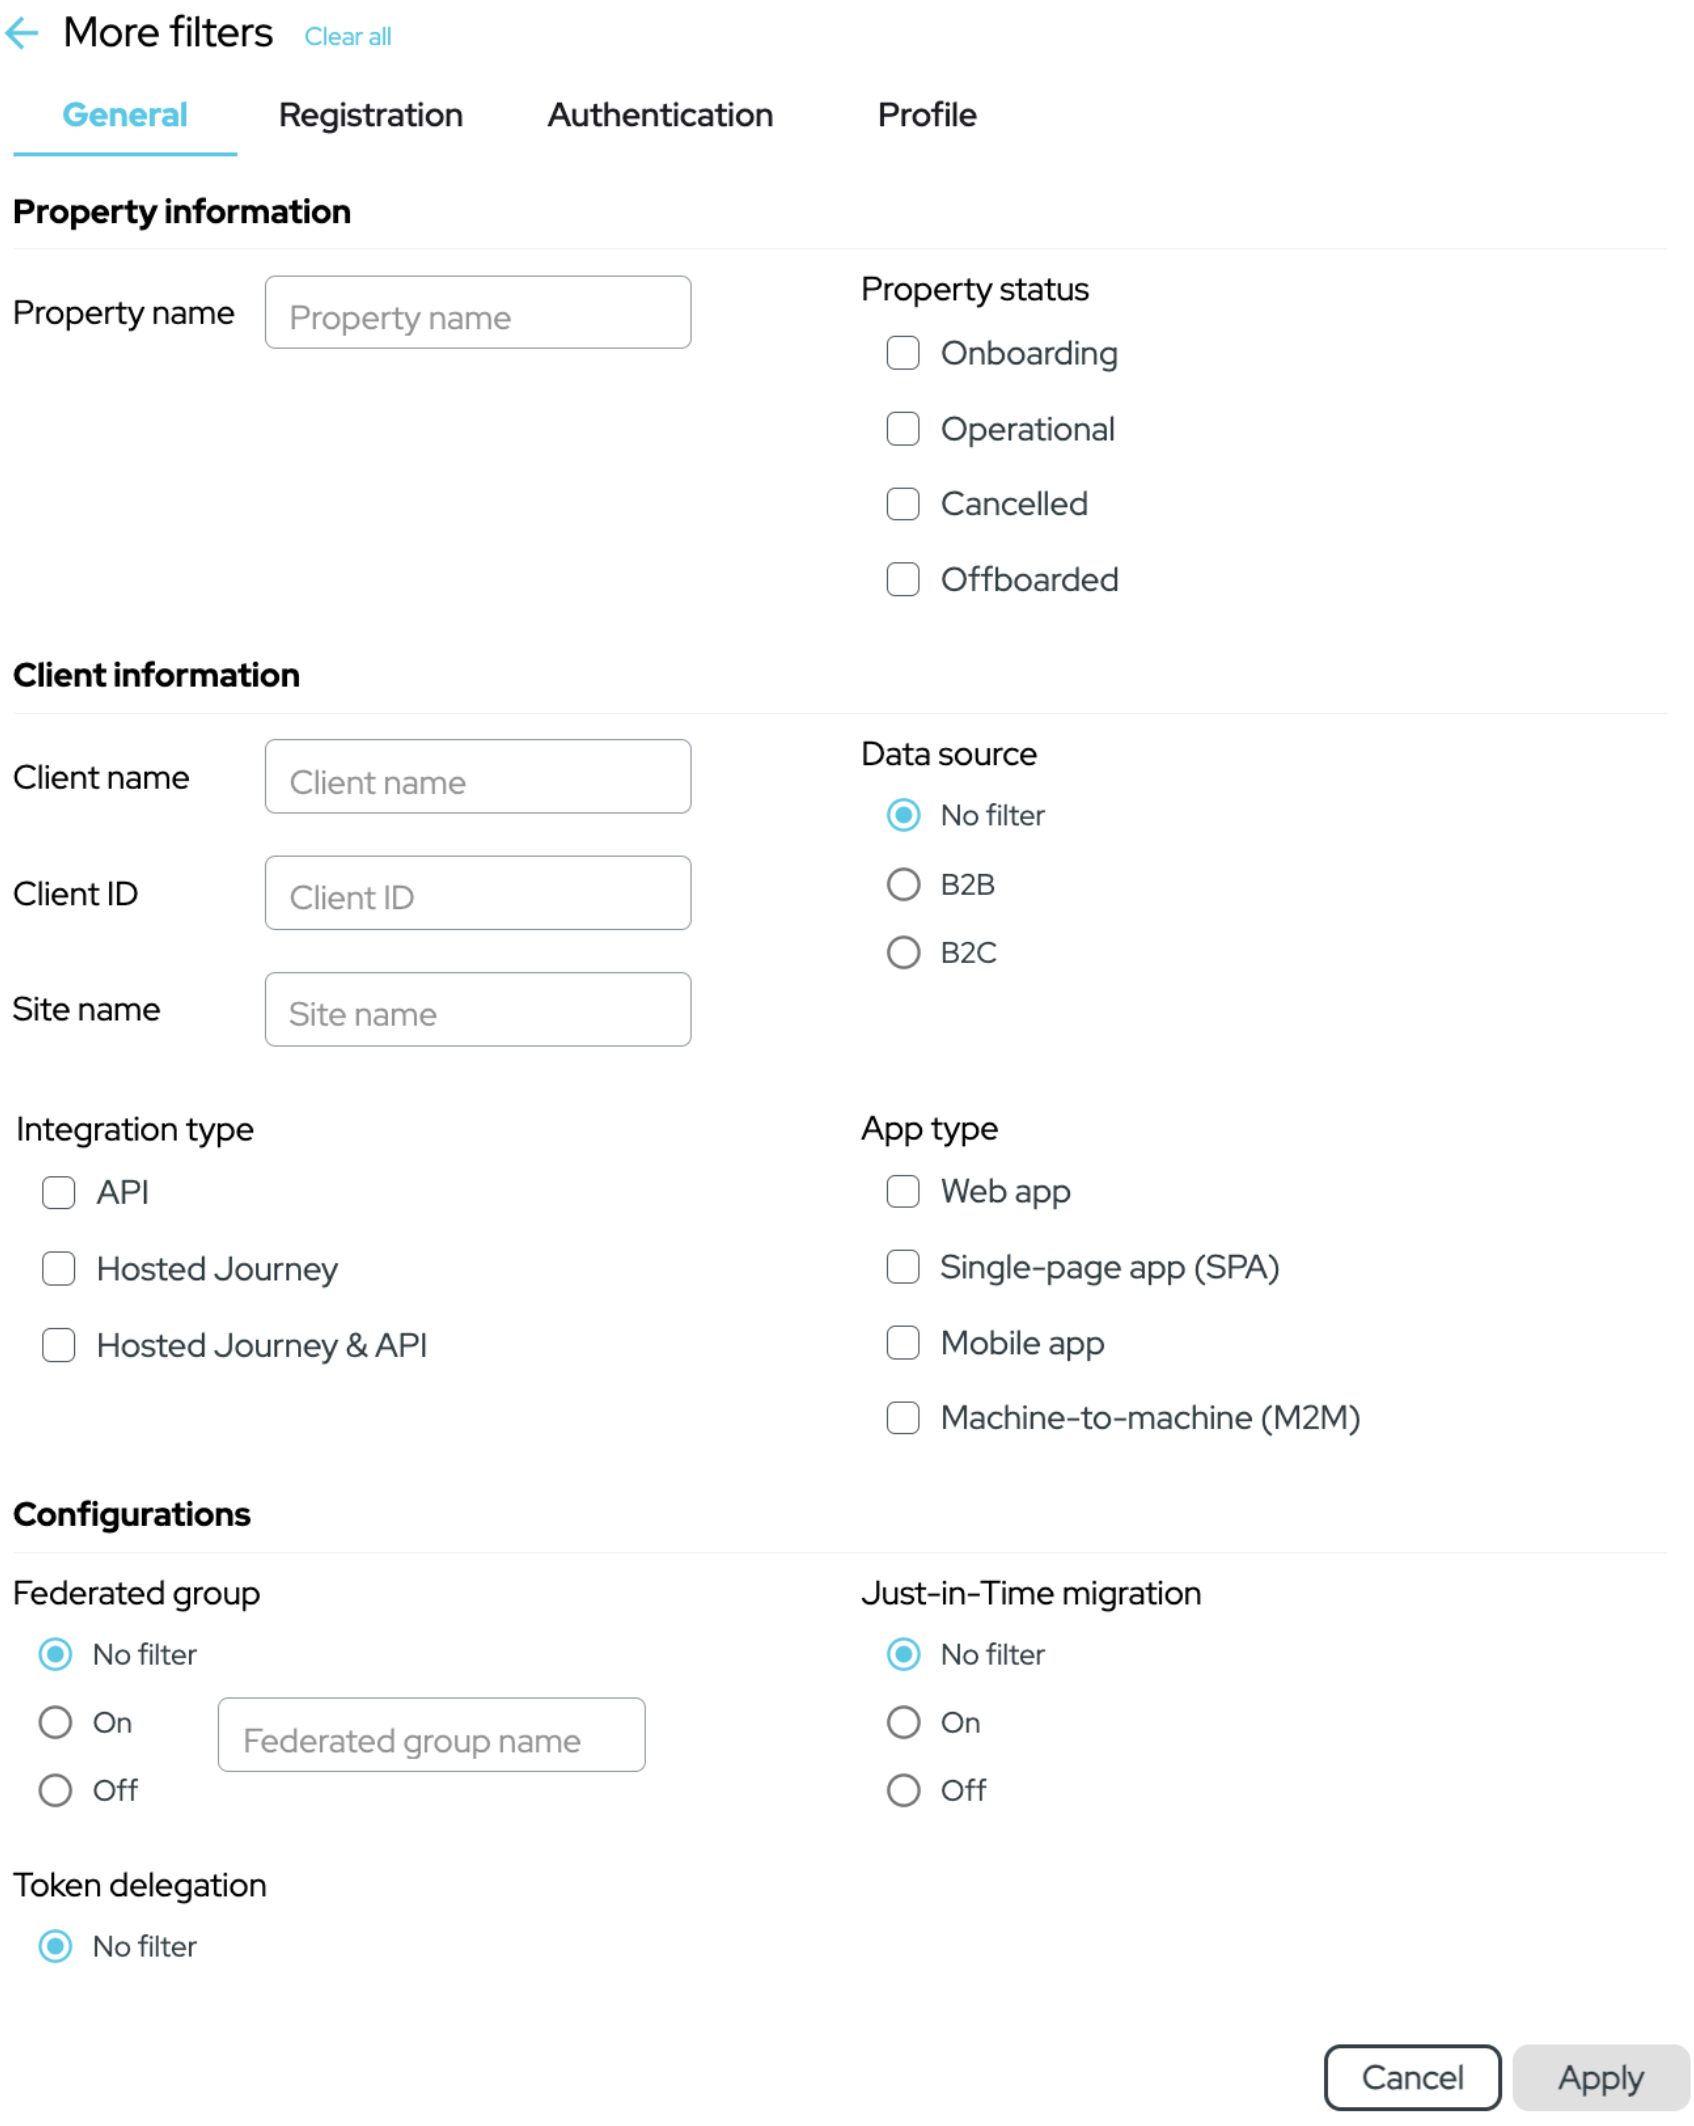
Additional Filters
- To remove applied filters, click on the Clear all button.
Sorting Function
The sorting function in the Properties view allows you to organize the list based on different columns. Here's how to use it:
- Hover your mouse pointer to the right of the column title, such as Property name, Status, or Clients.
- The Sort icon (a little blue arrow) will appear.
- Click the Sort icon to cycle through ascending, descending, and original order listings.
Viewing Property Details
In Service Management View, the Properties Details page provides detailed information about properties, including their description, status, kickoff date, deployment date, creation date, and other relevant properties. You can also access the list of clients associated with each property. Follow these steps to view property details:
- In the Properties page, click on the Analytics button under the Actions column.
- If you want to view the header information of a property, click on the corresponding View button under the Actions column.
- To return to the properties list, click the Back button at the top of the page.
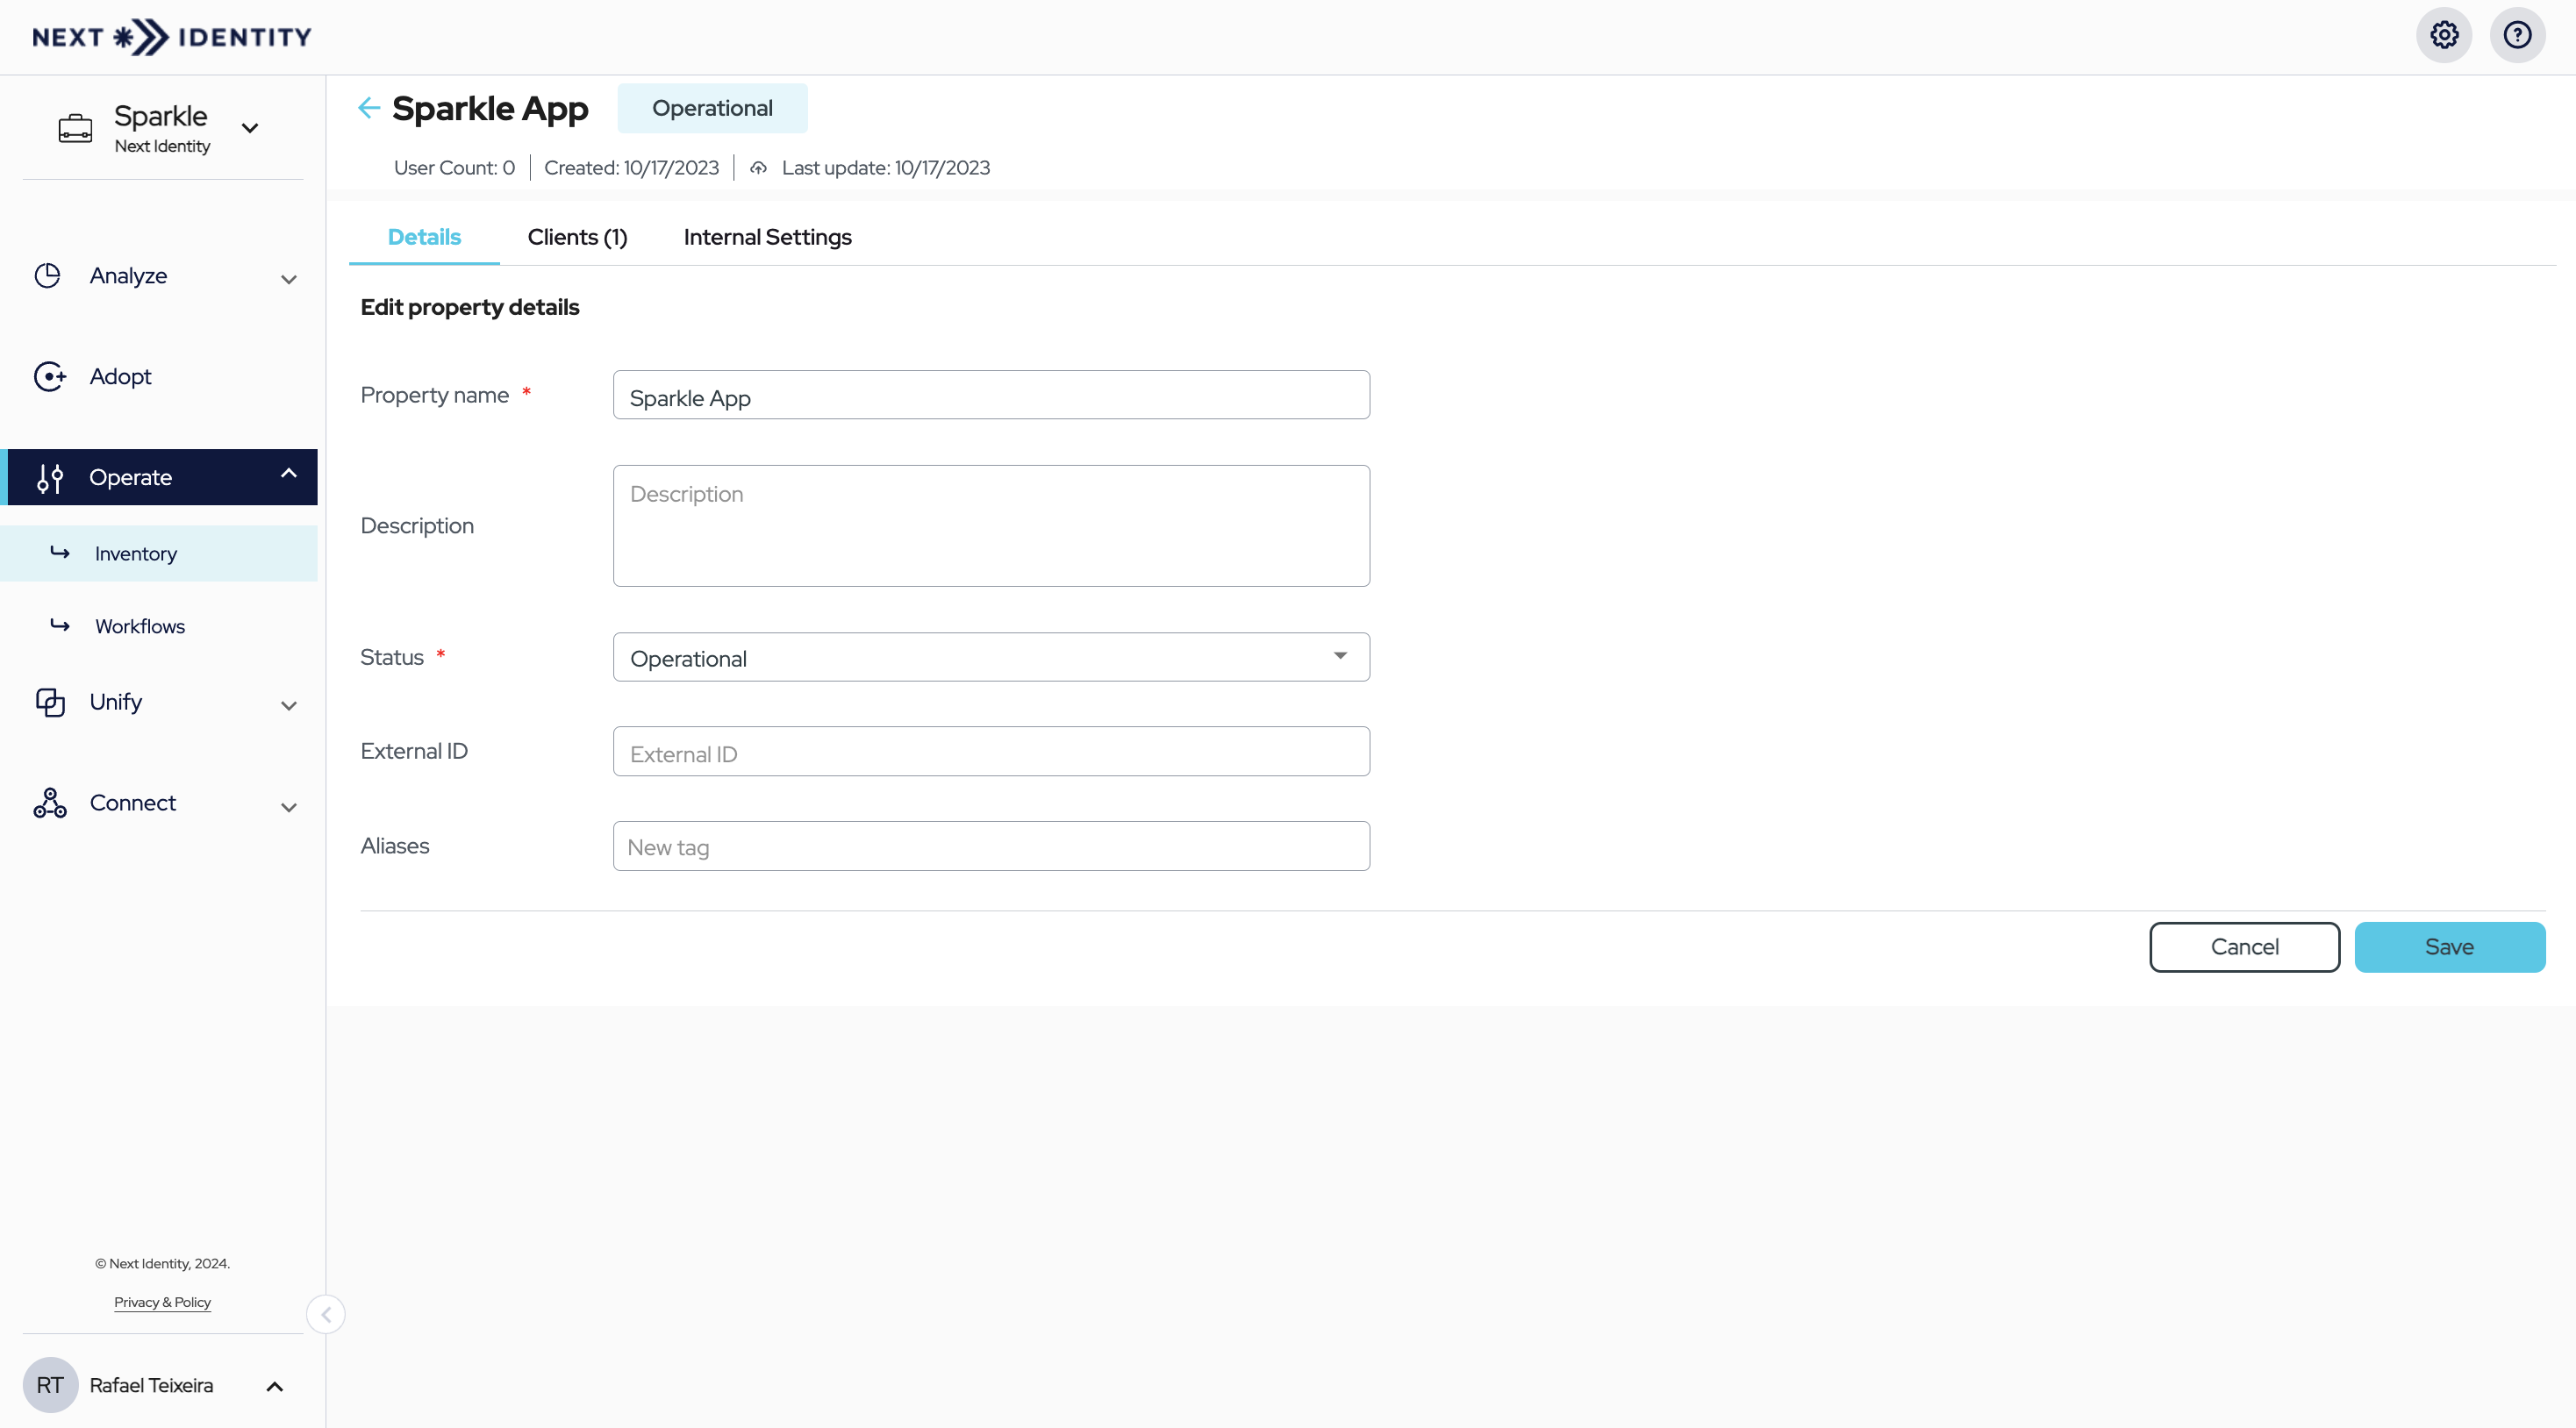
Property Details Page
Following these instructions, you can access the Properties Details page and obtain in-depth insights into each property's details, including associated clients.
Application Management ViewIf you are looking for more information about viewing property details in the Application Management View, check out the Application Management Guide.
Viewing Client Details
In Service Management View, user can find the Client Details screen to understand specific client settings comprehensively. There are two ways to view client details:
- In the Properties list, locate the desired client, click the arrow-down icon to expand the list of clients, and click the desired client to access its Client Details page.

Properties List with Expanded Clients List
- Alternatively, on the Property Details page, navigate to the Clients tab and click the desired client to access its Client Details page.
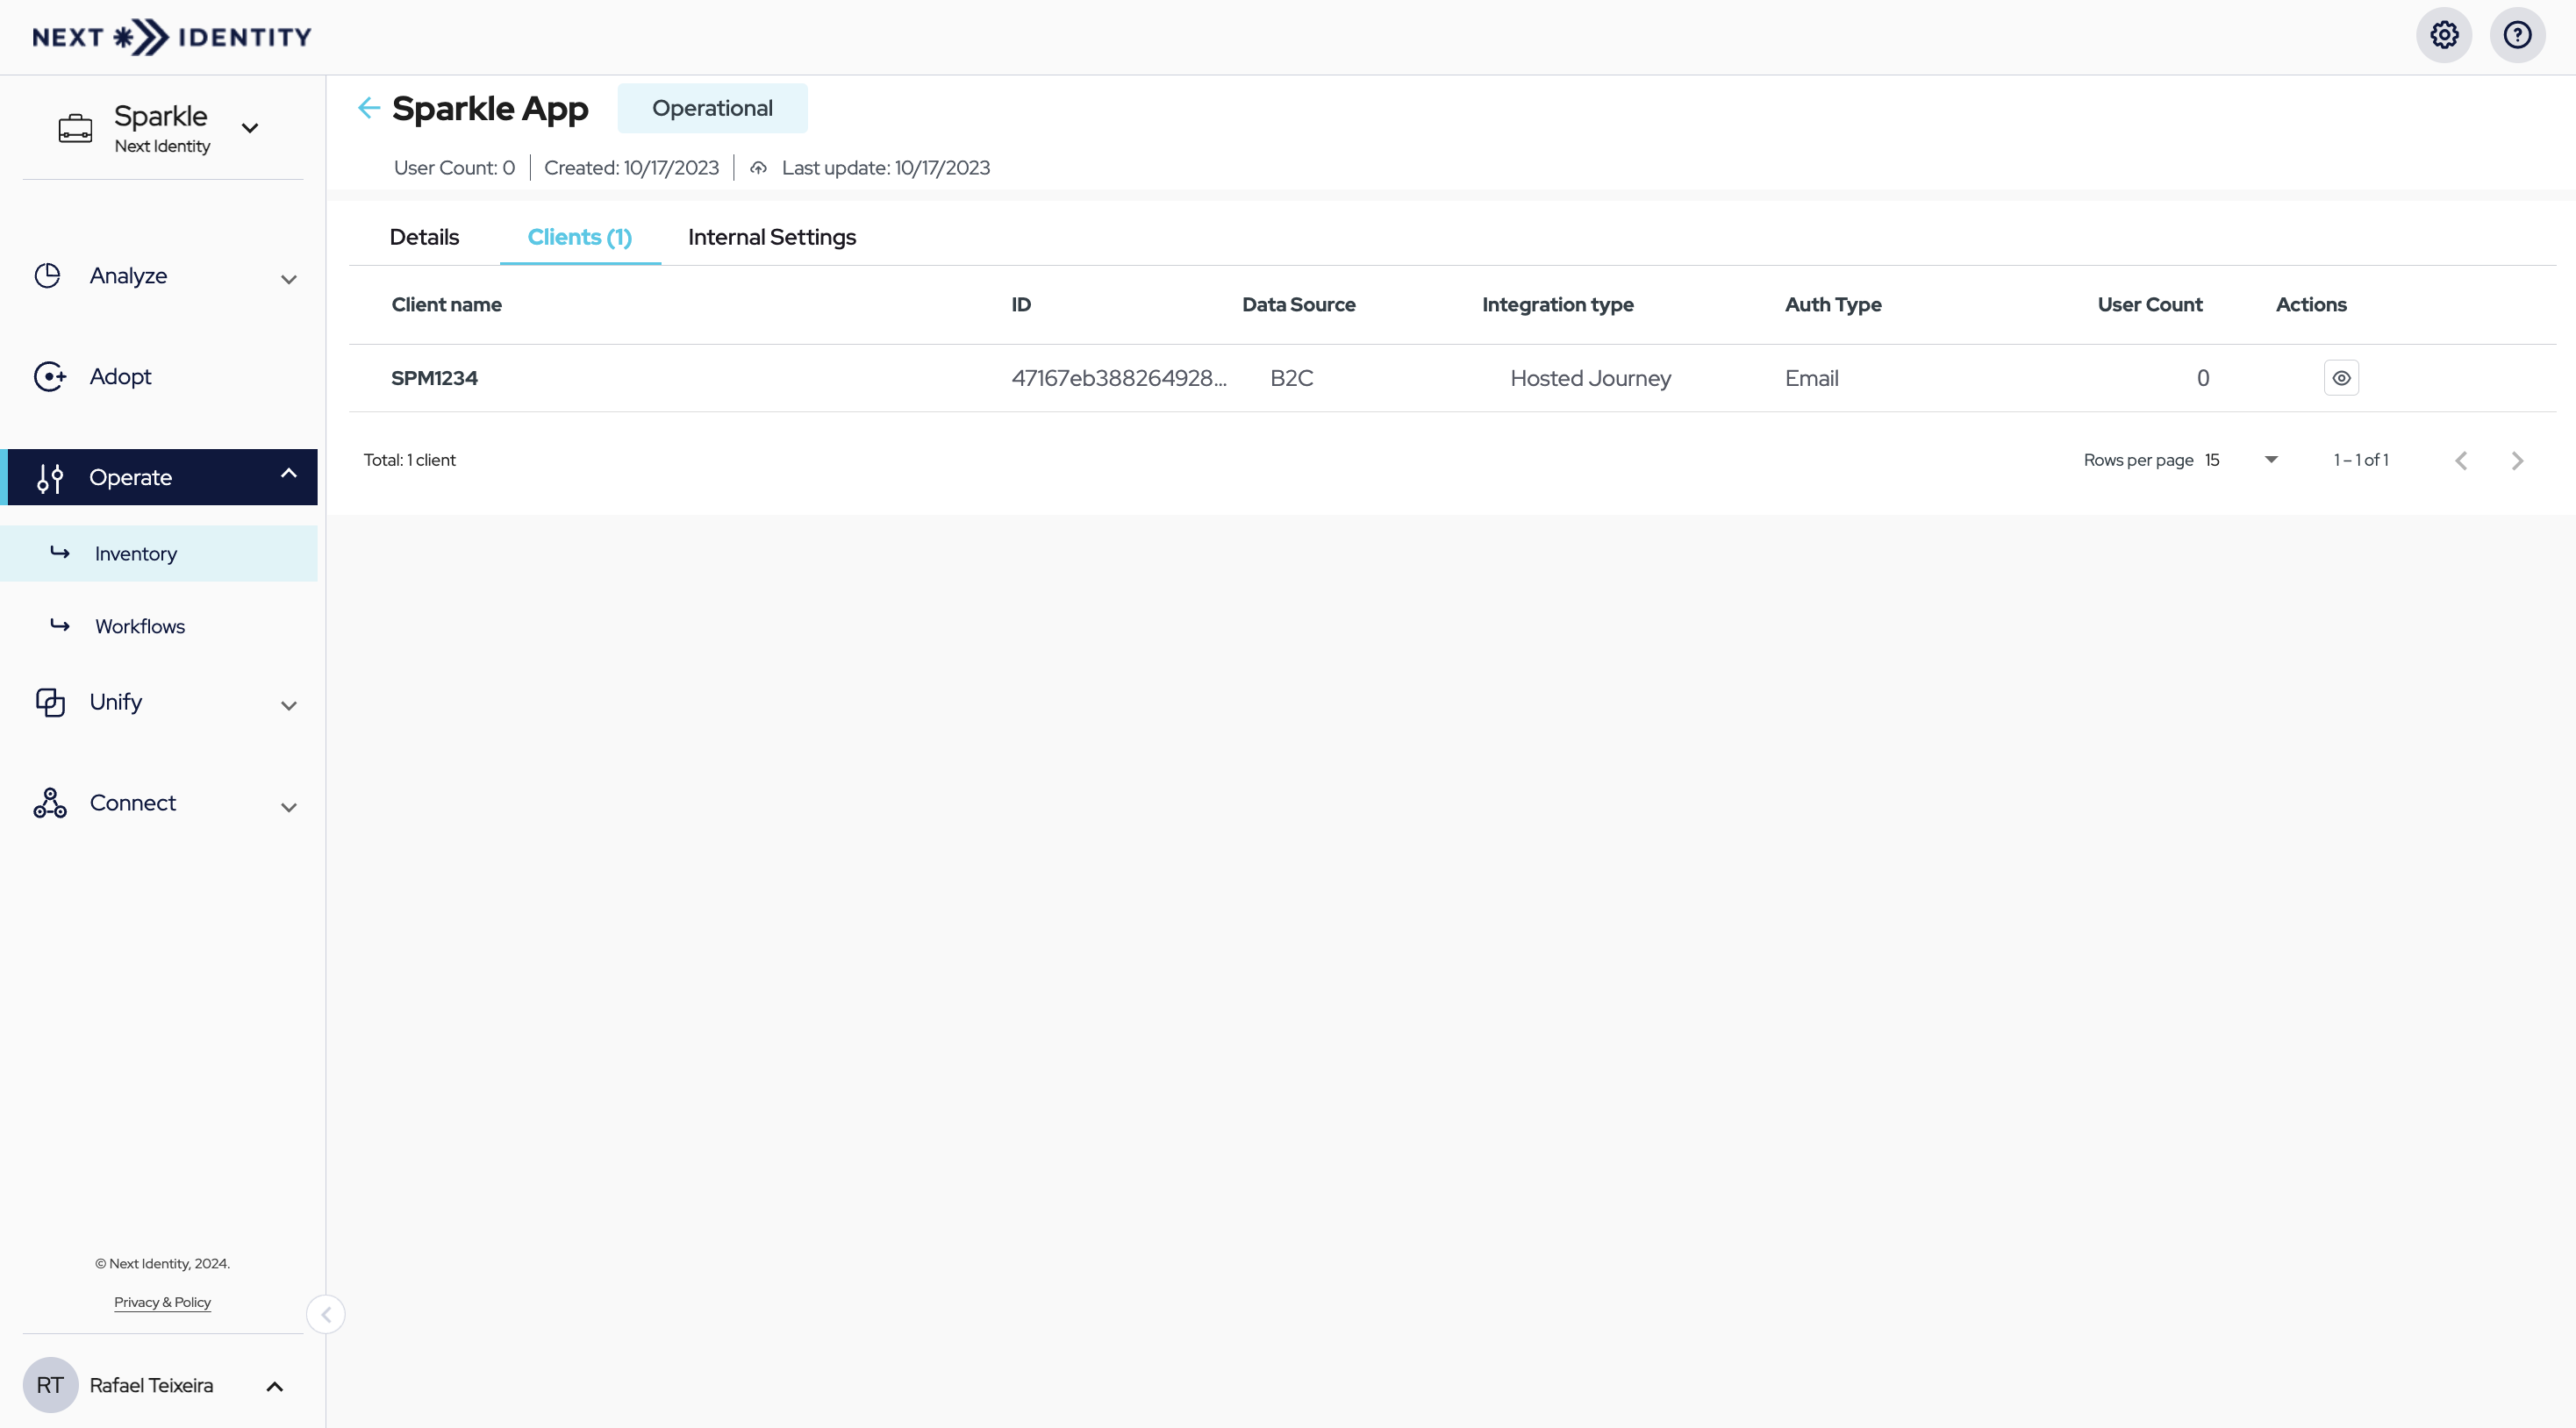
List of Clients on Properties Details Page - Clients Tab
Once you are on the Client Details page, you'll notice the primary tabs: Settings and Integration.
Settings Tab
This default tab opens when you access the Client Details screen. Once you are in the Settings tab, you will find several sub-tabs: General, Registration, Authentication, and Profile. Each sub-tab contains specific content organized by function.
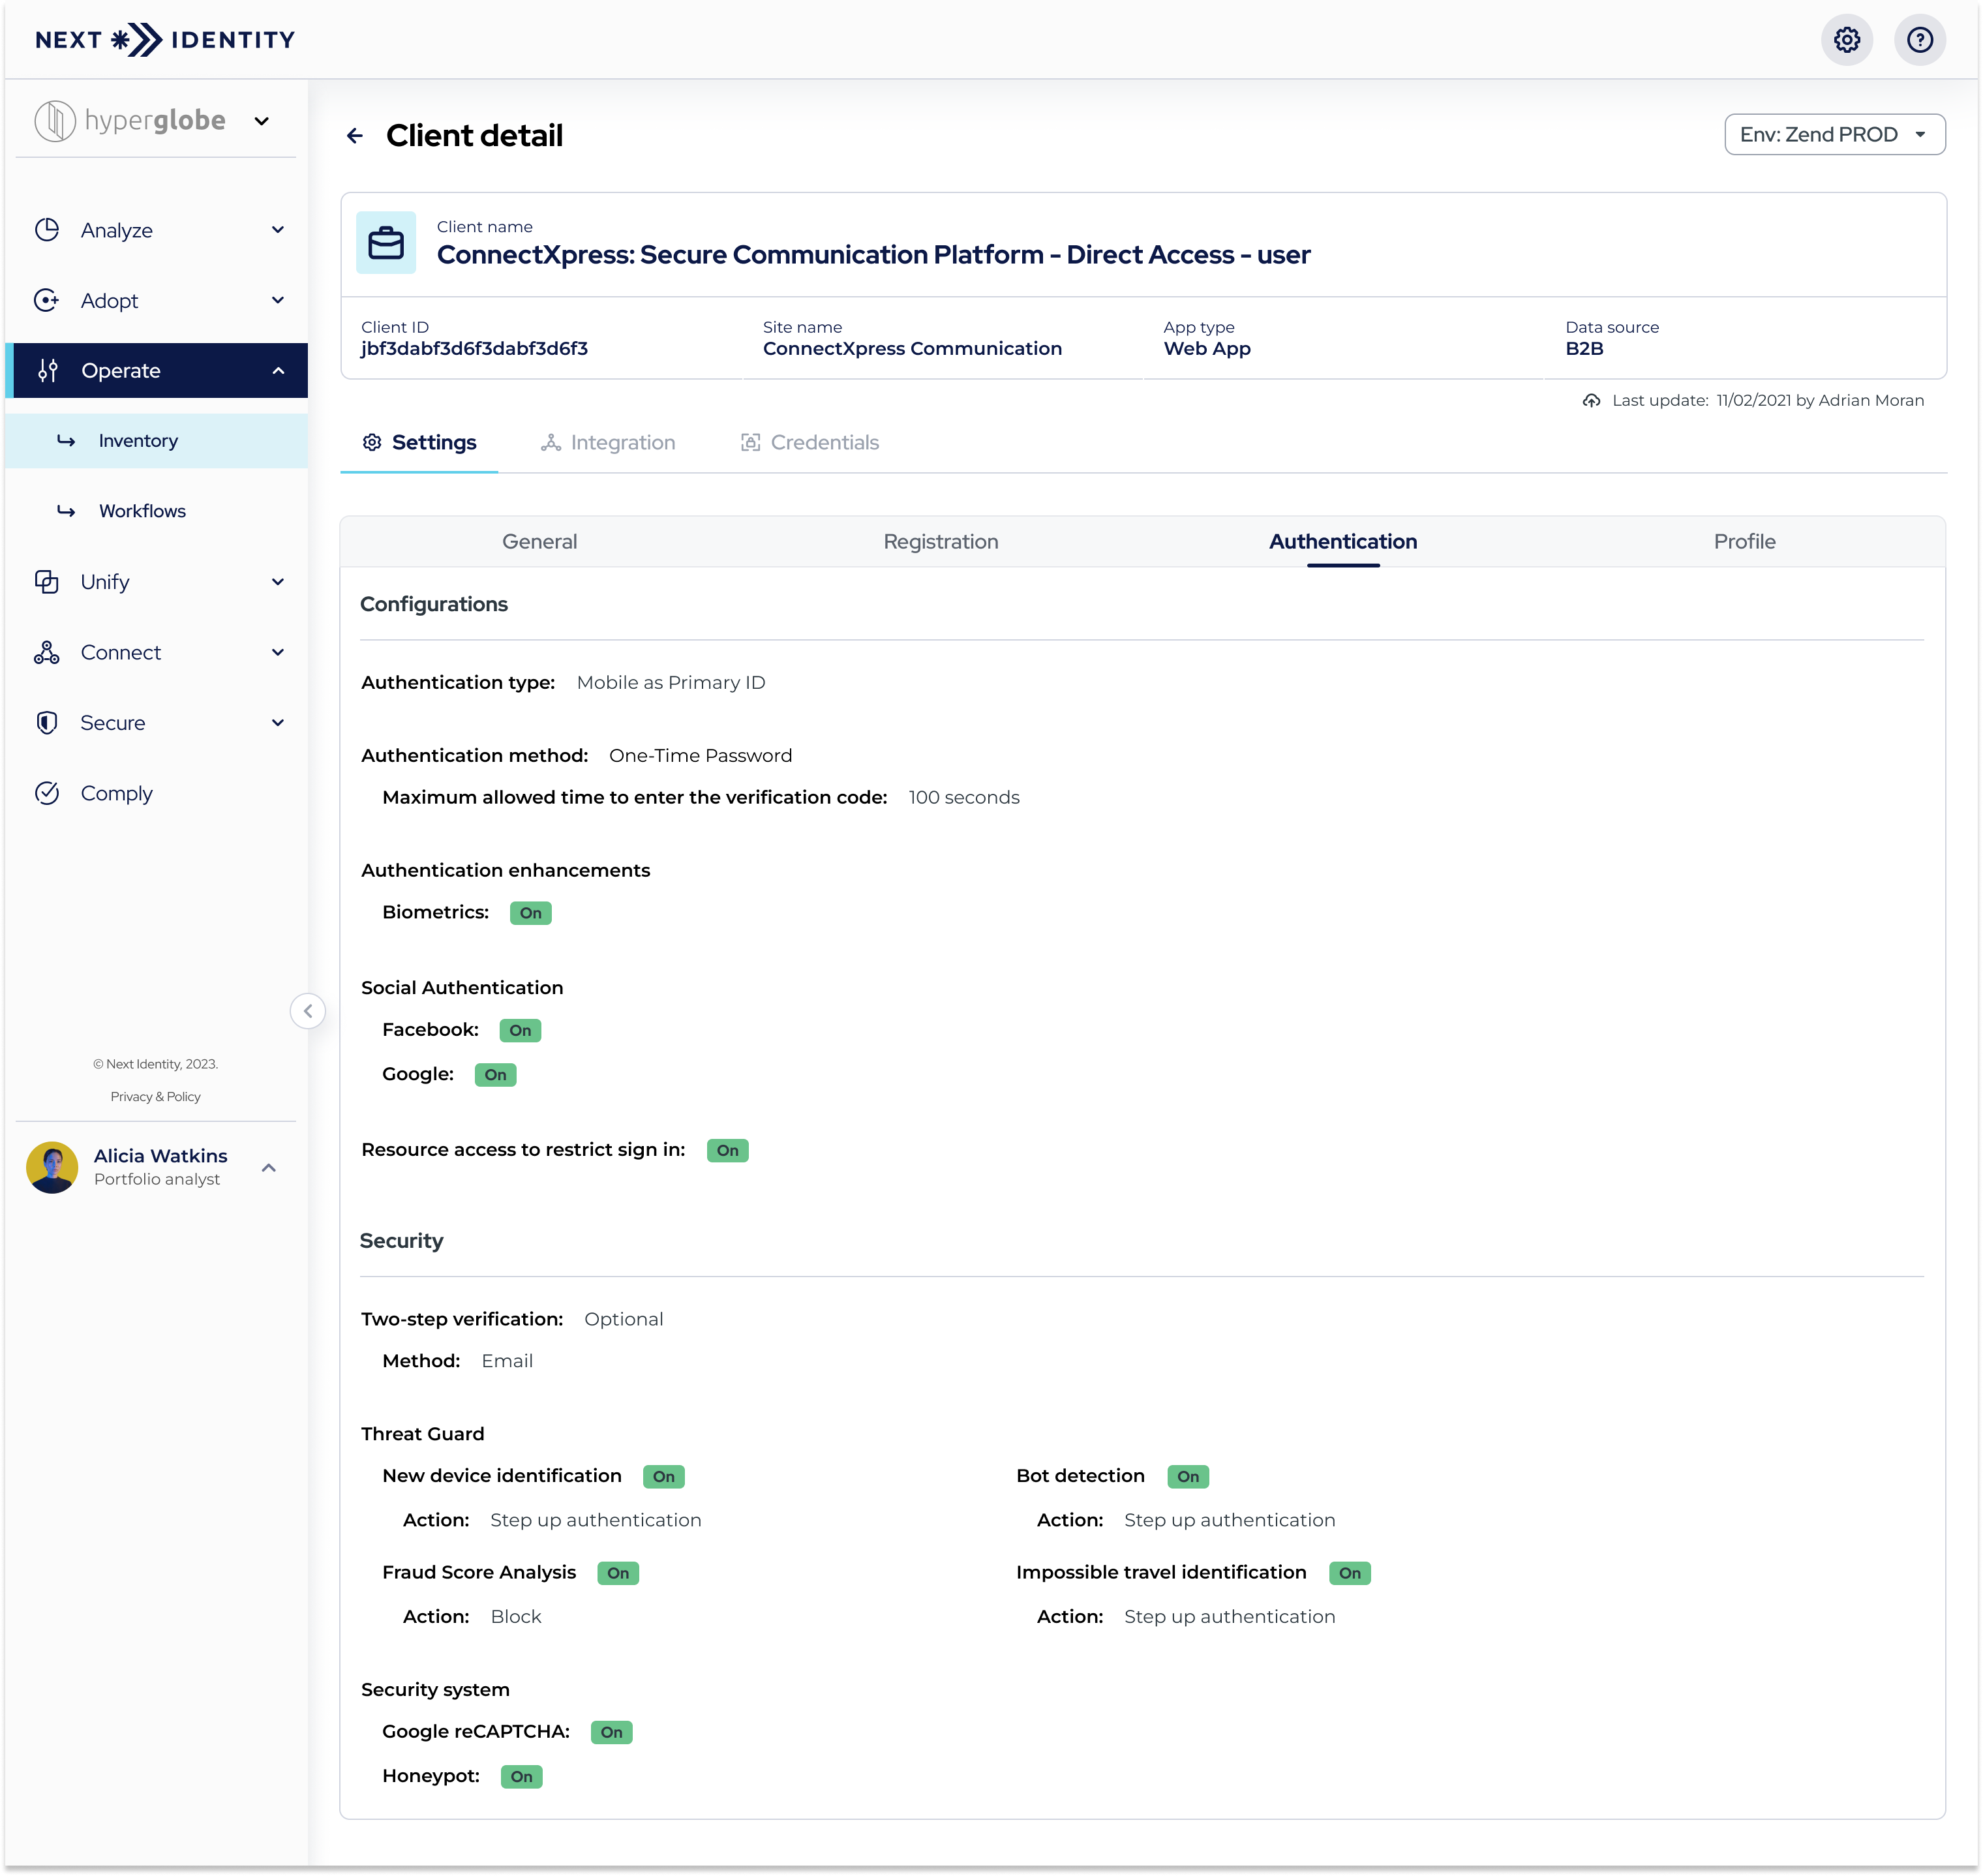
The Settings Tab: Organized into Sub-Tabs for General, Registration, Authentication, and Profile.
- General: Overview of client information, configurations, brand factory details, allowed redirect URI list.
- Registration: Access to configurations and password guard settings (if Auth Method is Password).
- Authentication: Explore configurations and security settings.
- Profile: Relevant profile information about the client.
By following these guidelines, you can efficiently navigate and explore the Client Details page, providing comprehensive insights into each client's configurations, security settings, profile information, and integration details.
Application Management ViewIf you are looking for more information on managing clients within the Application Management View, please visit the Application Management Guide.
Updated 9 months ago