
Workflow Designer
Creating, Editing, and Viewing Workflows with Workflow Designer
The Workflow Designer in Next Identity provides a comprehensive set of features for creating, editing, and viewing workflows. Whether you need to make changes to an existing workflow or explore the details of a workflow configuration, the Workflow Designer has you covered.
Creating a Workflow
To create a new workflow, follow these steps:
- Step 1: Access the Workflow Designer Screen through the Workflow Manager by selecting the "New workflow" button on the Workflows Management Screen.
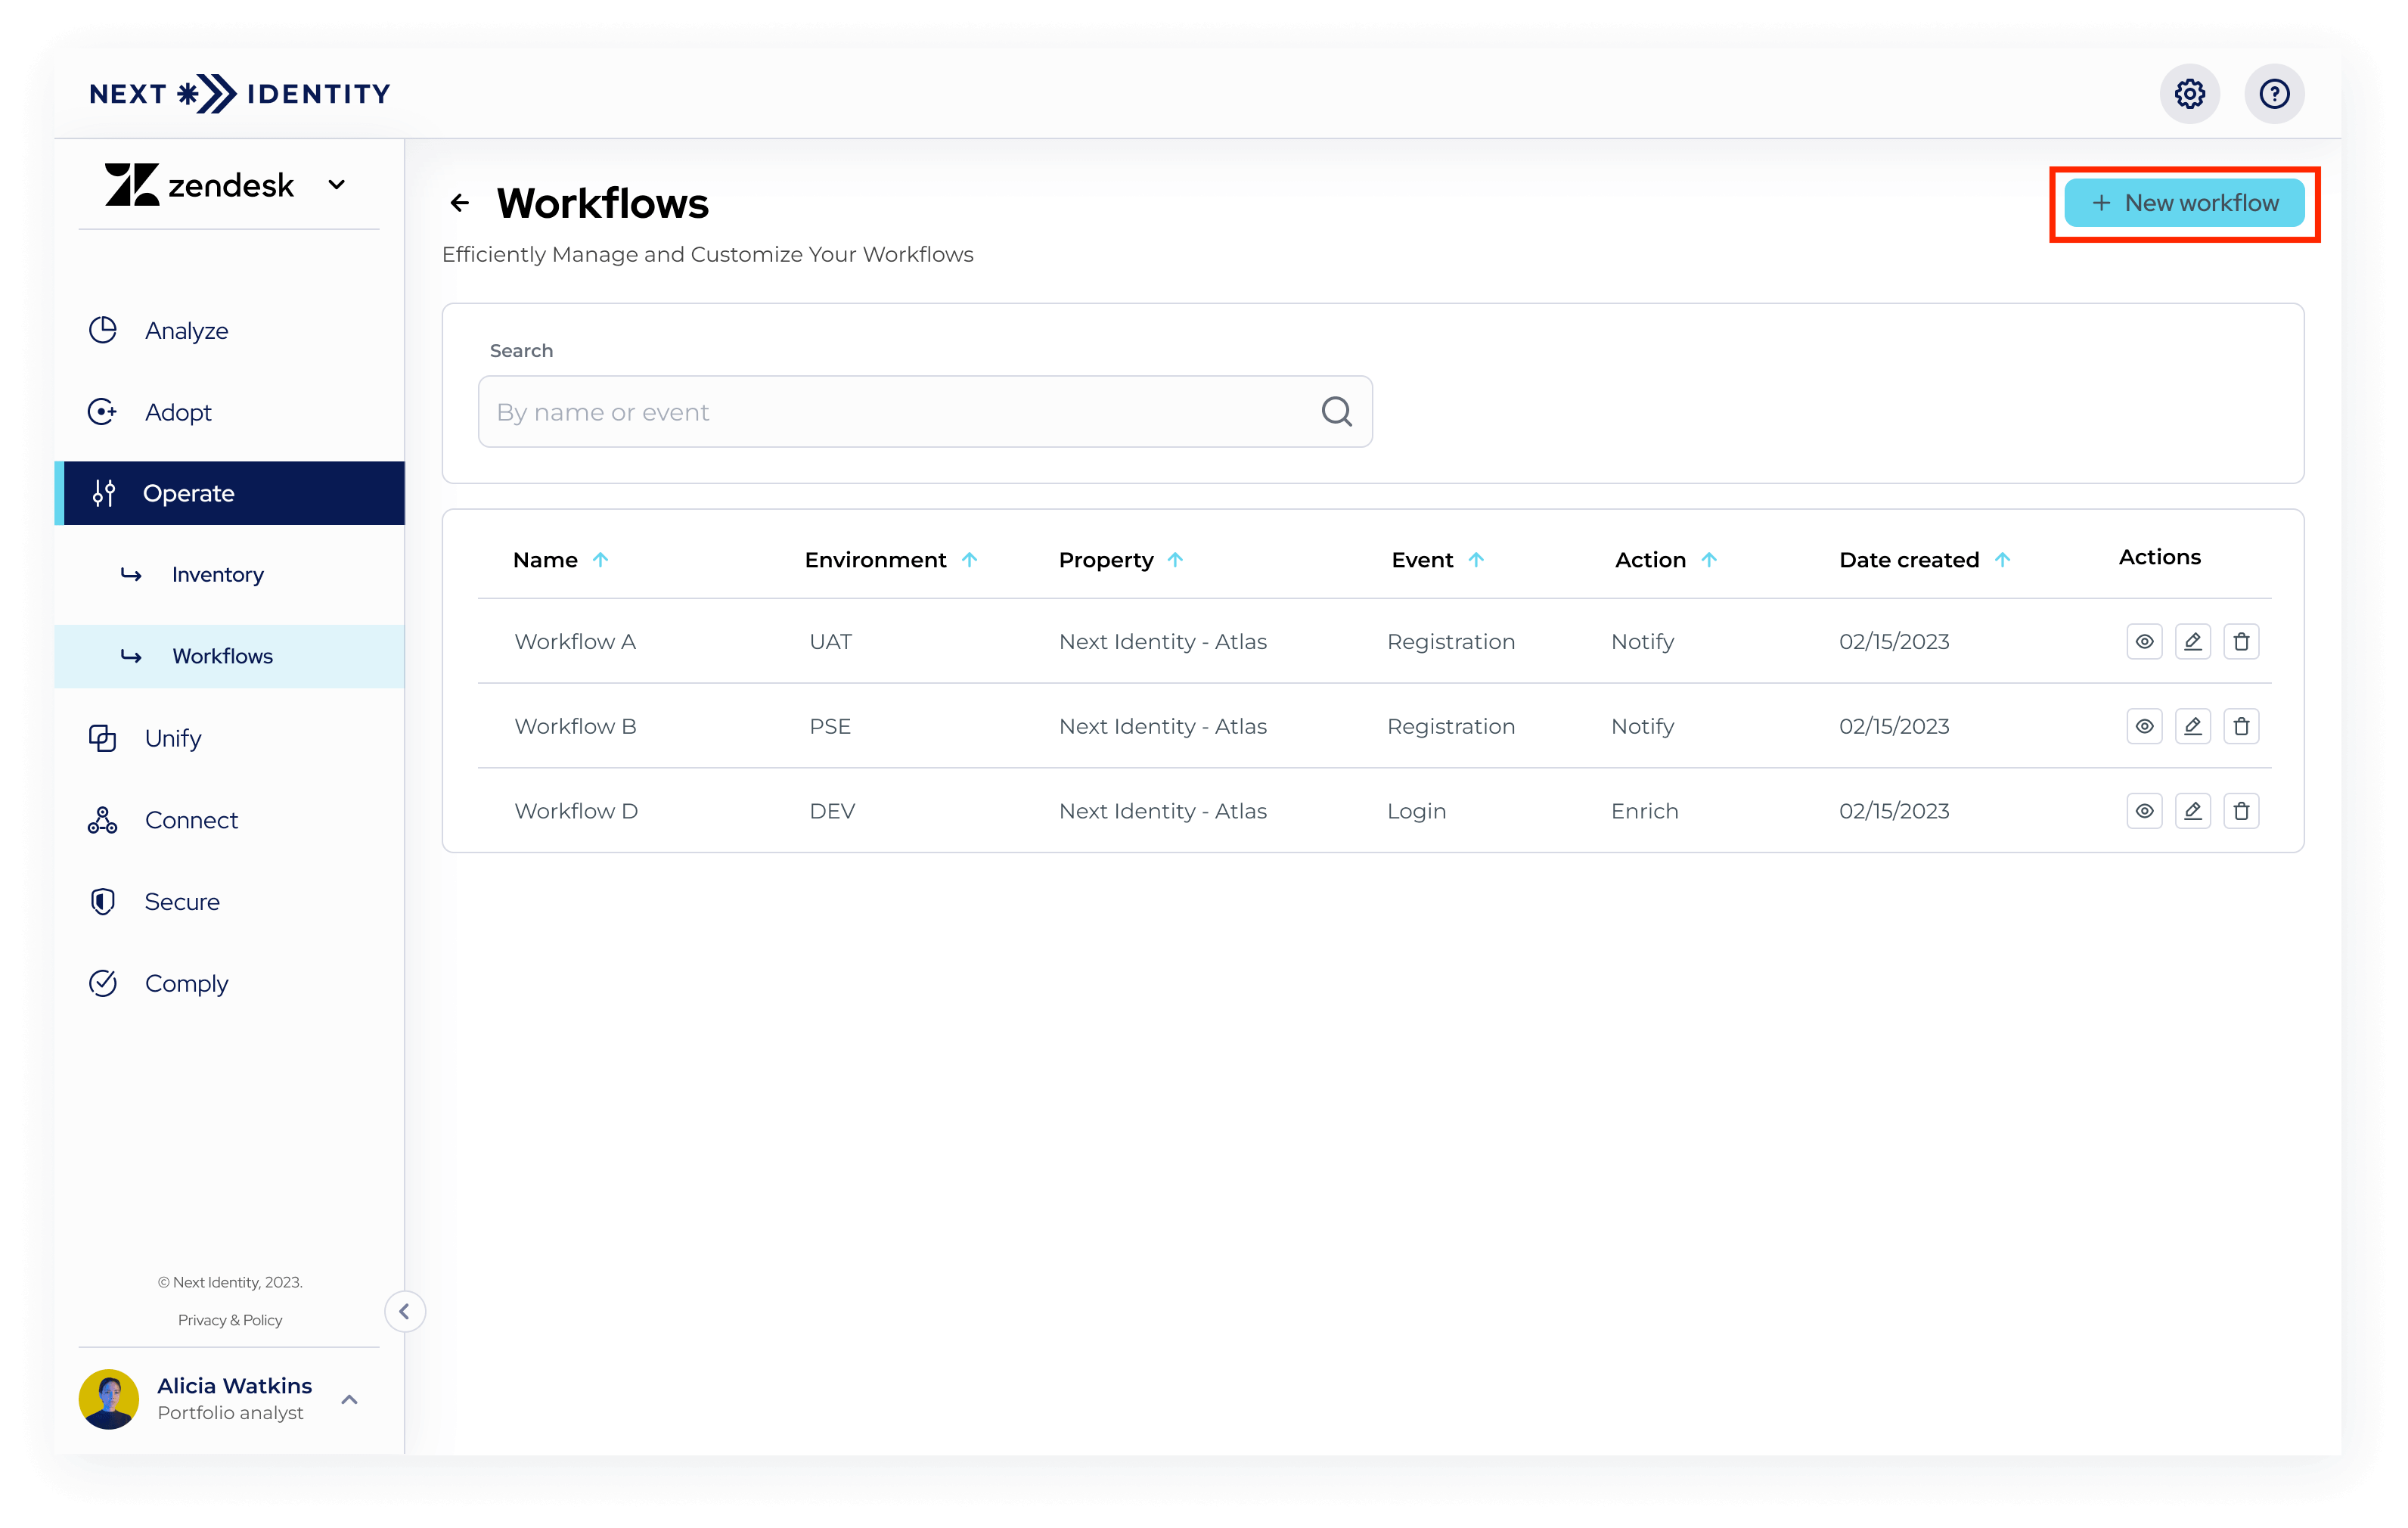
Workflow Manager Screen - New Workflow Button
- Step 2: Start by providing a descriptive name for the workflow. This name should accurately represent the purpose of the workflow. Select the appropriate environment and property for the workflow. These settings define the context and scope of the workflow within your Next Identity setup.
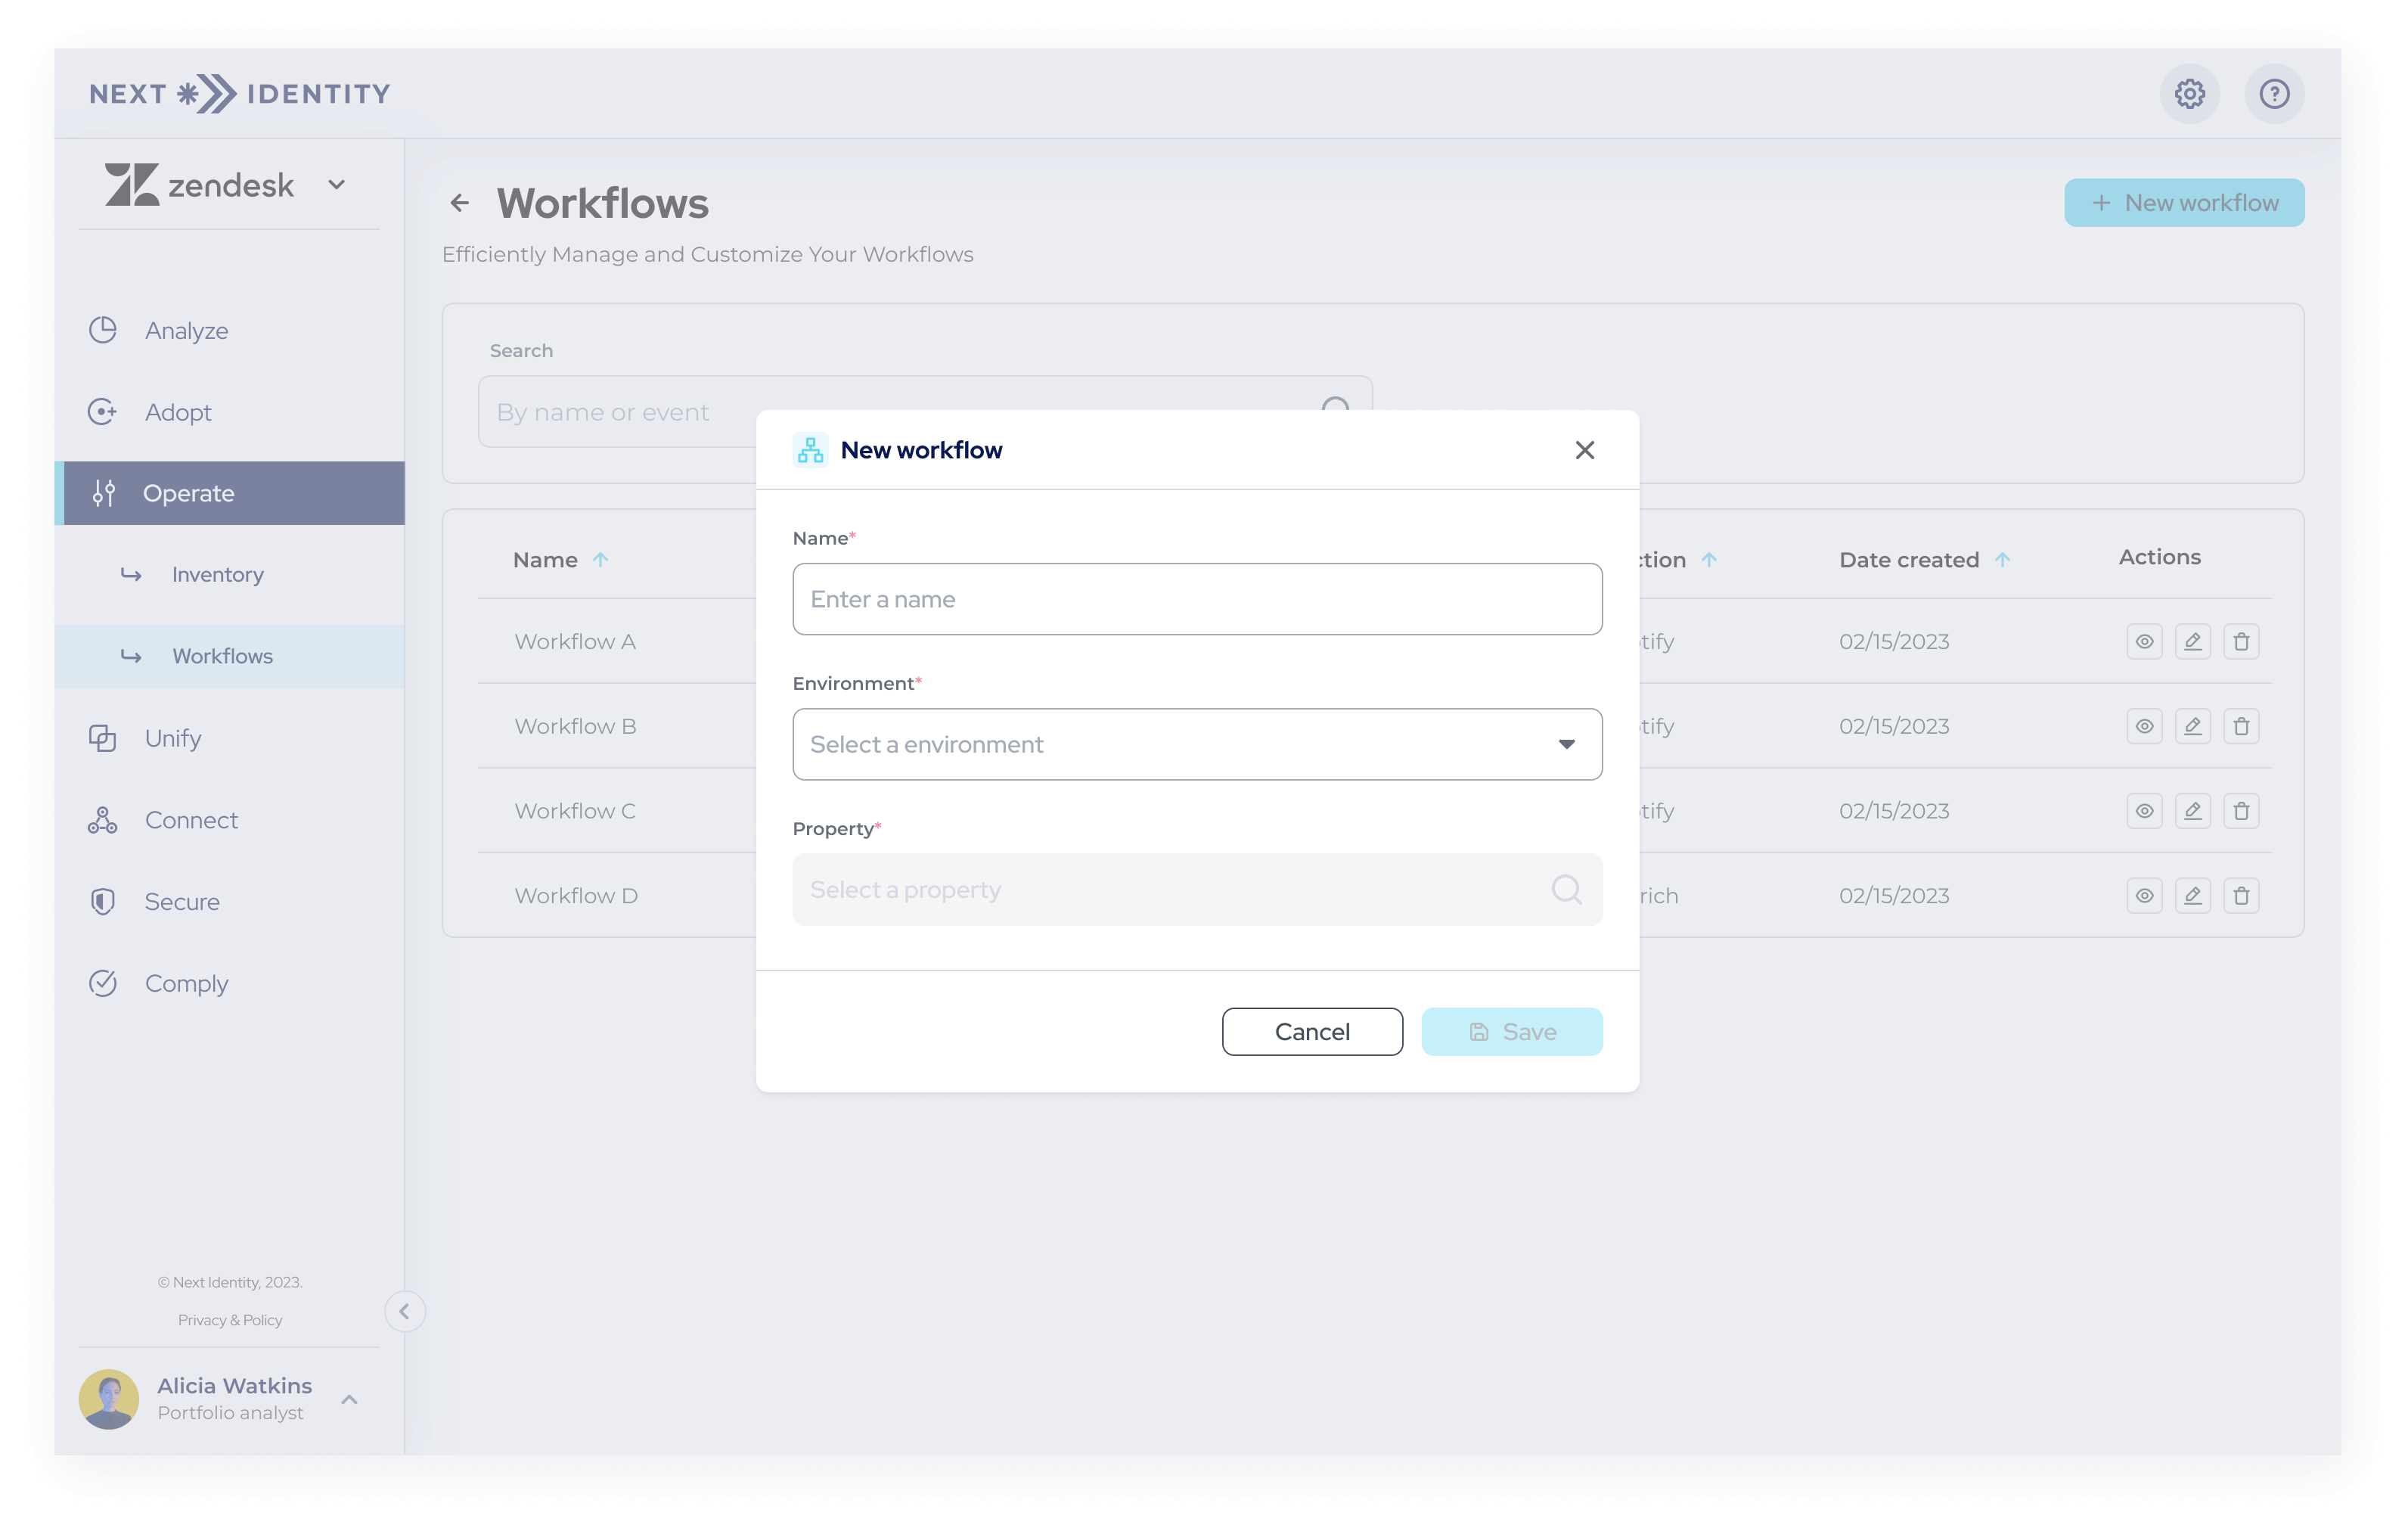
Workflow Manager Screen - Configuring Workflow Name, Environment, and Property
- Step 3: In the Workflow Designer Screen, you'll find various options and fields to configure your workflow. Begin adding and configuring steps for your workflow. Each step consists of a source, event, action, and target.
- Source: Select the event source from the available options. This can be either Next Identity or Akamai Identity Cloud.
- Event: Choose the specific event that triggers the workflow. The available events depend on the selected source. You can customize the behavior for each event.
- Action: Select the action that should be performed when the event occurs. The available actions vary based on the chosen event.
- Target: Configure the target system or URL endpoint where the notifications will be sent. The target determines where the workflow actions are directed.
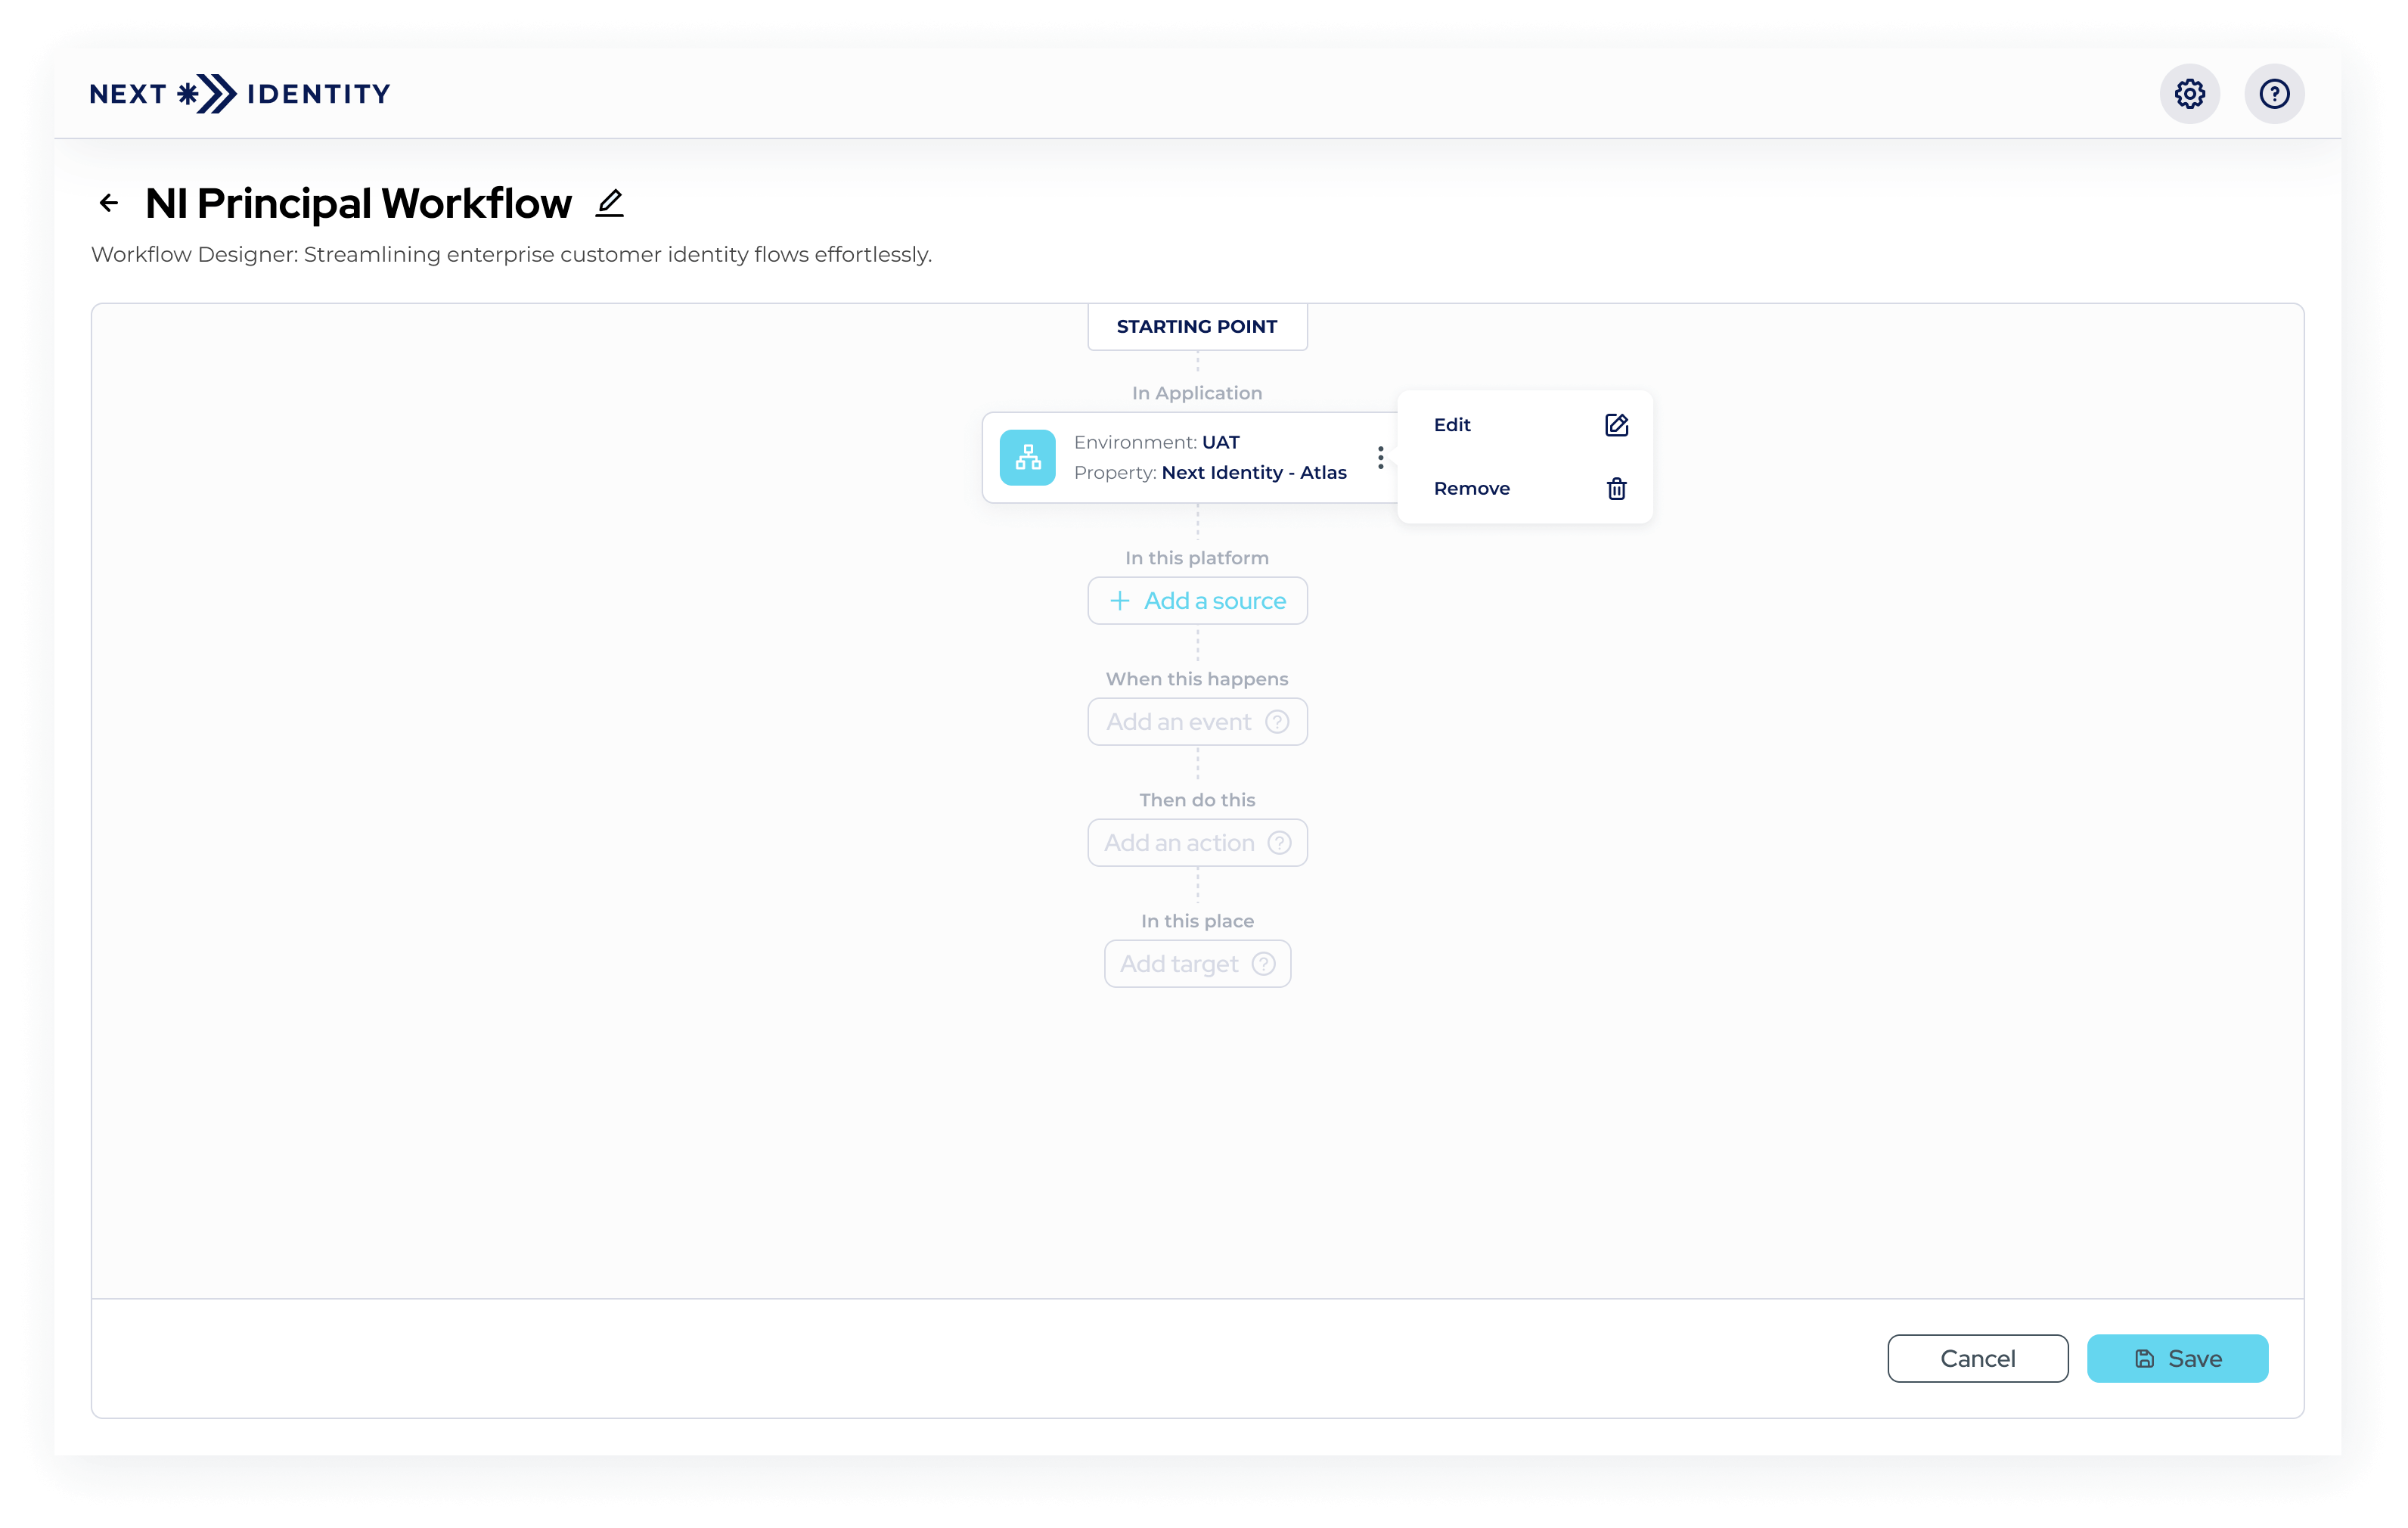
Workflow Designer Screen - Starting Point
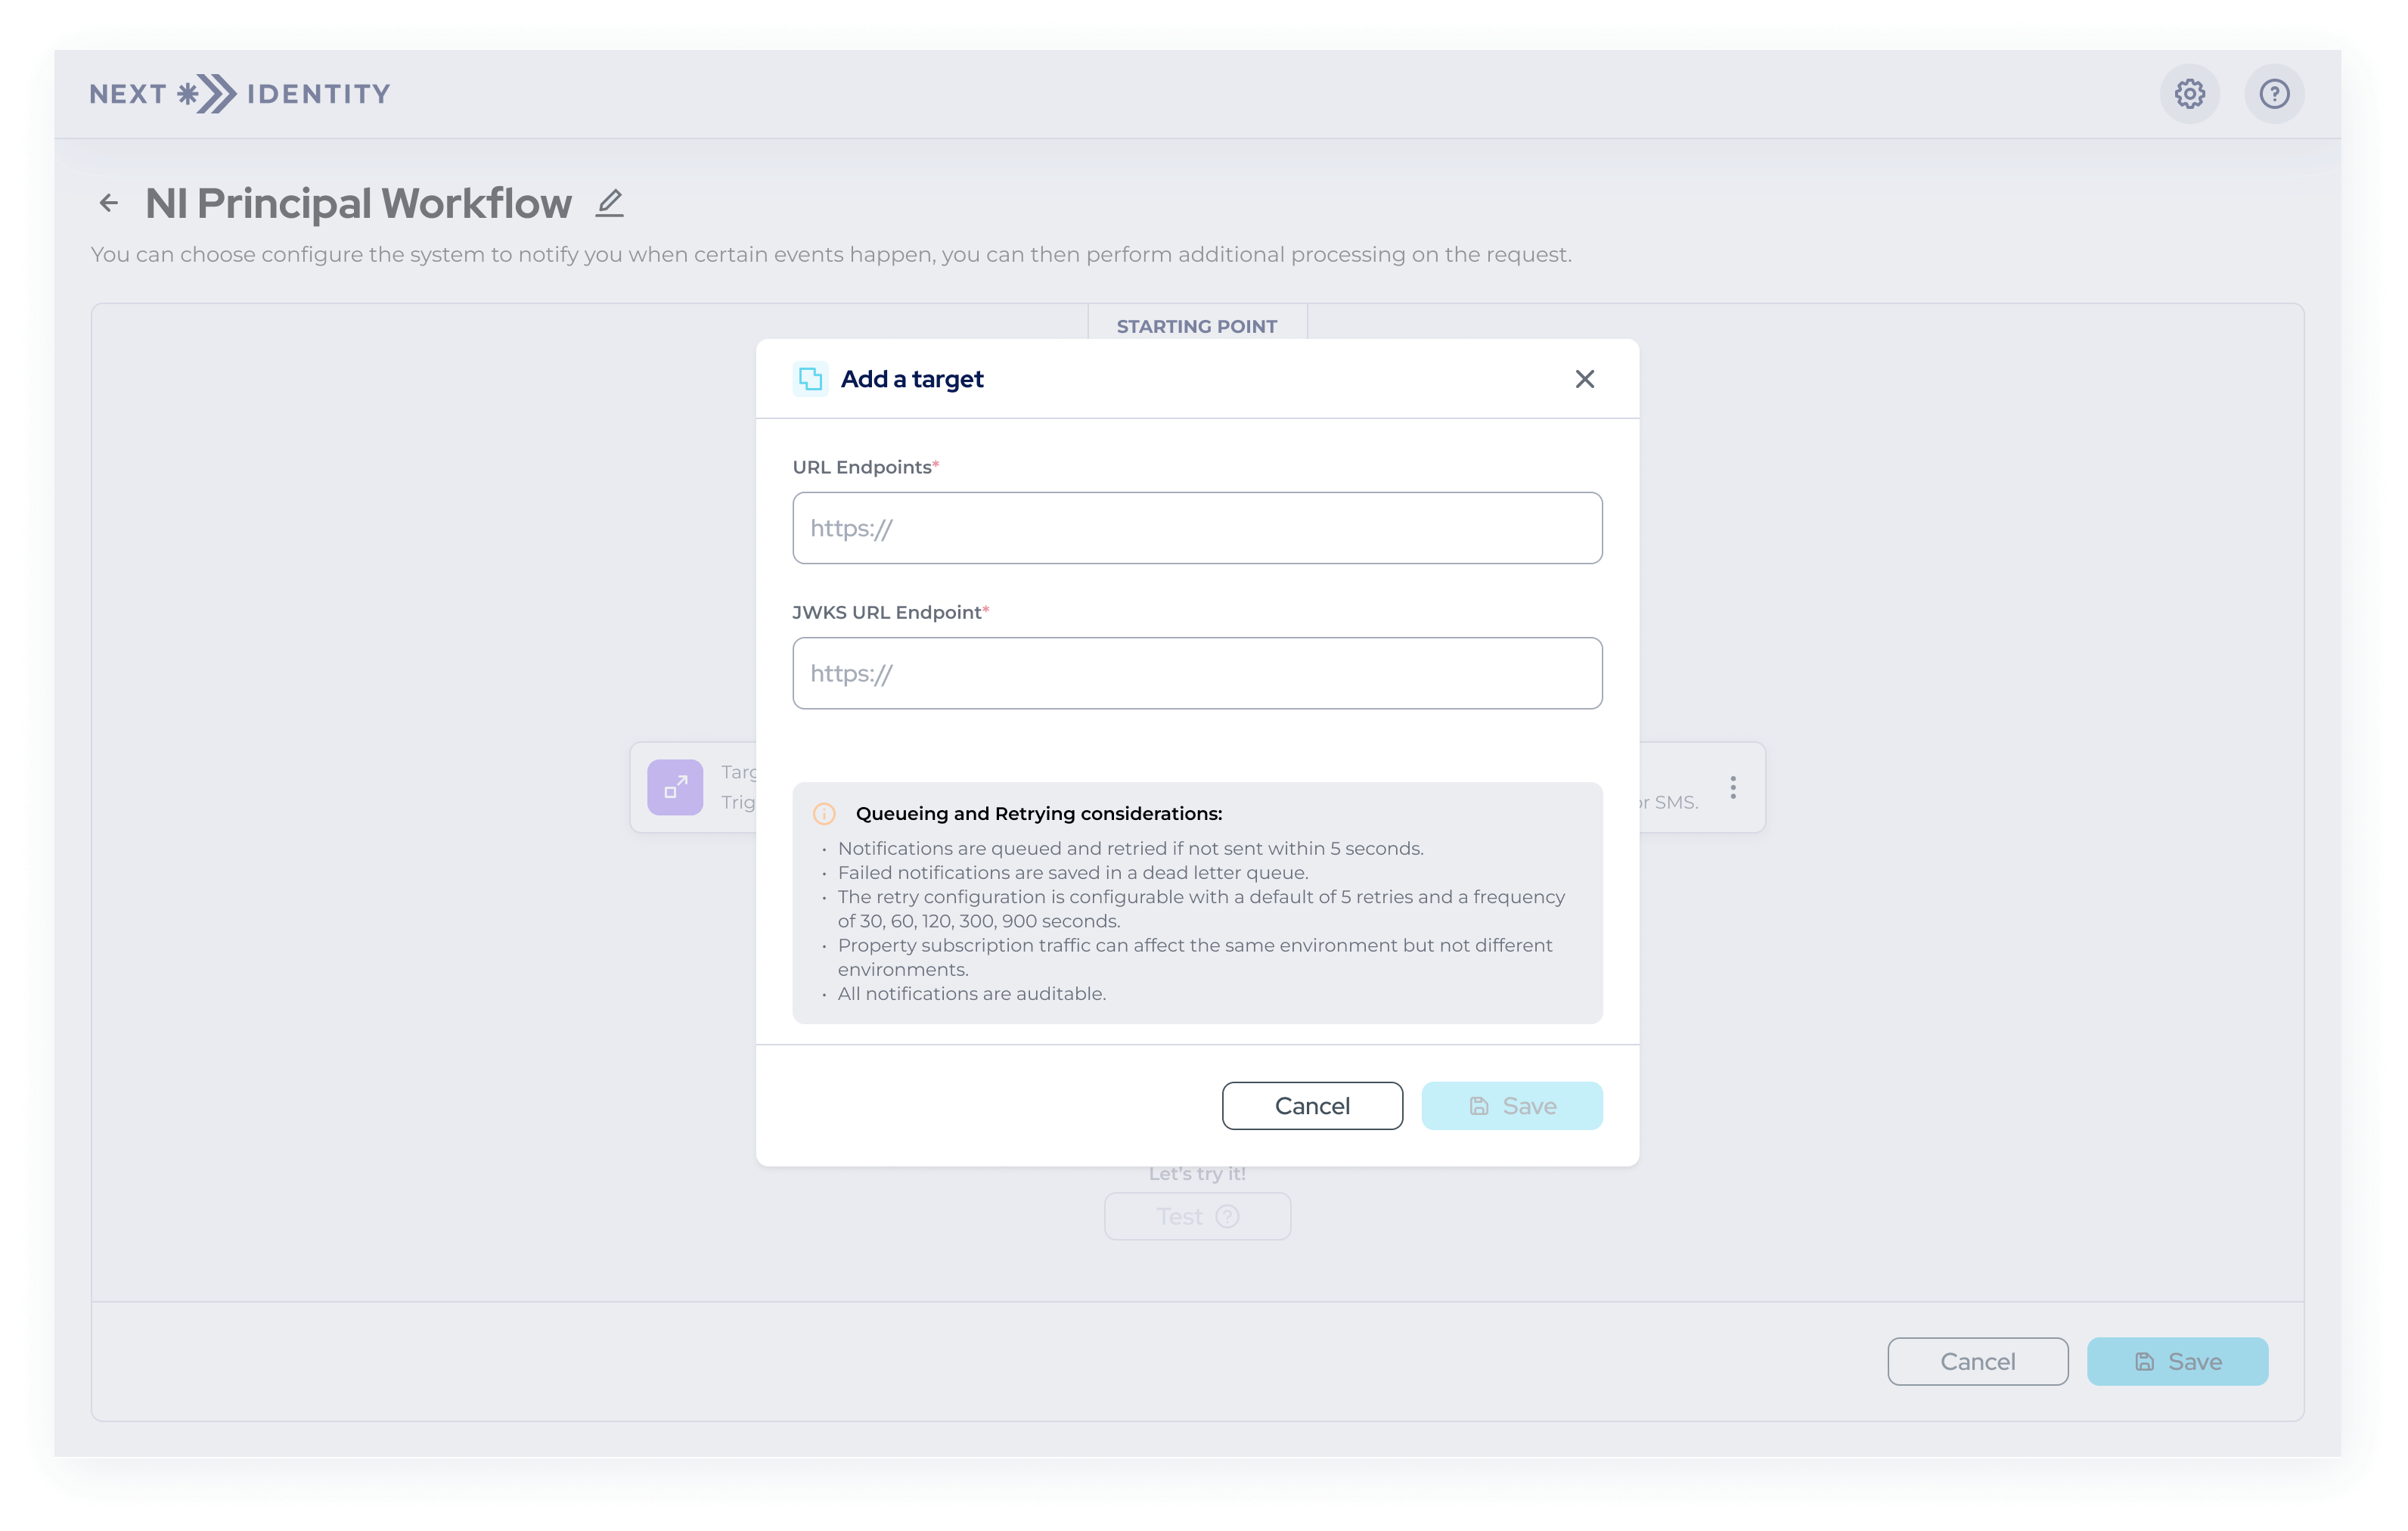
Workflow Designer Screen - Example of a Step Configuration
- Step 4: Save the workflow configuration. This will finalize the creation of the workflow and take you back to the Workflows Management Screen.

Workflow Manager Screen - Workflow Successfully Created
Editing a Workflow
To edit an existing workflow, follow these steps:
- Step 1: Access the Workflow Designer Screen through the Workflow Manager by selecting the edit button (pencil icon) for the desired workflow on the Workflows Management Screen.
- Step 2: In the Workflow Designer Screen, you can modify the name, environment, and property fields of the workflow.
- Step 3: Add, remove, or configure steps within the workflow as needed. The rules for editing the steps are the same as when creating a new workflow.
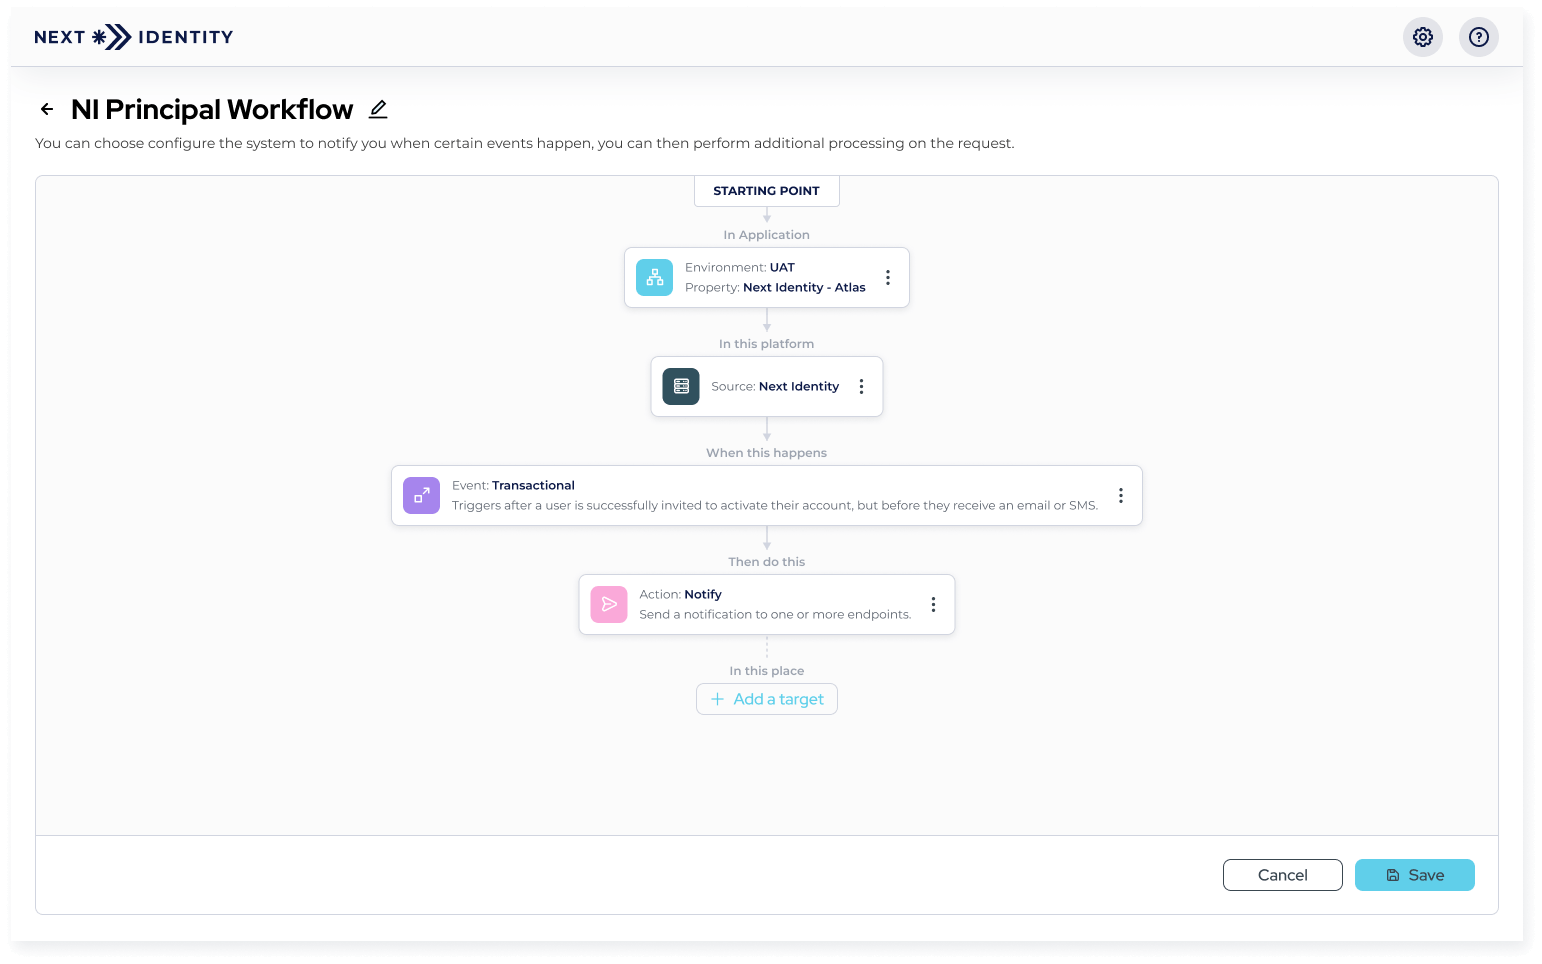
Workflow Designer Screen - Edit Mode
- Step 4: Save the workflow configuration to apply the changes. This will finalize the workflow edition and take you back to the Workflows Management Screen.
Viewing Workflow Details
To view the details of an existing workflow, follow these steps:
- Step 1: Access the Workflow Designer Screen through the Workflow Manager by selecting the eye icon for the desired workflow on the Workflows Management Screen.
- Step 2: The Workflow Designer Screen will display the details of the selected workflow, including its name, environment, property, and steps (source, event, action, and target). You can review the workflow configuration without making direct edits.
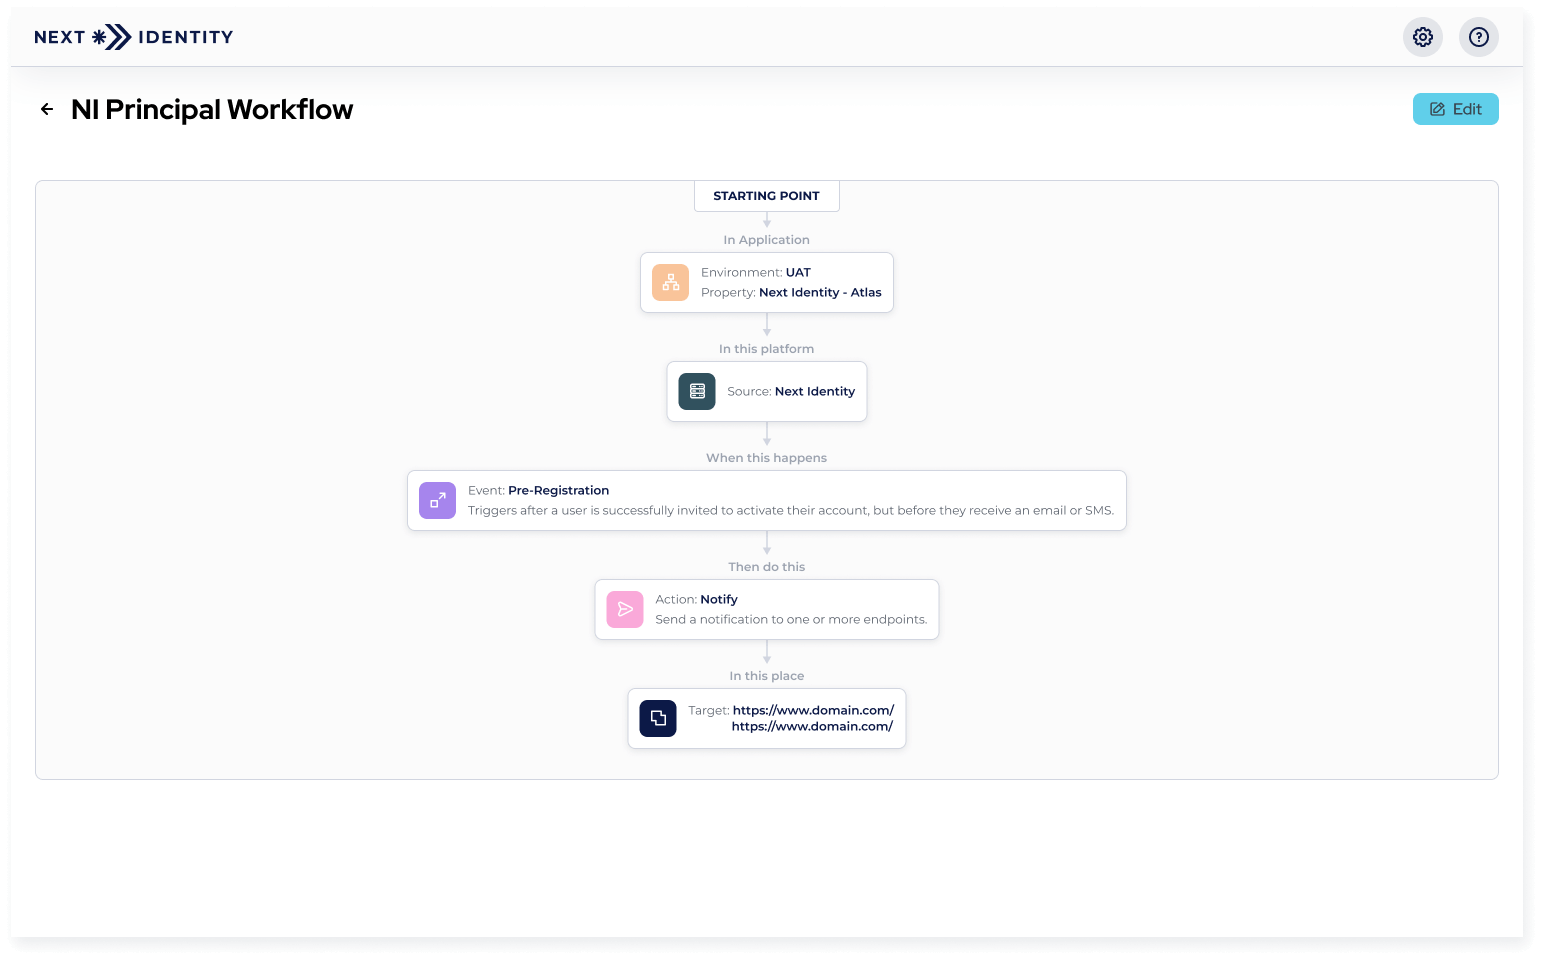
Workflow Designer Screen - View Mode
- Step 3: Use the back button in the Workflow Designer Screen to return to the Workflows Management Screen.
By utilizing the Workflow Designer, you can easily create, edit, and view workflows in Next Reason, empowering you to tailor your workflow behavior to meet your specific requirements.
Updated 9 months ago