Authentication Journey
View, understand and edit the configuration of your application's authentication journey.
The Authentication Journey allows App Managers to gain visibility into how their authentication flows are configured within the Next Identity platform . This is an essential tool for understanding key aspects of the authentication process and ensuring it aligns with your application's security requirements.
View the Authentication Journey of your app
To view your Authentication Journey of you application, follow these steps:
-
Log into the Next Identity console.
-
Navigate to the Application Management view.
-
If you are an Application Manager, you will automatically be in the Application Management view.
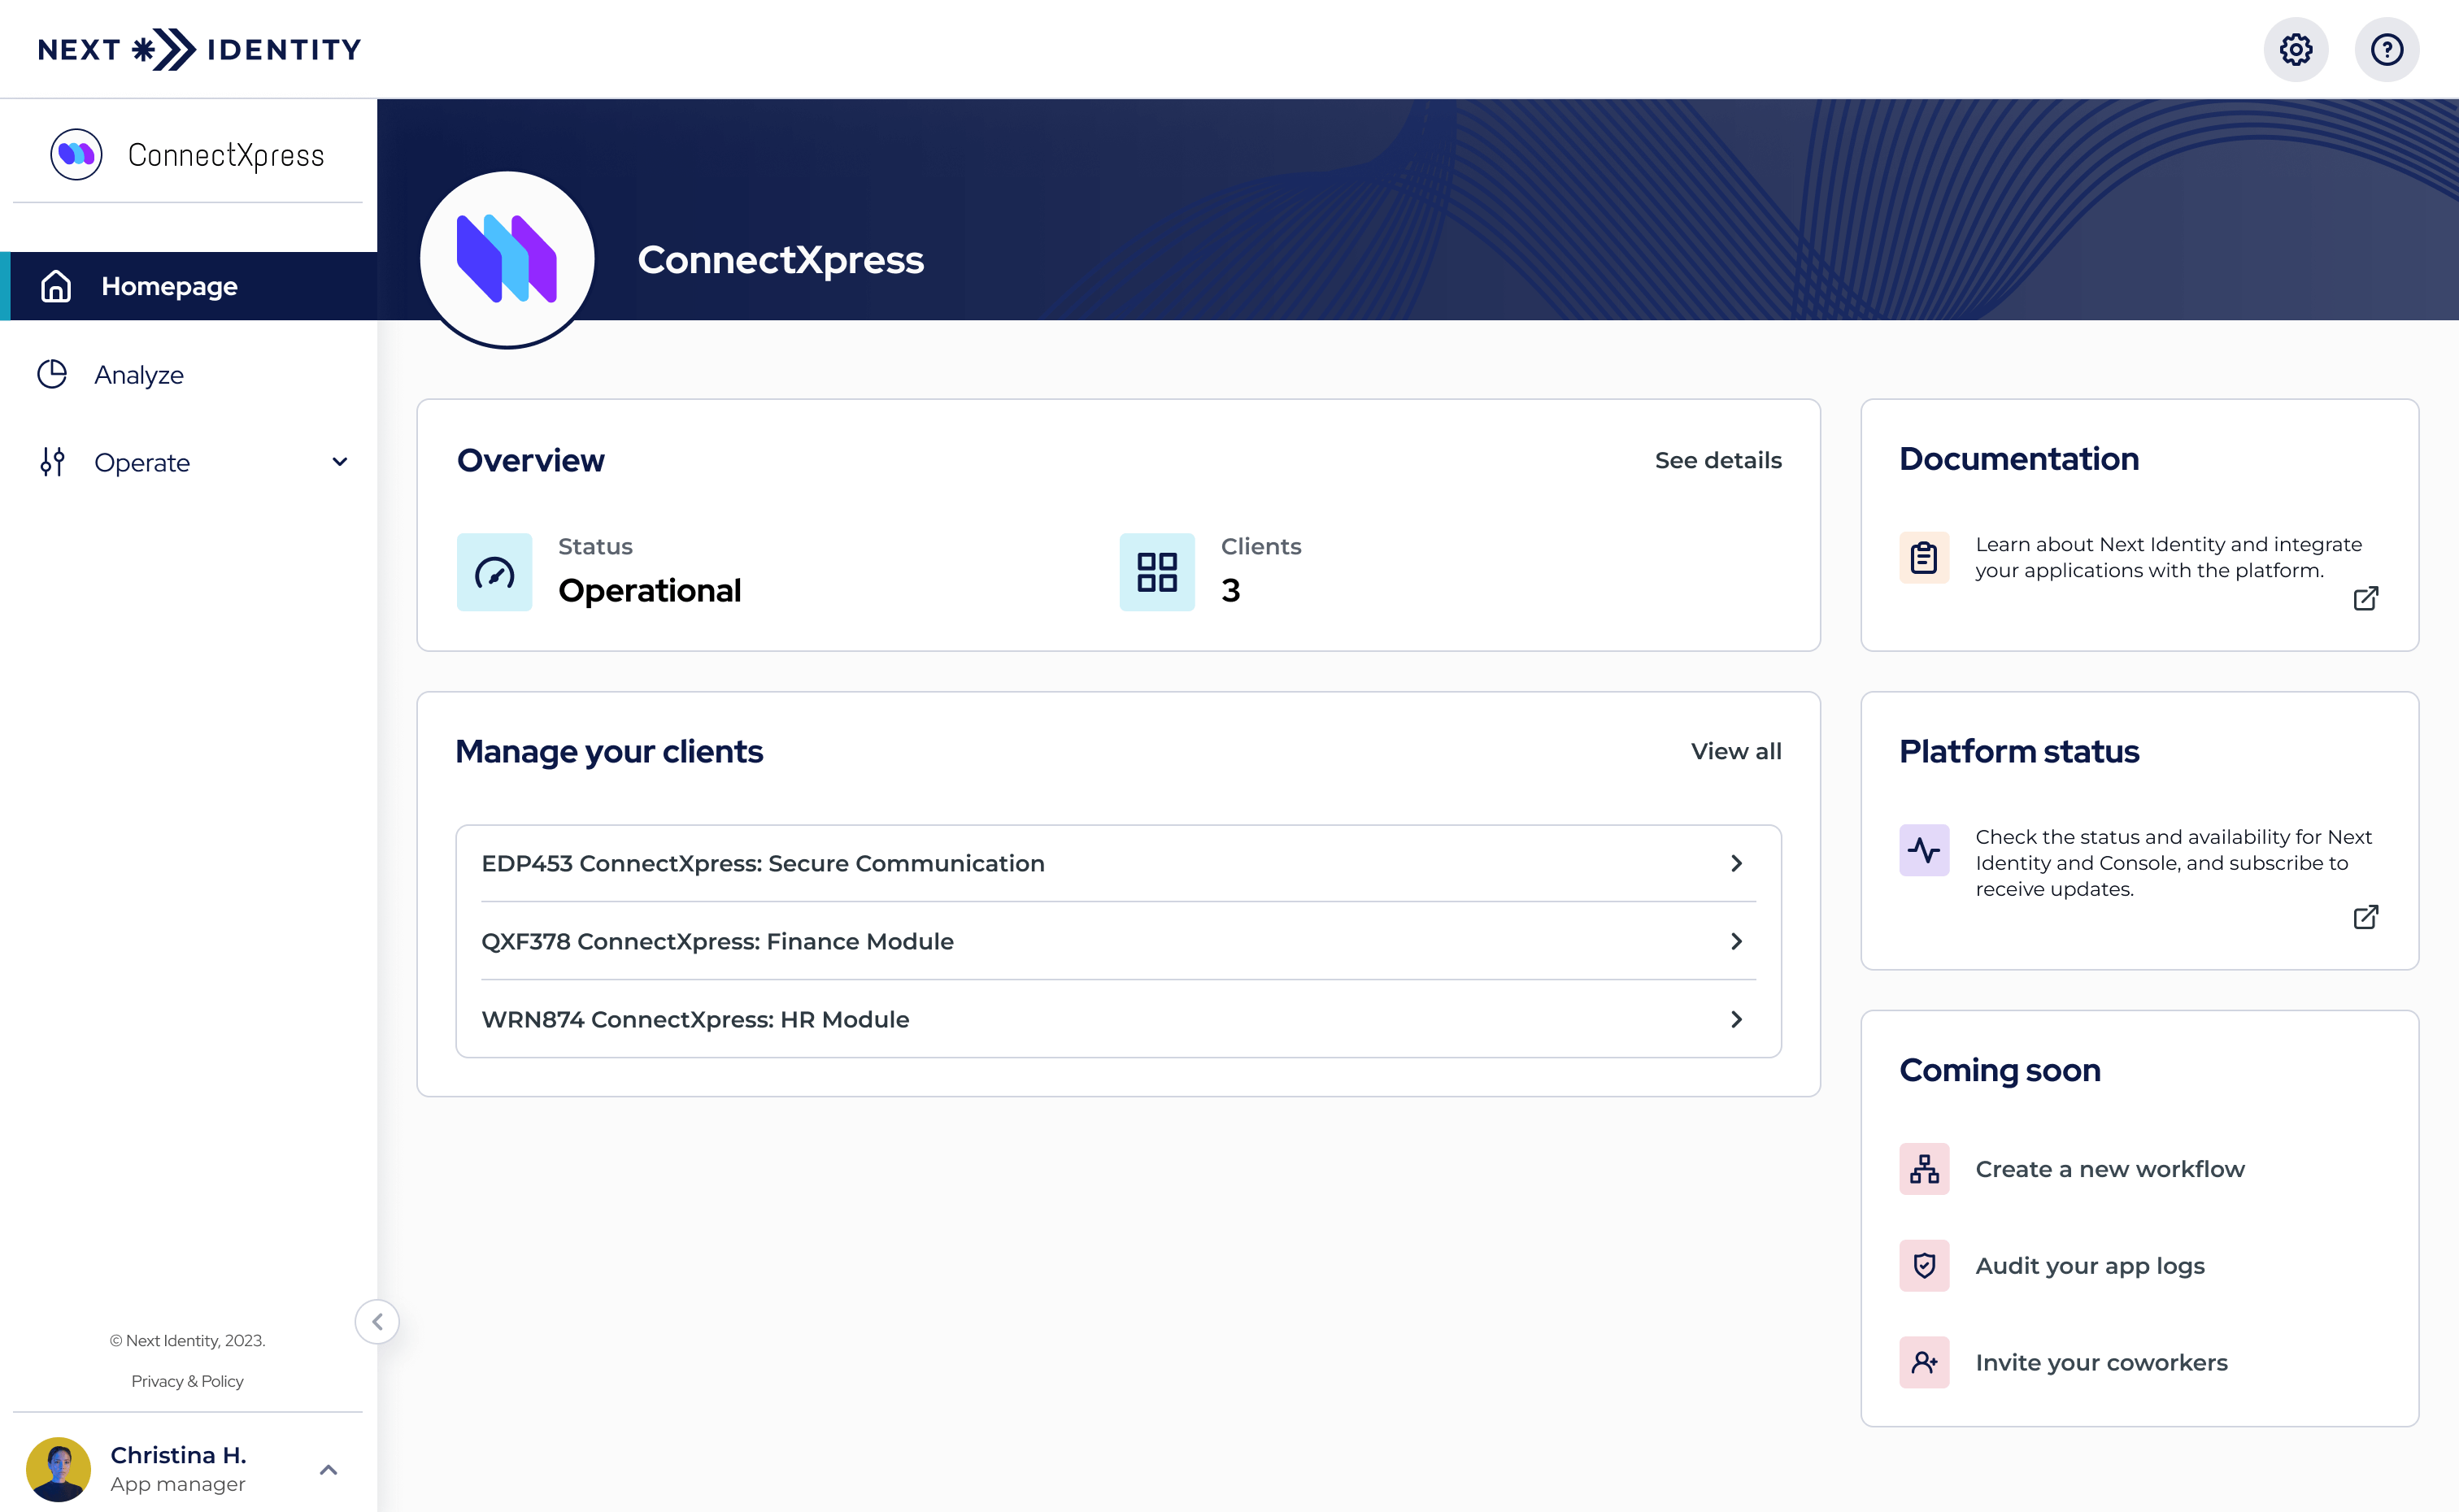 Application Management View - Property Homepage
-
If your default access is set to the Service Management view, follow these steps to switch views:
-
Go to the Inventory screen.
-
Select the Production environment to view the list of properties.
-
Choose the desired property and navigate to the Property Details page.
-
Click the App Team View shortcut located at the top right of the screen..
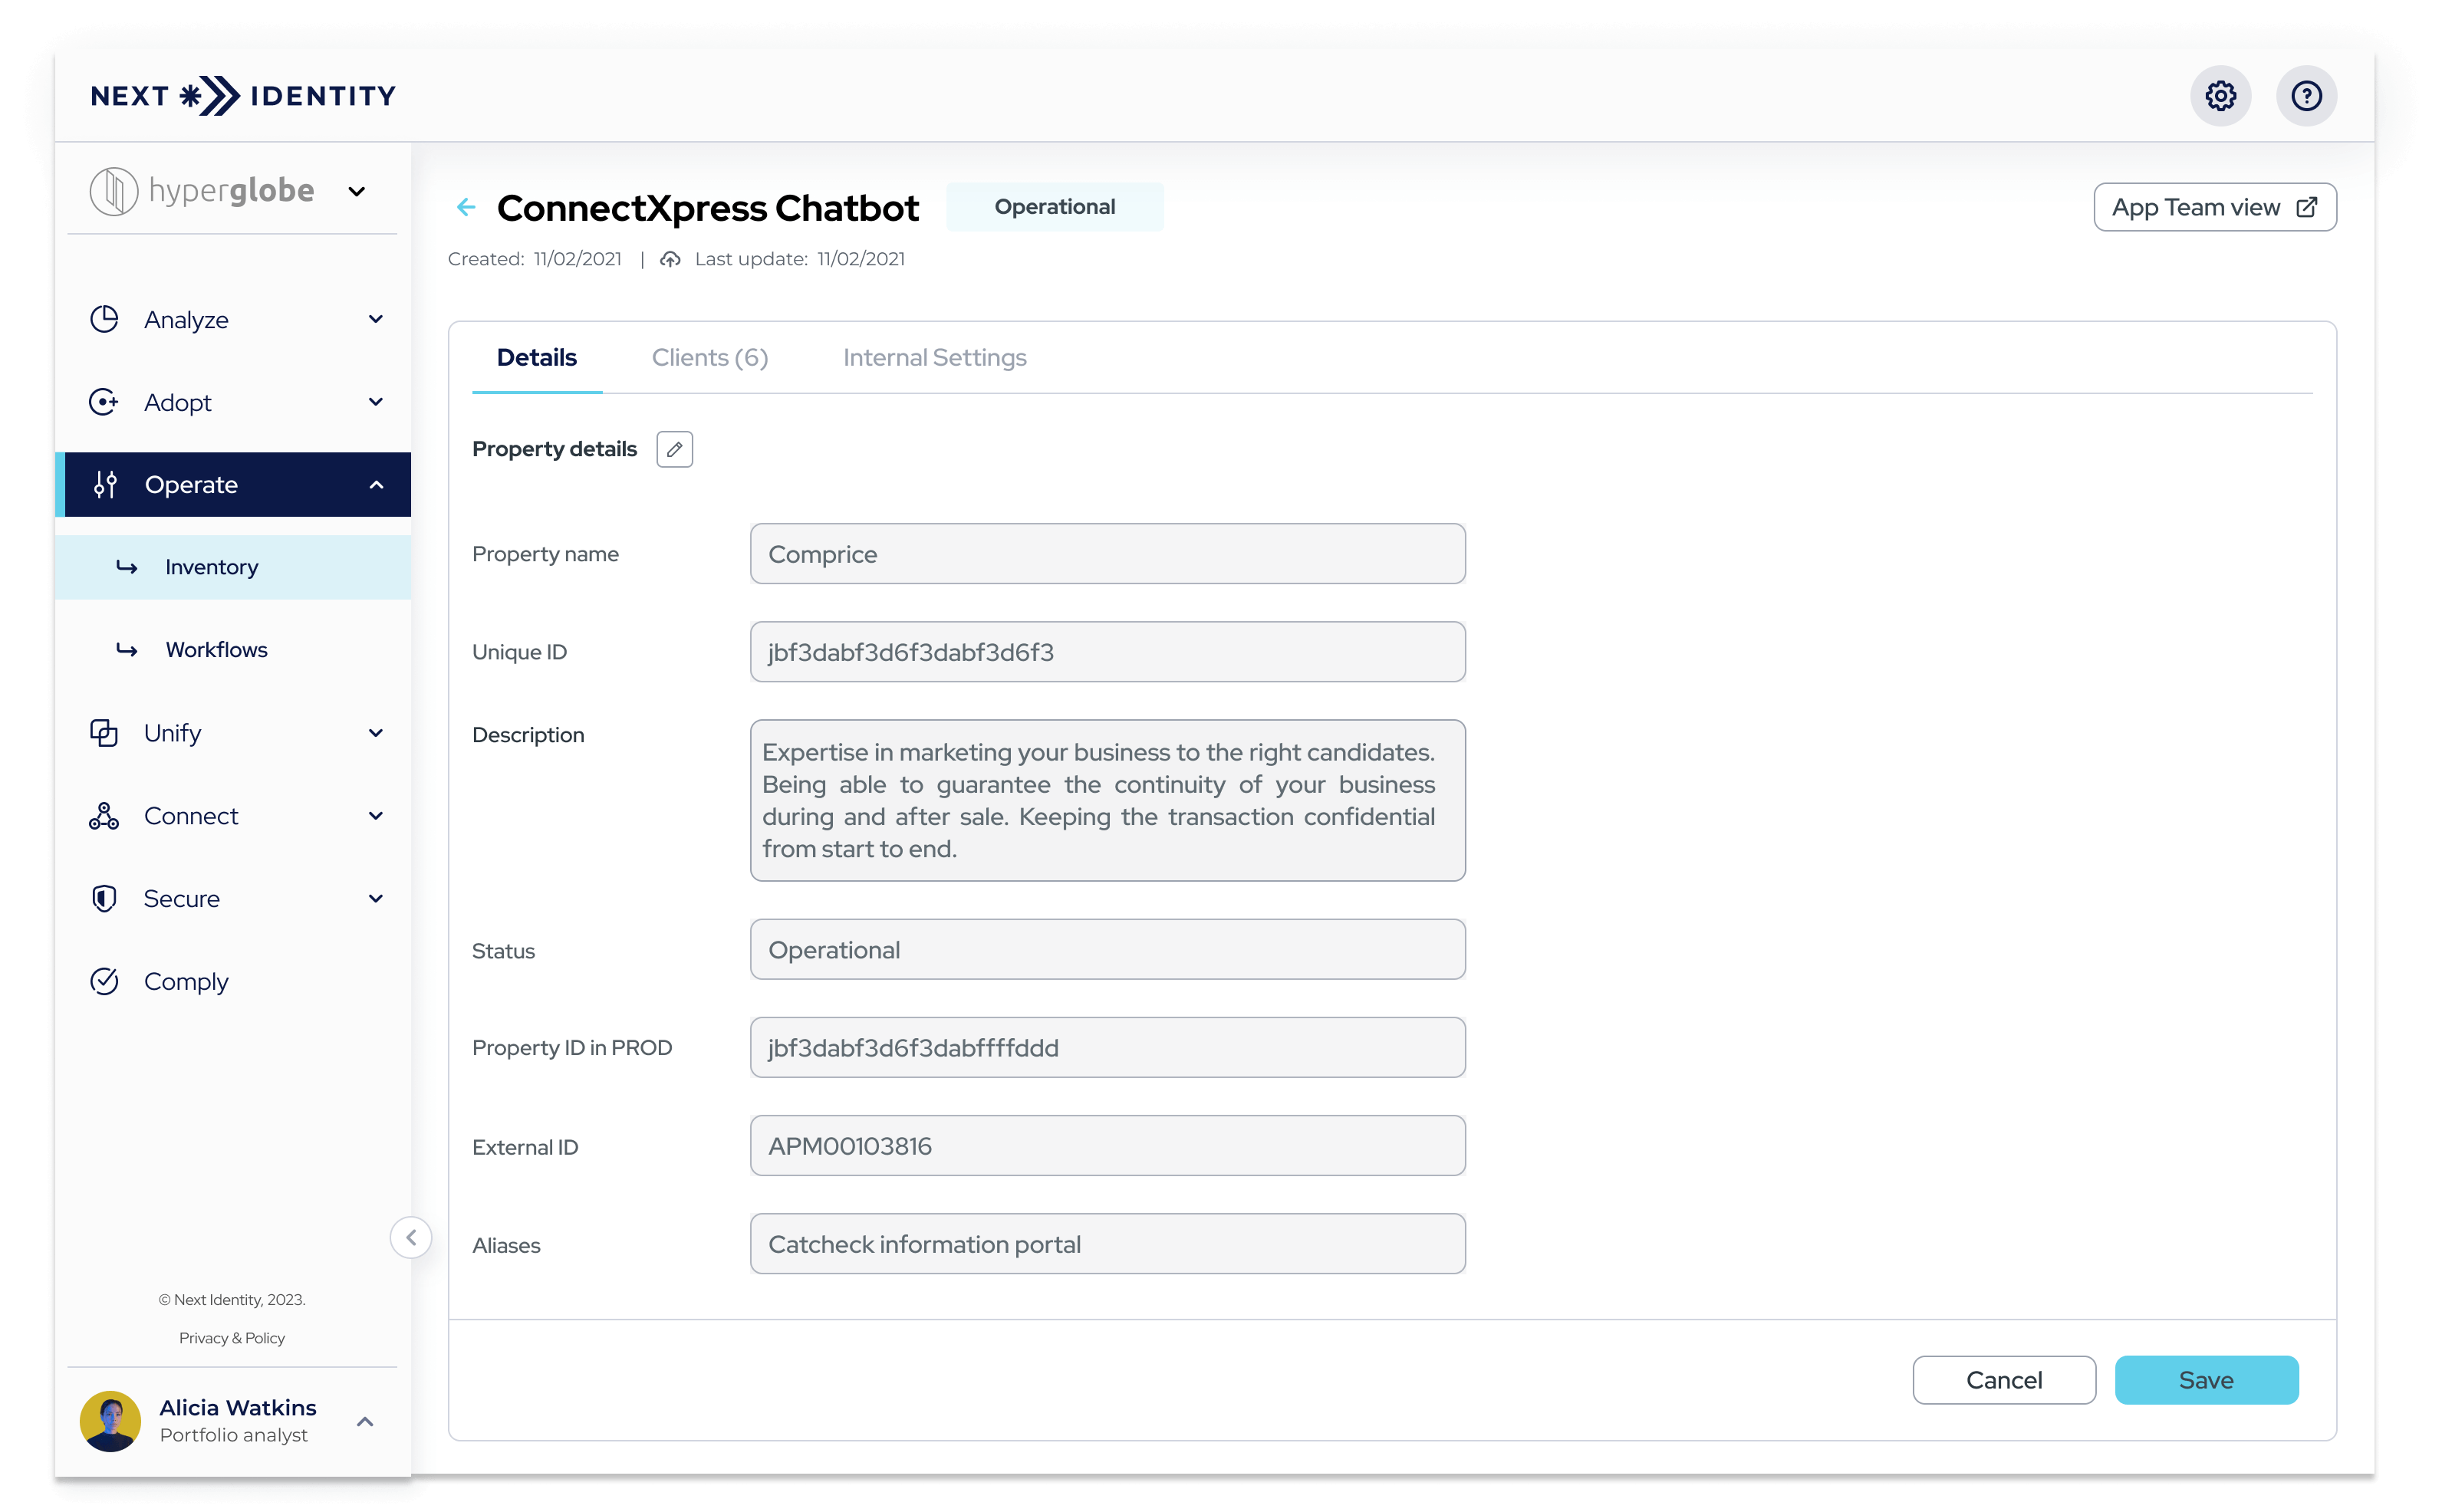 Property Page with App Team View shortcut
-
A new tab will open, showing the Application Management view for that property.
-
-
-
Select the desired client and navigate to the Client Details screen for the specific client you want to manage.
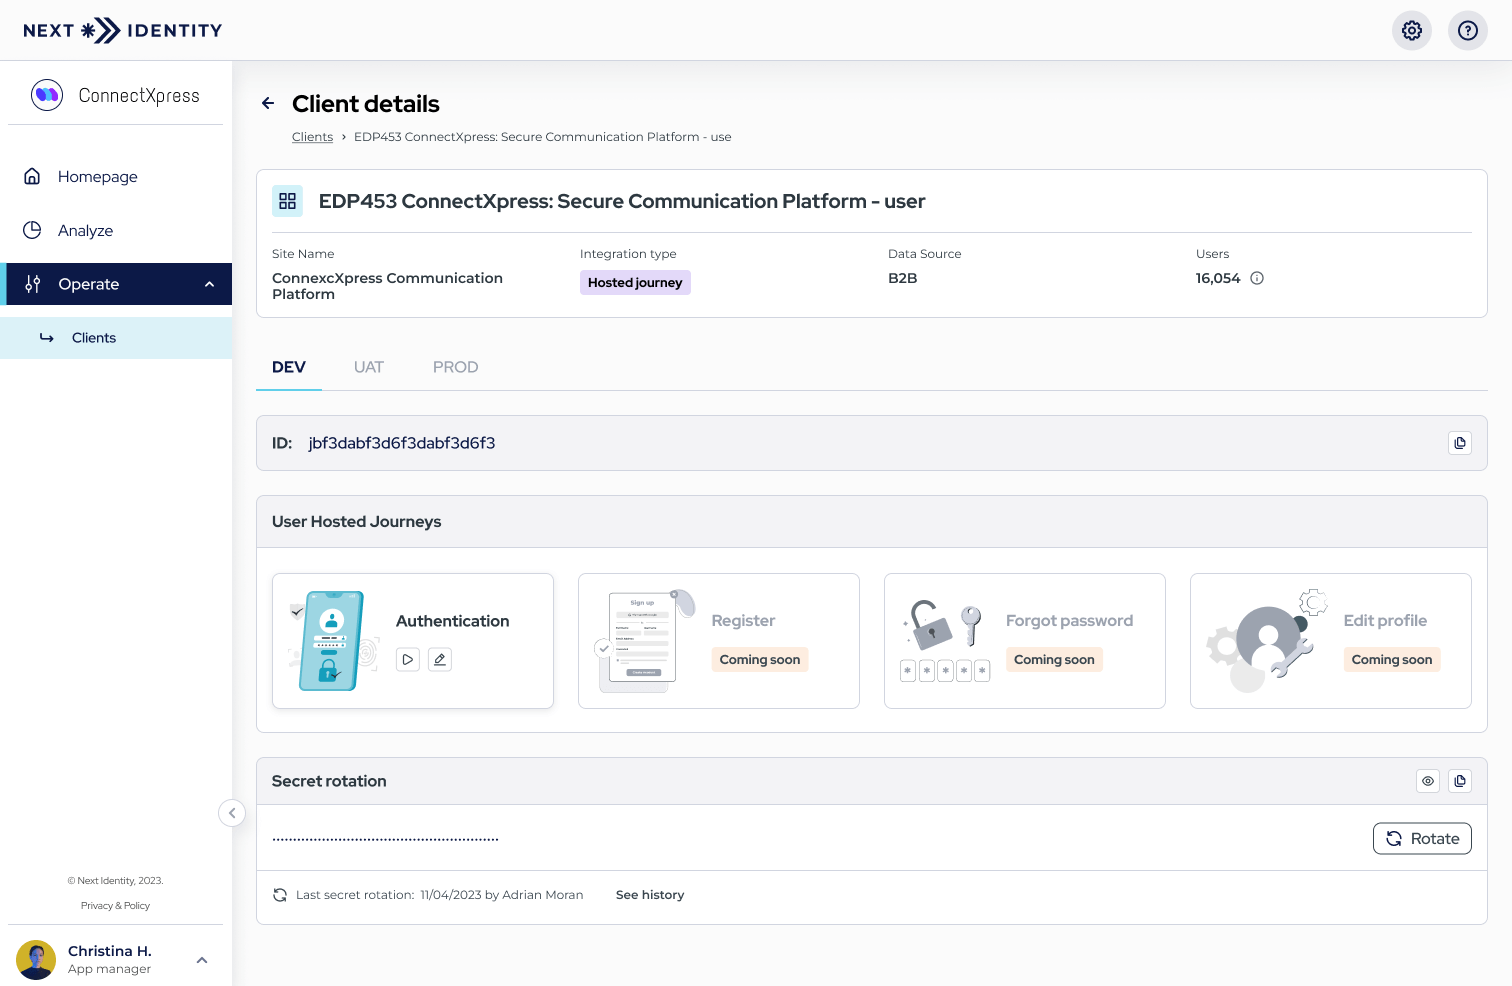 Application Management View - Client Details
-
Choose the appropriate environment for your application (e.g., Development, UAT, Production) and click on the corresponding environment tab.
-
Locate the User Hosted Journeys section, which appears just below the Client ID.
-
In the Authentication Journey card, click the edit button (pencil icon) or view button (eye icon) to open the detailed Authentication Journey page. (For the lowest environment in your pipeline, click the Edit button. For upper environments, click the View button.)
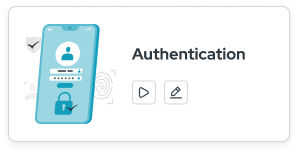 Authentication Journey Card
-
The Authentication Journey page will load, allowing you to visualize and understand how the authentication process is configured for your application.
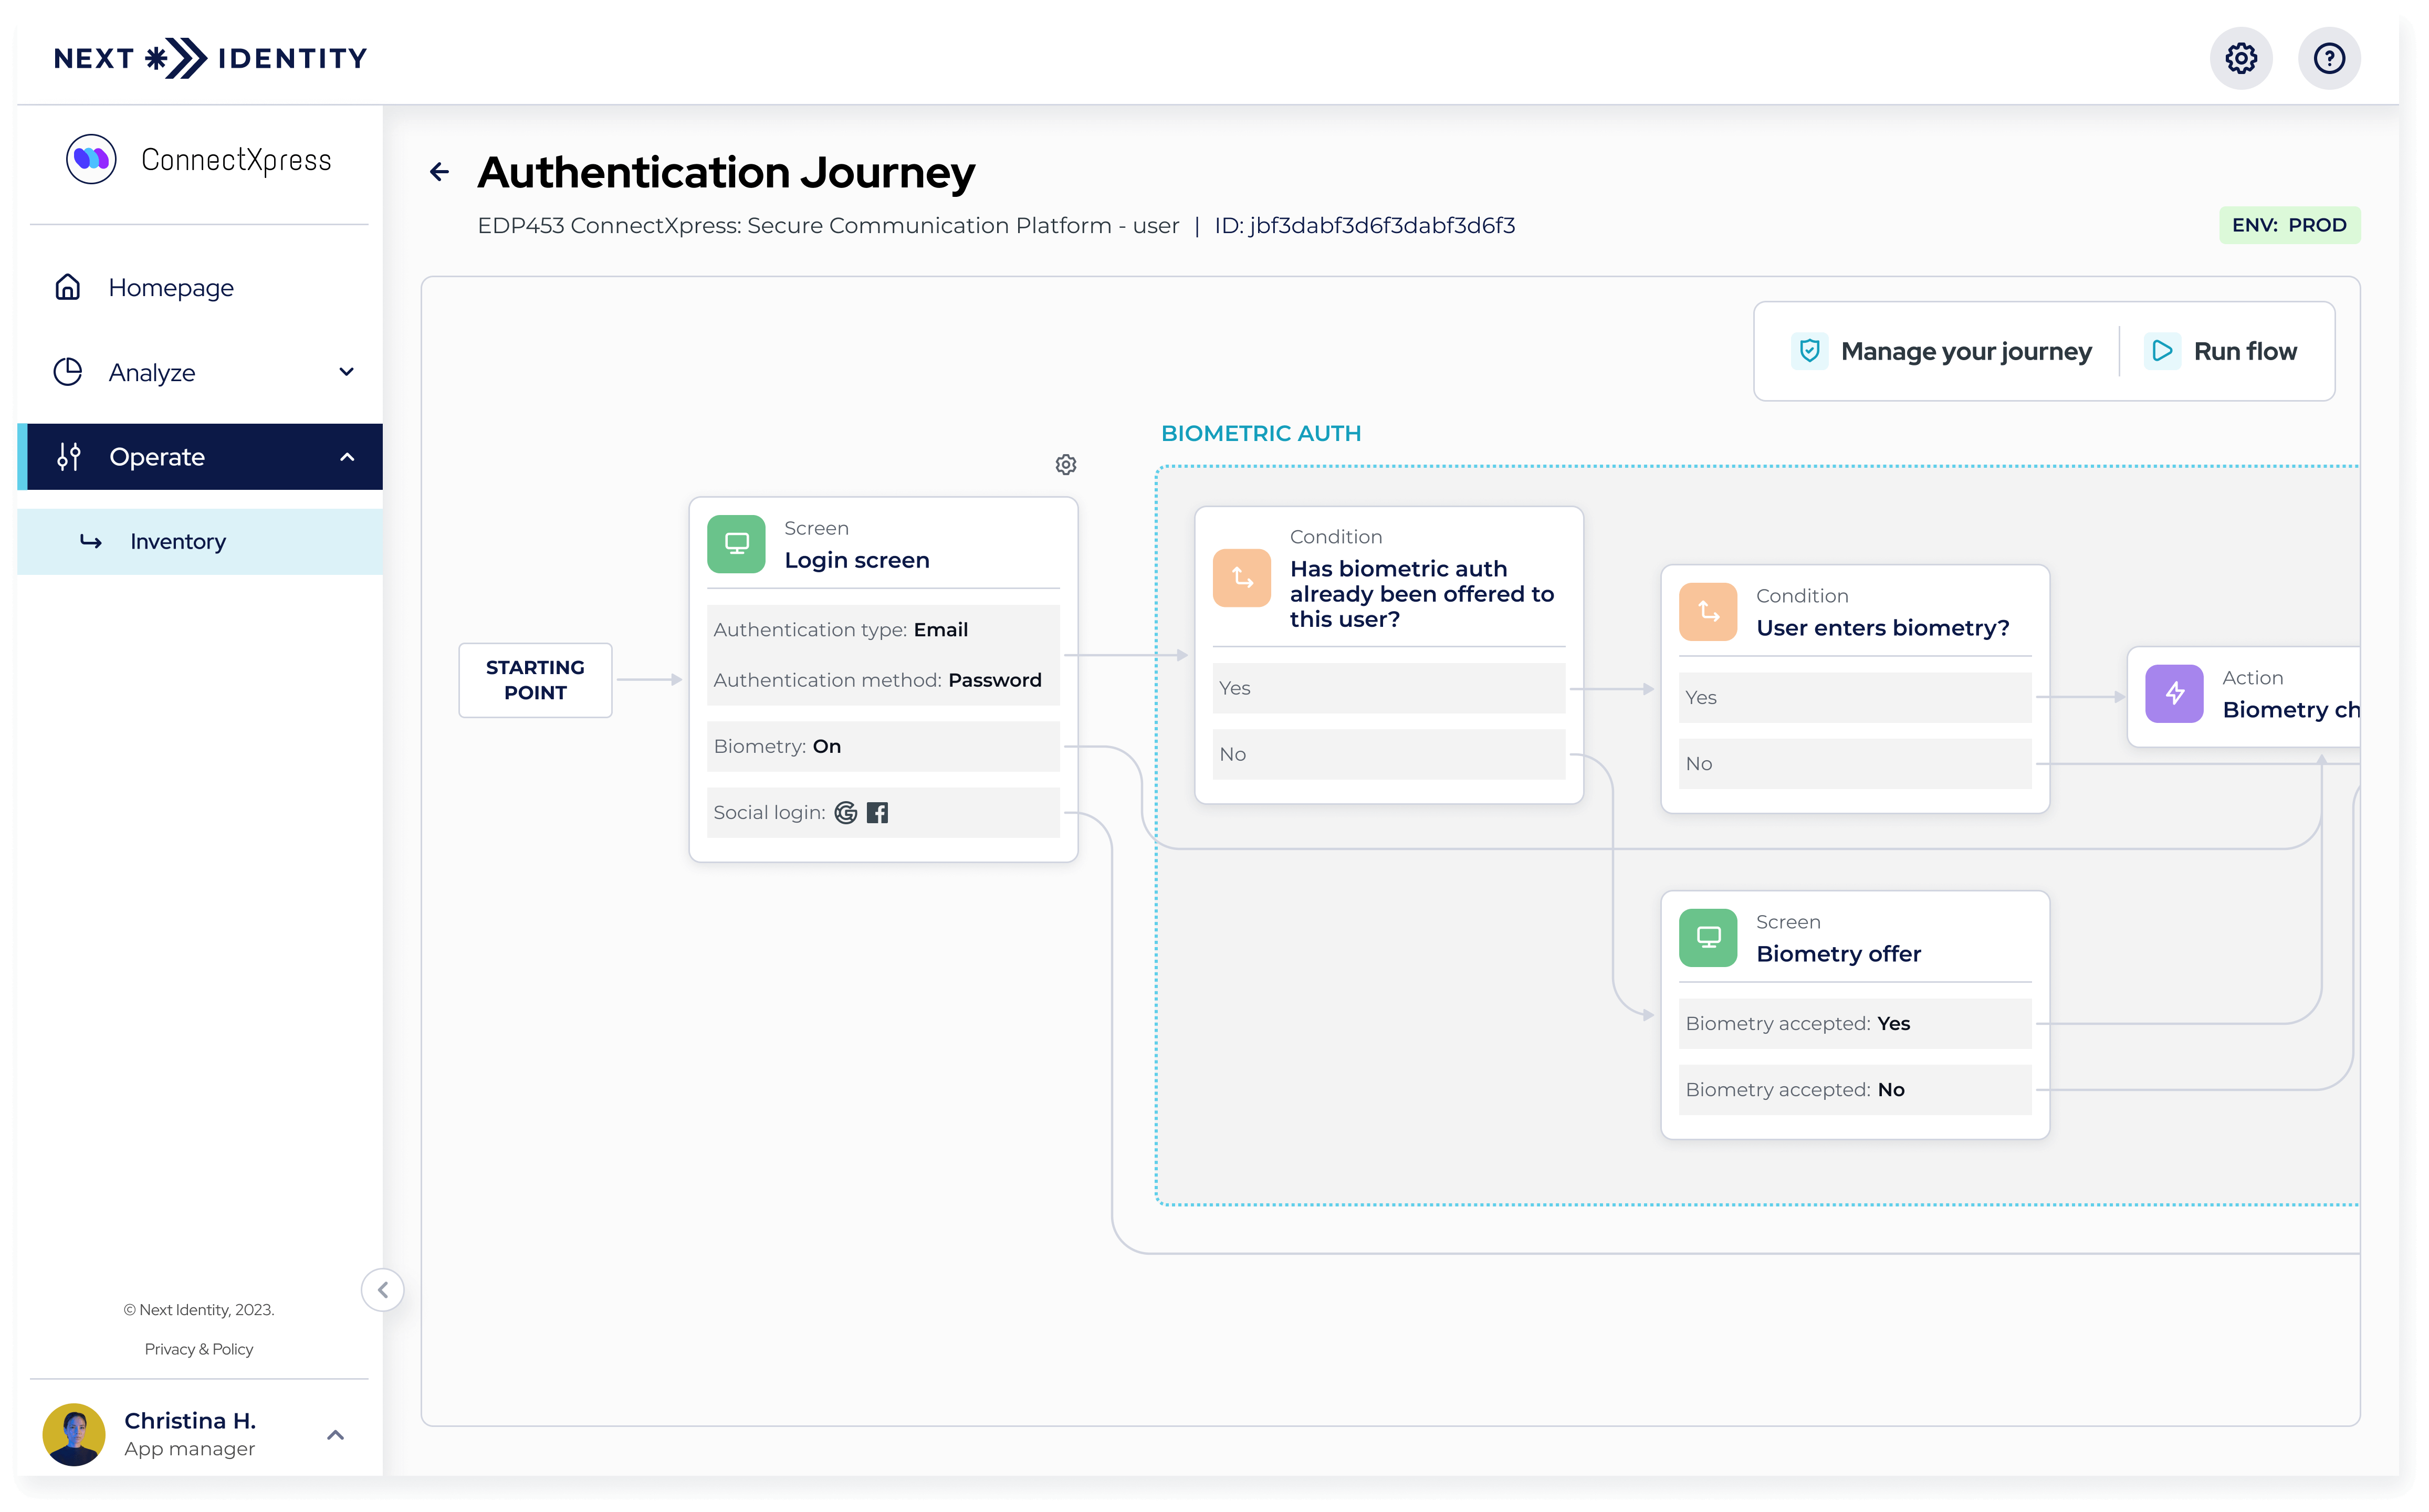 Authentication Journey page
Run the Authentication Journey of your app
Once you've reviewed the configuration of your application's Authentication Journey, you may want to test it in a live environment to ensure that all steps and settings are functioning as expected. To run the Authentication Journey for your application, follow these steps:
-
Repeat steps 1 to 5 from the section View the Authentication Journey of your app.
-
In the Authentication Journey card, click the run button (play icon) to run Authentication Journey of your client.
-
If your client is not in the lowest environment, you can run the flow directly from the Authentication Journey screen by clicking the Run Flow button.
-
If your client has more than one Host URL associated with it, you will be prompted to select a Host URL to run the journey. The Host URL is the base address used to test the configuration in the chosen environment.
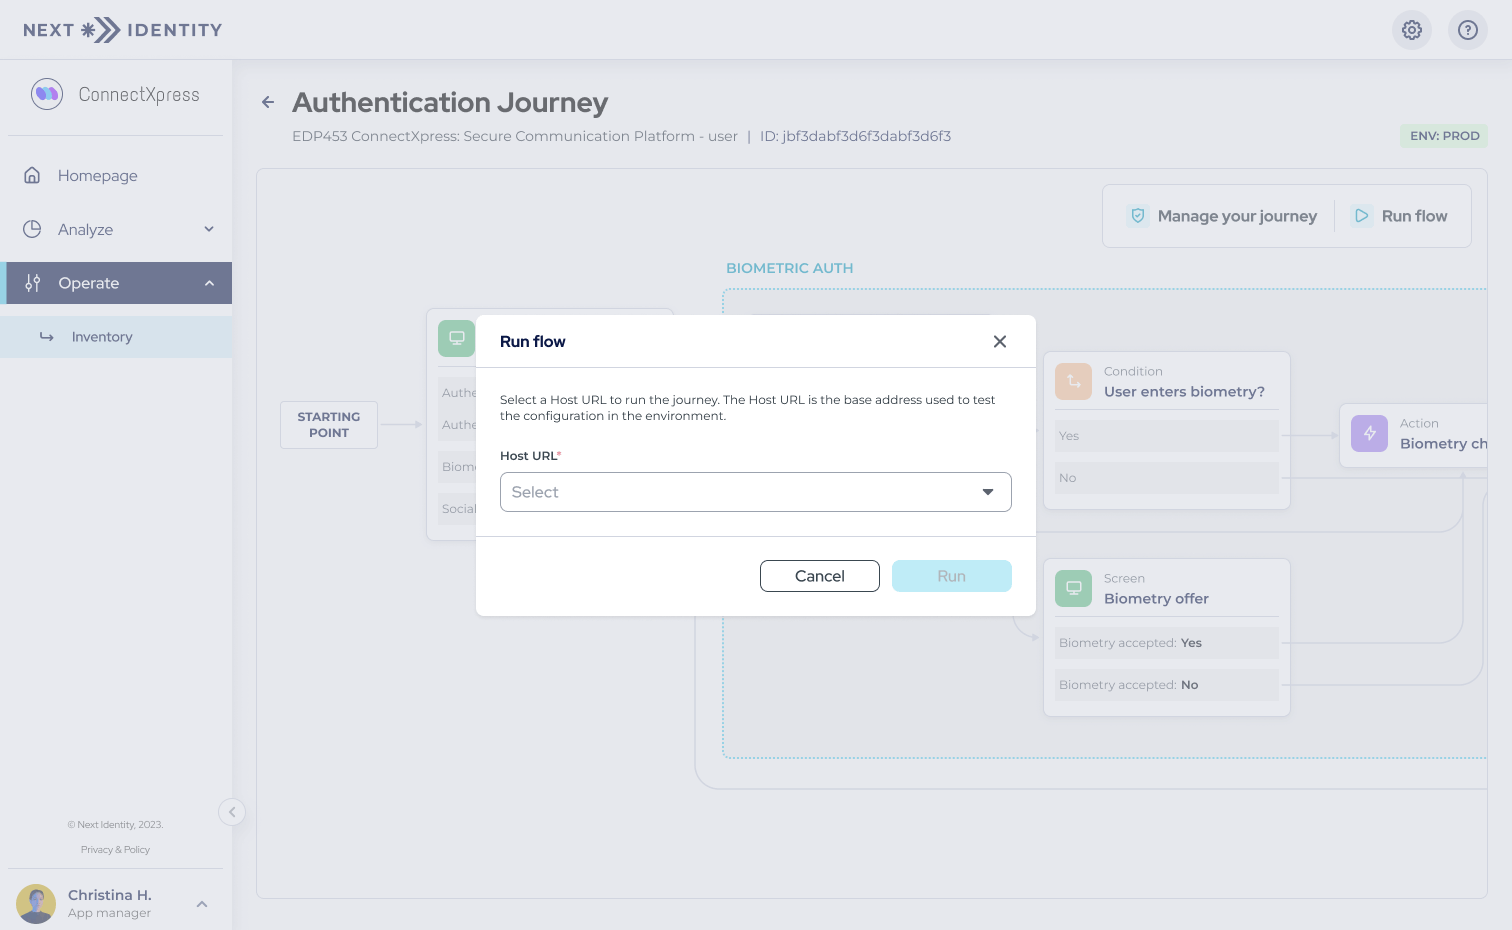
-
After selecting the Host URL, the login page will open in a new tab. Complete the authentication steps as configured for your application.
Edit the Authentication Journey of your app
To edit the Authentication Journey for your application:
-
Repeat steps 1 to 5 from the section View the Authentication Journey of your app.
-
Select the tab of the lowest environment in your pipeline.
Edit in Lowest Environment First
Changes to the Authentication Journey can only be made in the lowest environment of your pipeline (e.g., Development). This ensures that updates are tested in a controlled environment before being applied to production. Once your changes are finalized, they can be propagated to upper environments (e.g., UAT, Production) using the Propagate feature.
For detailed instructions on how to propagate changes to upper environments, refer to this guide. -
In the Authentication Journey card, click the edit button (pencil icon) to modify the Authentication Journey for your client.
-
The Authentication Journey page will load, allowing you to add or remove steps in the journey.
4.1. Use the Manage your journey menu to add or remove steps to your Authentication Journey.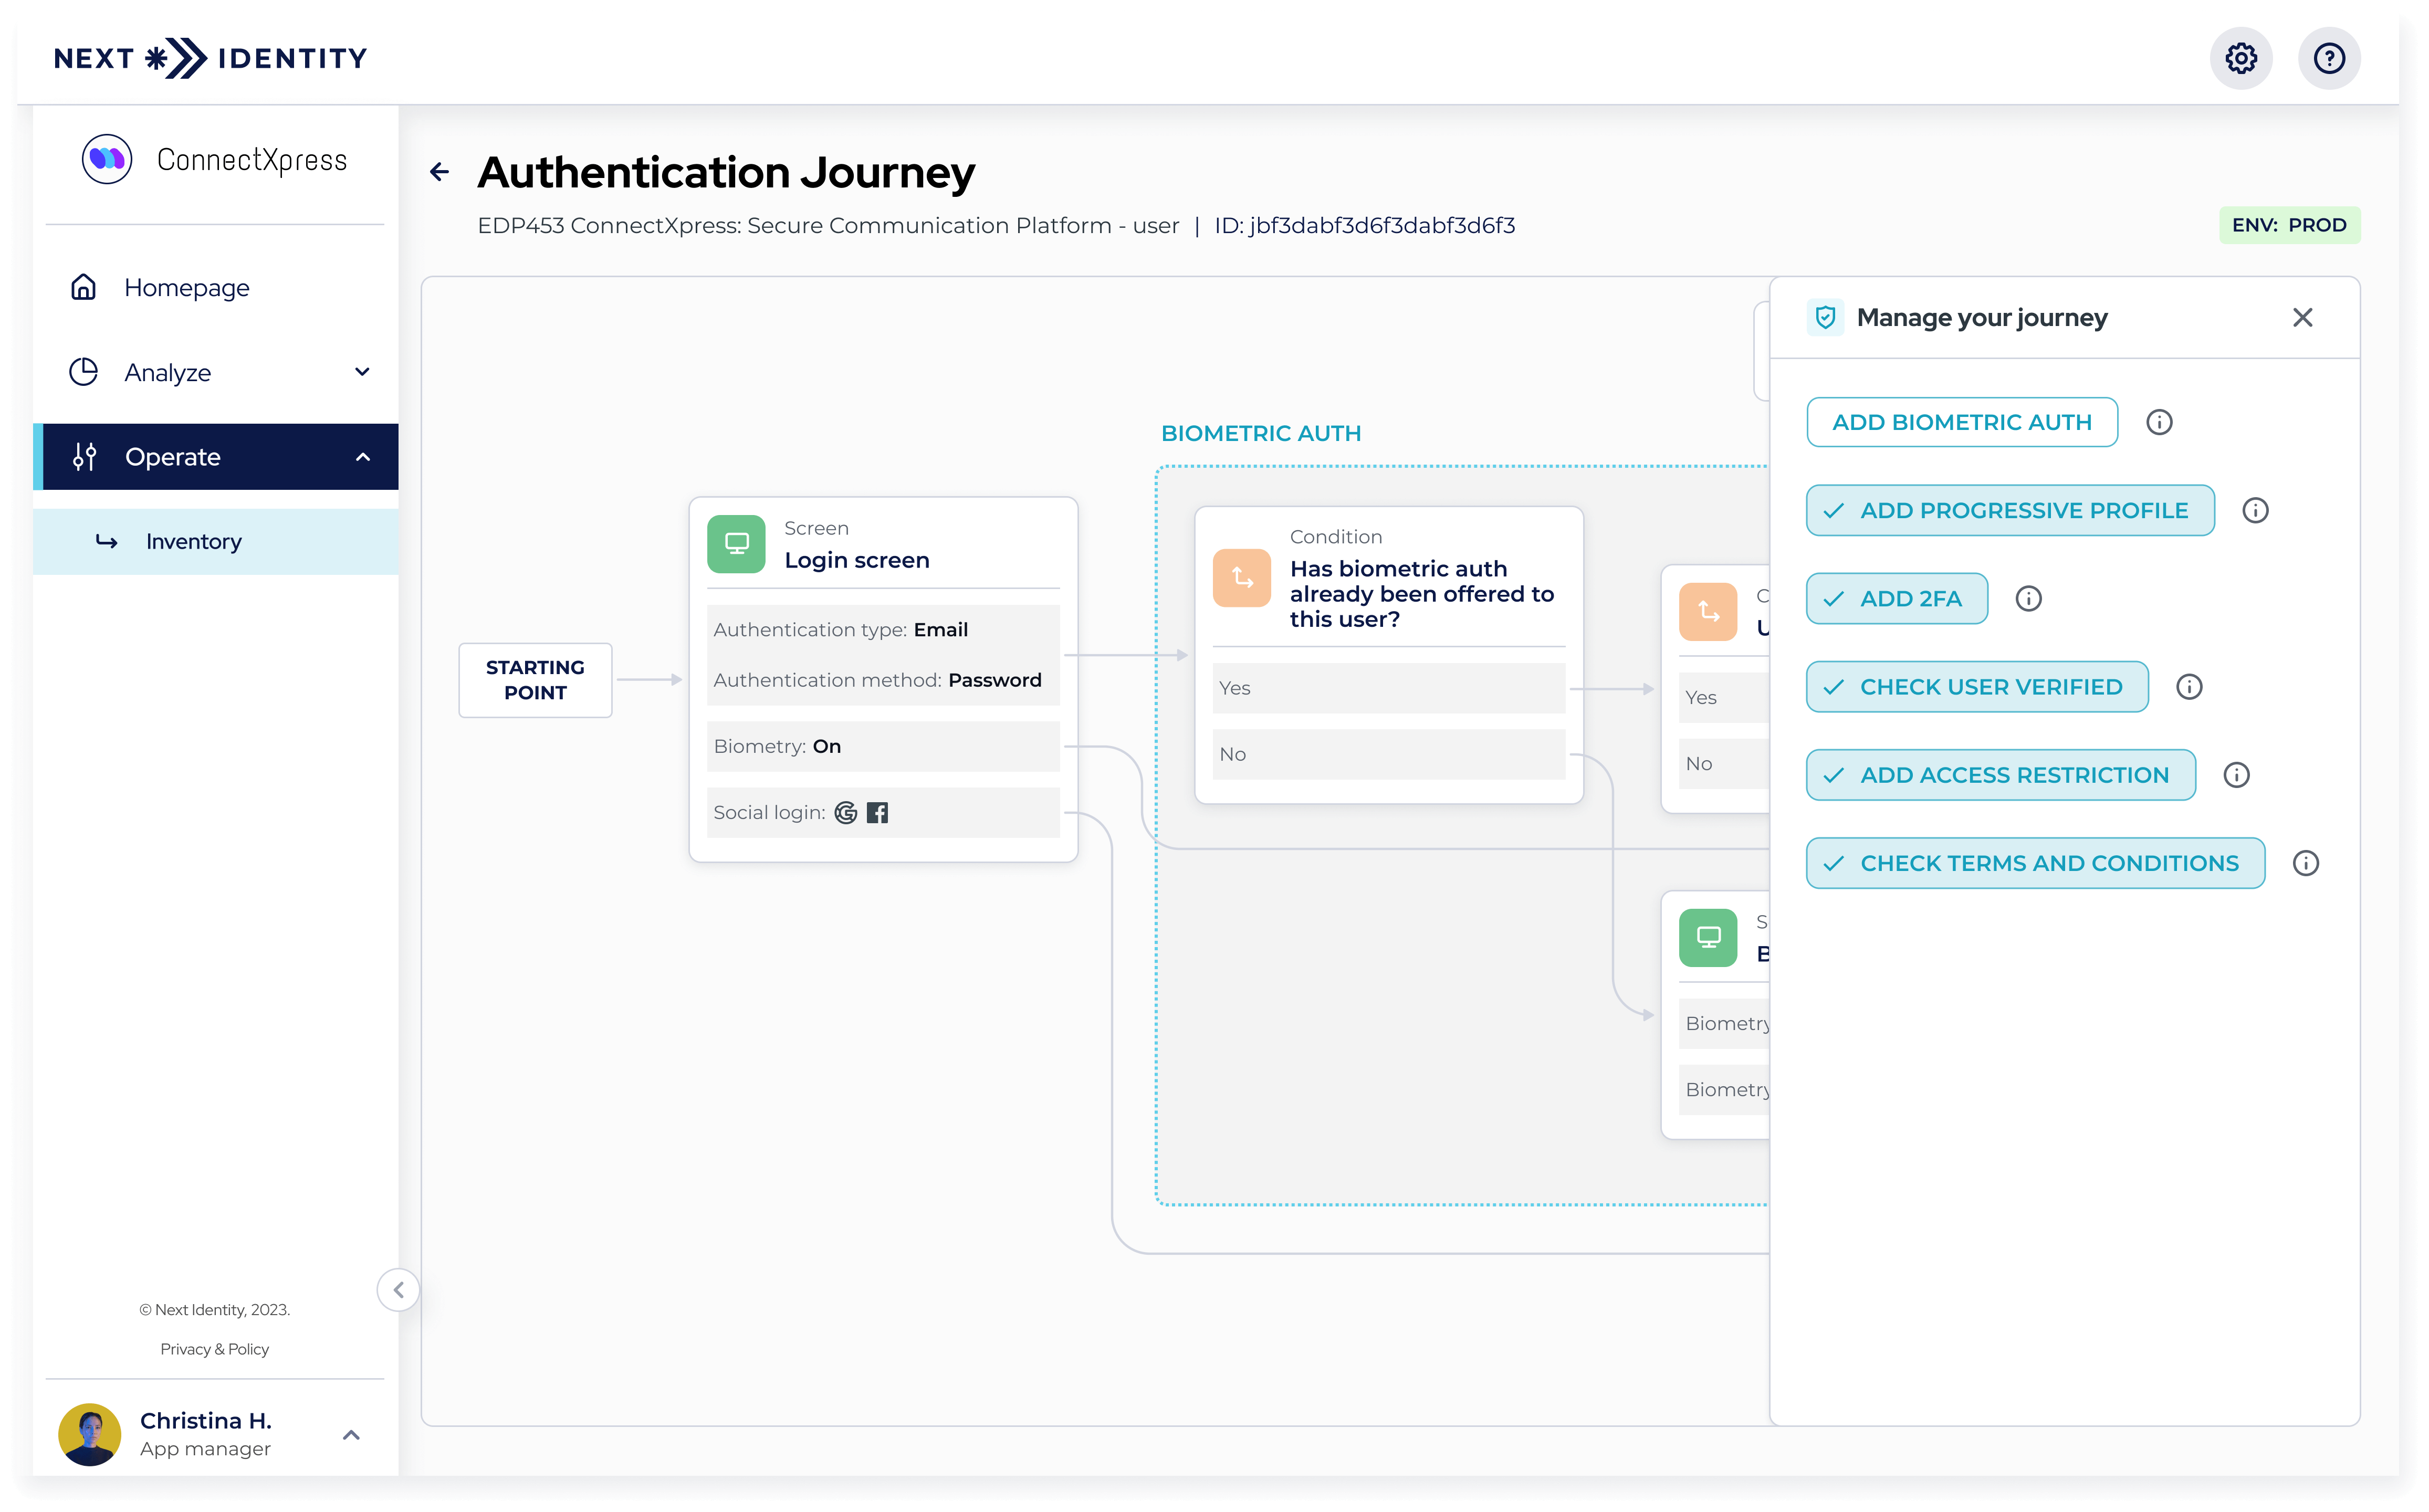 Manage your journey menu - Add and organize steps
4.2. Shortcut: To remove a step, click the delete button (trash icon) next to the step you wish to delete.
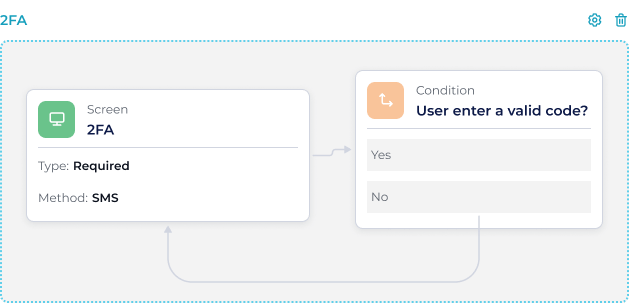 Removing a step from the Authentication Journey - Delete Button
-
After making changes, a Review Changes section will appear at the bottom of the screen, highlighting all modifications made to the journey. Review these changes, and if you approve, click Save in .
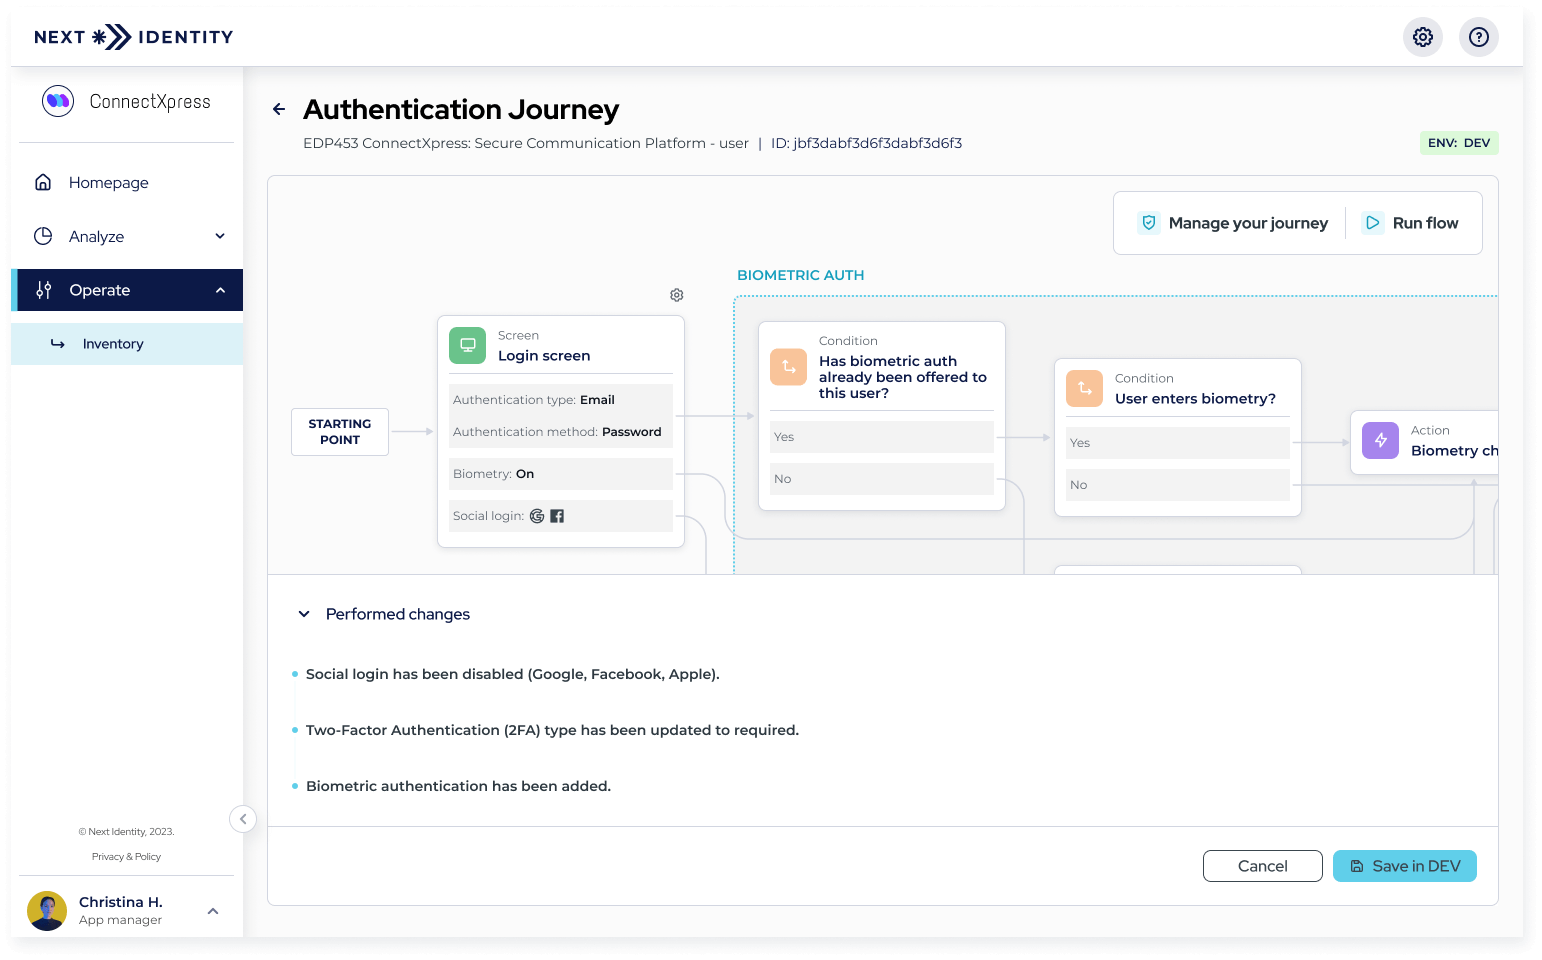 Reviewing changes in Authentication Journey
-
Your changes will be immediately saved in the lowest environment.
-
If you need to propagate these changes to upper environments, refer to this guide.
Edit the Login Screen
You can also configure advanced settings for the login screen, such as the Authentication Type and Authentication Method. To make these changes:
-
After loading the Authentication Journey page, locate the Login Screen box.
-
Click the gear icon next to the Login Screen box.
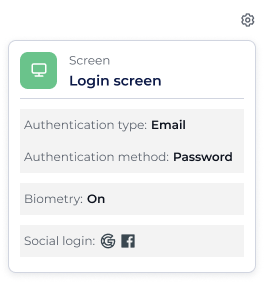 Login Screen box with gear icon
-
You will be redirected to the Login Settings page.
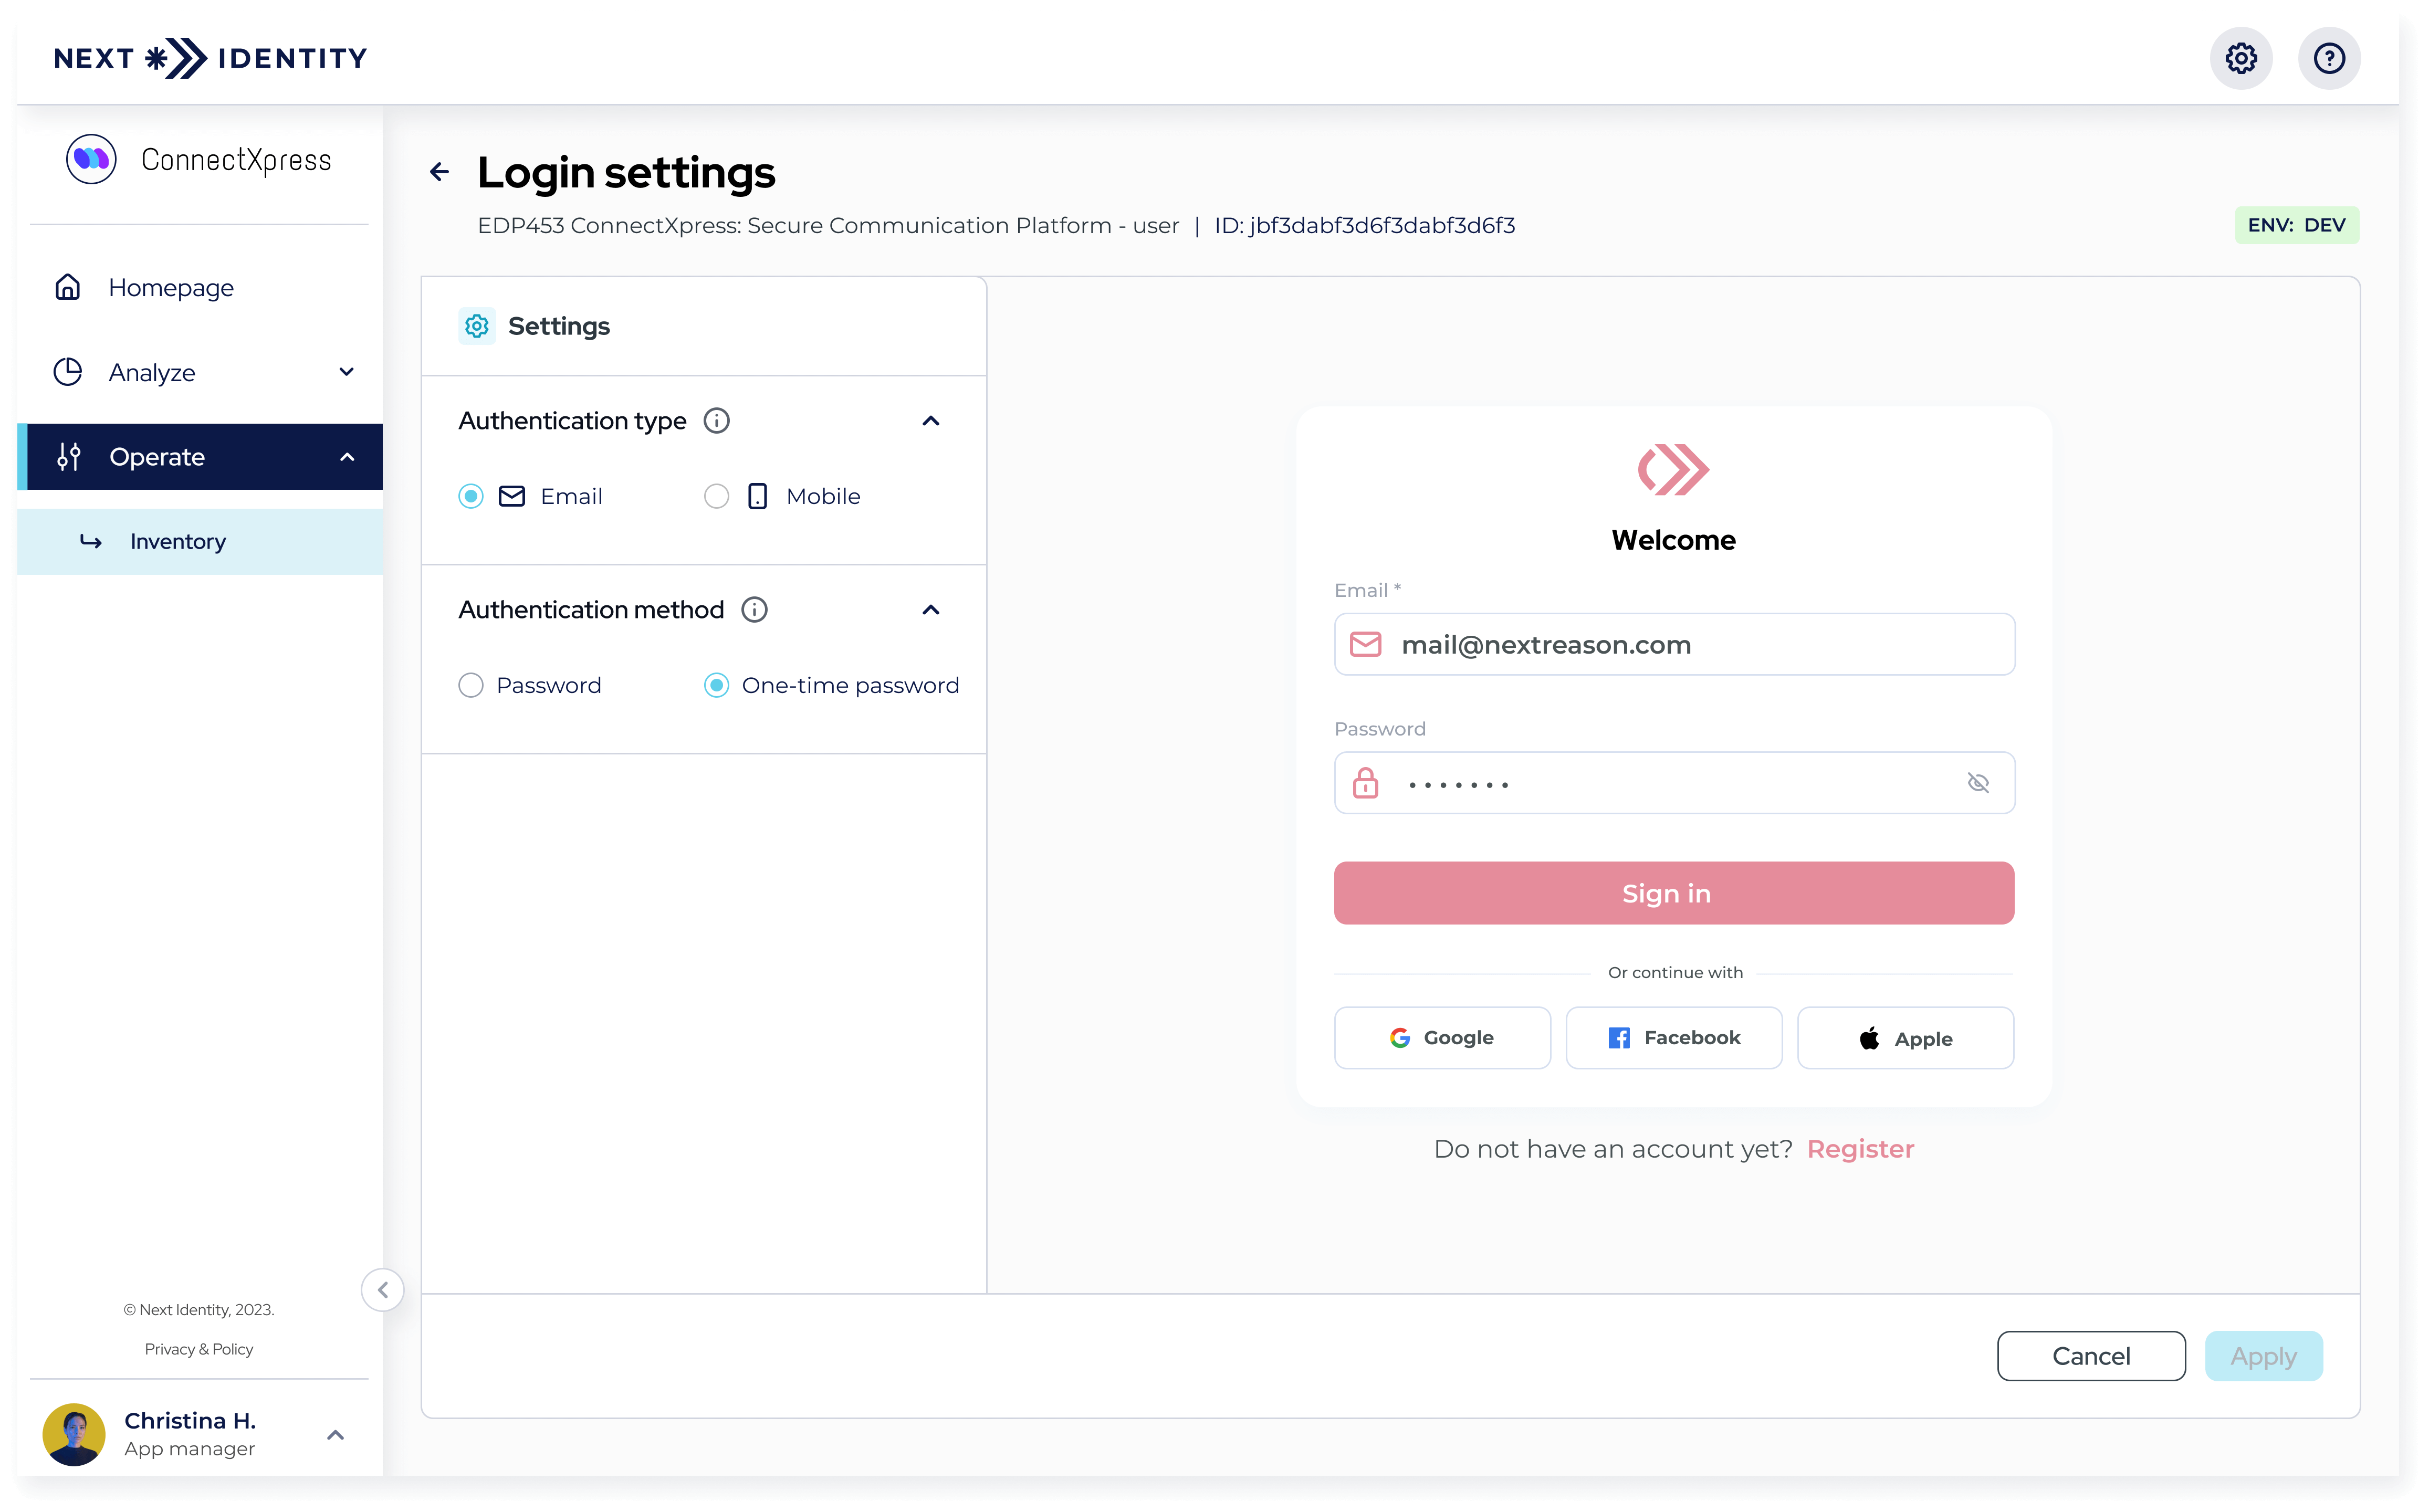 Login Settings page
-
Make your desired changes.
-
Click Apply to save the changes.
-
After clicking Apply, you will return to the Authentication Journey page. A Review Changes section will appear at the bottom, highlighting your modifications. Review them, and if you approve, click Save in .
-
Your changes will be saved in the lowest environment.
-
If you need to propagate these changes to upper environments, refer to this guide.
Edit the 2FA Step
The 2FA step includes advanced configurable settings such as the 2FA Method and 2FA Type. To edit these settings:
-
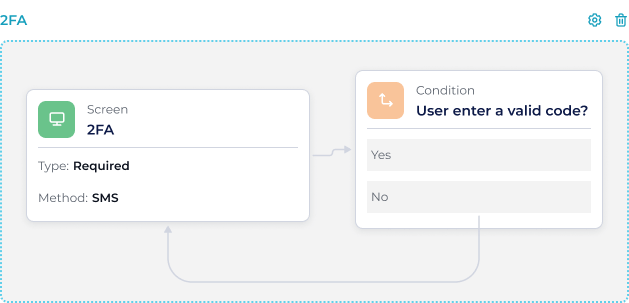
After loading the Authentication Journey page, locate the 2FA Step box.
-
Click the gear icon next to the 2FA Step box.
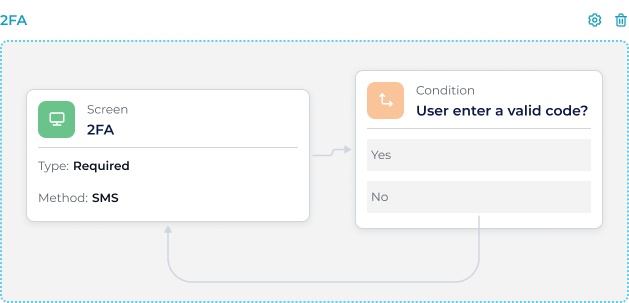 2FA Step box with gear icon
-
You will be redirected to the 2FA Settings page.
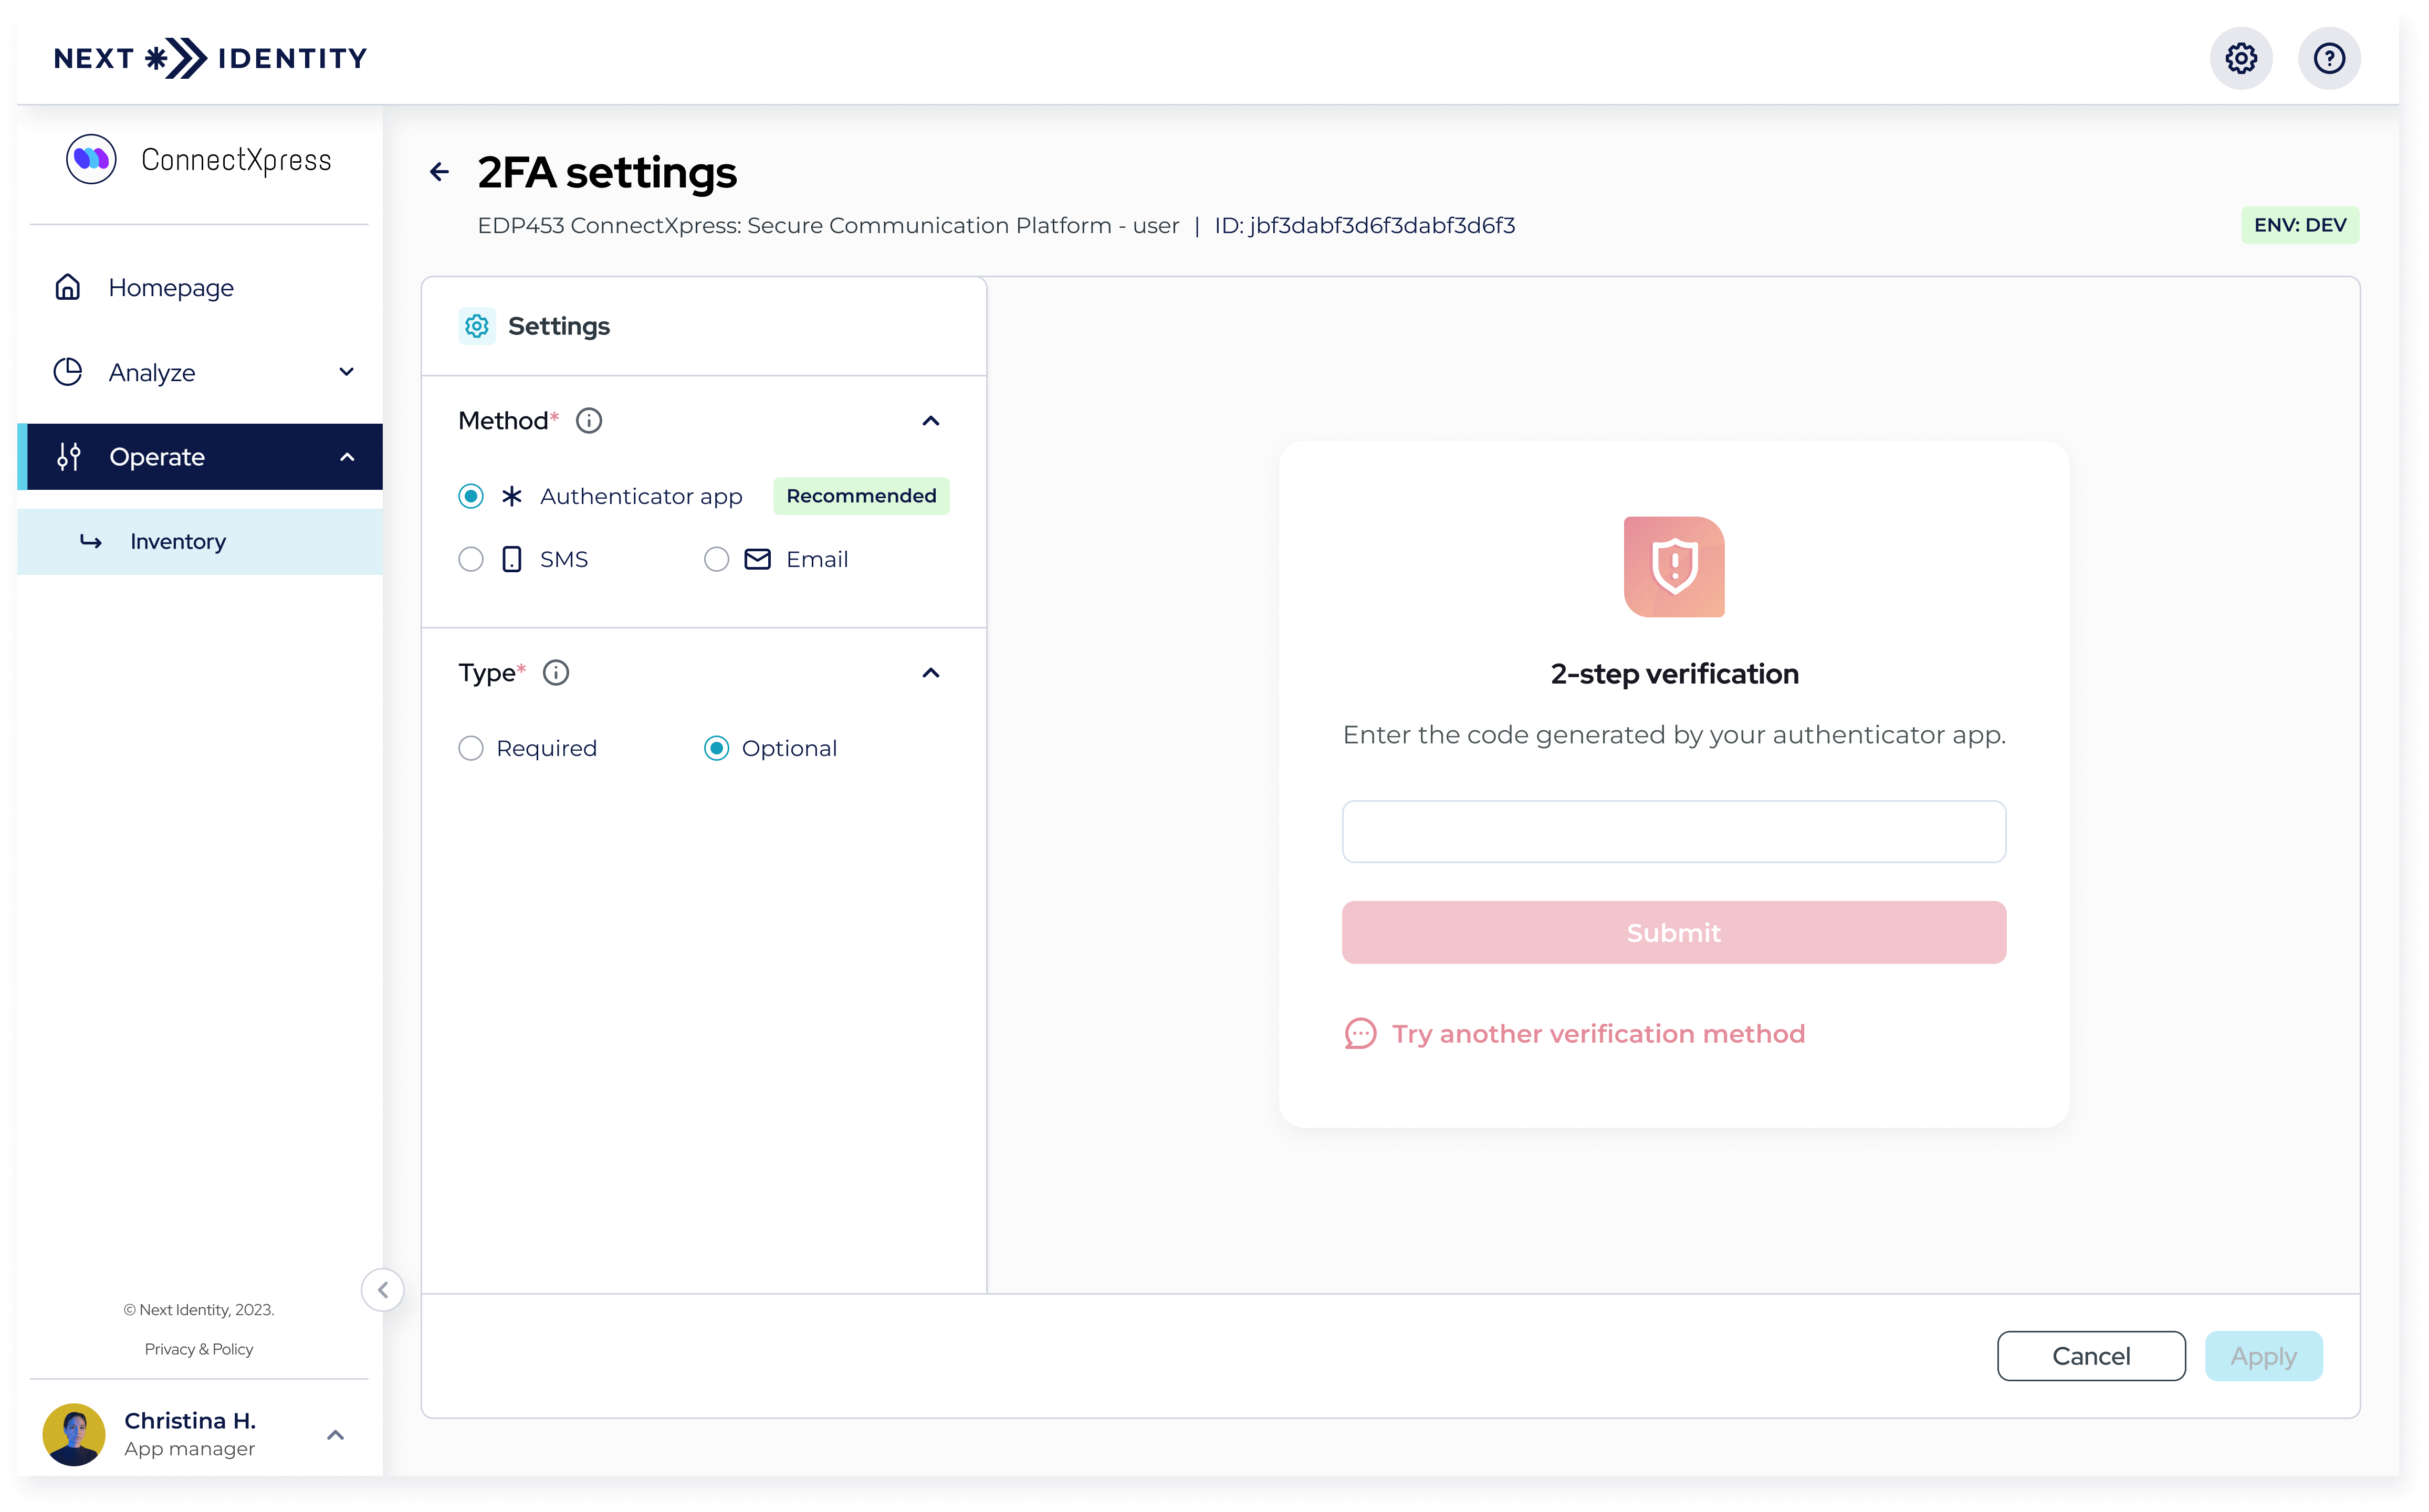 2FA Settings page
-
Make your desired changes.
-
Click Apply to save the changes.
-
After clicking Apply, you will return to the Authentication Journey page. A Review Changes section will appear at the bottom, highlighting your modifications. Review them, and if you approve, click Save in .
-
Your changes will be saved in the lowest environment.
-
If you need to propagate these changes to upper environments, refer to this guide.
Updated 9 months ago
